
A practical tutorial plus top stud finder picks, with troubleshooting tips for drywall, plaster, lath, and stubborn false positives.
home improvement and DIY
Maximize Space in a Small Laundry Room

Marcus Hayes
Marcus Hayes is a lifelong DIY enthusiast and former residential carpenter who has spent the last decade renovating his 1970s fixer-upper. Through Tinksmith, he shares his hands-on experience to help fellow homeowners tackle repairs, choose the right tools, and build spaces they love without breaking the bank.
Published October 17, 2026
Updated October 17, 2026
Small laundry rooms have a special talent for feeling even smaller the second you add a hamper, a detergent bottle, and one sock that refuses to find its mate. The good news is you do not need a full remodel to make a tight laundry space feel organized and easy to work in. You need a plan, a tape measure, and a willingness to put a few things on the wall where they belong.
Below is the exact approach I use in my own not-so-spacious 1970s laundry setup: make the machines behave, steal space vertically, add a sink without turning the room into an obstacle course, and build a folding surface that disappears when you are done.
Start with a real-world layout
Before you buy anything, measure everything. I mean everything. Most laundry room headaches come from assuming there is more clearance than there really is.
Measurements that matter
- Room dimensions: width, depth, and ceiling height.
- Door swing: the arc of the door and whether it eats the only “standing spot.” If it does, consider flipping the swing or switching to a bi-fold or pocket door if the wall allows.
- Machine footprints: width and depth, plus space for hoses, cords, and venting.
- Service clearances: you need enough room to pull the washer forward someday. Because you will. Probably when it is full of water.
- Walk path: many designers aim for roughly 30 to 36 inches when possible. In small spaces you can work with less if doors and drawers are managed carefully.
Quick layout rule I live by
Put the biggest boxes first: machines, sink, and any tall storage. Folding space and hampers come last. If you plan around a hamper first, you end up building a laundry room for a basket instead of a human.
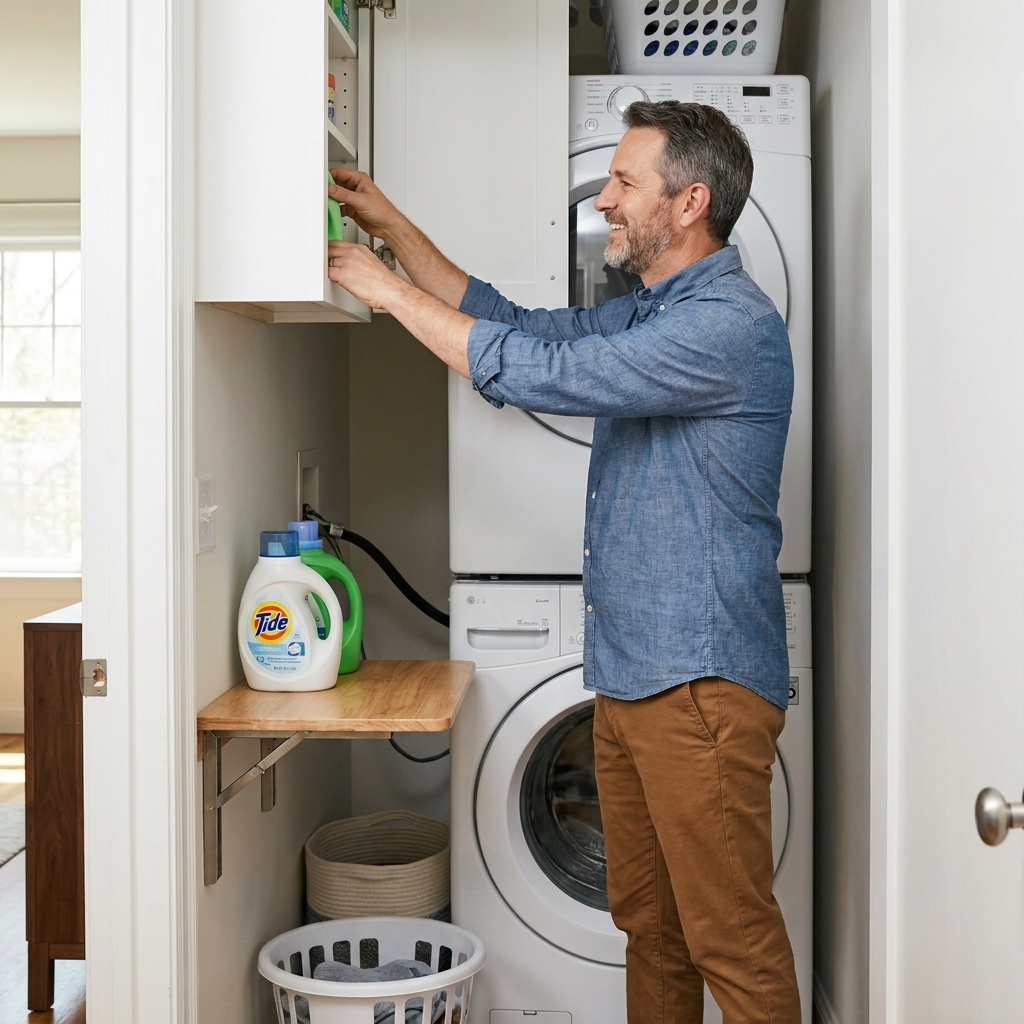
Stacking appliances the right way
Stacking is the single biggest space win in a small laundry room, especially in a hallway nook or closet setup. But do it safely and intentionally.
Stacking options
- Factory stacking kit (best choice): Made for your exact washer and dryer models. It locks the dryer in place and usually includes brackets.
- Laundry center (one-piece unit): Great for tight closets and rentals, fewer compatibility questions.
- All-in-one washer dryer combo: Useful when venting is difficult, but cycle times can be longer and capacity is often smaller.
DIY checklist for a safe stack
- Confirm compatibility between washer, dryer, and stacking kit. “Same brand” is not always enough. Some models are simply not designed to be stacked, and the manual gets the final vote.
- Level the washer perfectly. Shims are not a long-term plan. Adjust the feet and lock the nuts.
- Use vibration control if the floor is bouncy. Anti-vibration pads can help, but leveling comes first. In older homes, also be honest about floor stiffness. If it already feels springy, stacking can amplify the problem.
- Plan your hookups so nothing kinks: dryer vent path, washer drain hose, and water lines.
- Think about access: can you still reach the water shutoffs and outlet?
Dad-logic warning: Do not “DIY” a stacking setup with scrap plywood and optimism. Dryers are heavy, and vibration is relentless. Use the proper kit.

Add a utility sink without losing space
A utility sink is one of those upgrades you do once and wonder why you waited. It is perfect for pretreating stains, soaking paintbrushes, filling mop buckets, and washing the dog gear that should not touch your kitchen sink. In a small laundry room, the trick is choosing a sink that earns its square inches.
Choose the right sink style
- Wall-mounted sink: Great for small rooms because the floor stays open and cleaning is easier. You need solid wall blocking or studs to carry the load.
- Freestanding tub sink: Often cheaper and deep, but it eats floor area and can feel bulky.
- Compact cabinet sink: Gives you storage under the bowl, but make sure the doors can open without hitting machines.
- Corner sink: A smart solution if you have a dead corner and a workable drain location.
Plumbing reality check
Most laundry rooms already have hot and cold water and a drain, but that does not automatically make adding a sink “easy.” You still need proper venting and a trap, and you cannot assume you can share or tap into the washer standpipe setup without consequences. A sloppy tie-in can cause overflow, slow draining, or venting headaches.
- Best-case scenario: sink goes near existing supply lines and an appropriate drain connection point.
- Harder scenario: sink is across the room, meaning longer drain runs and potentially more work to vent correctly.
If plumbing code in your area requires a permit for adding a fixture, get one. I like DIY, but I like dry subfloors more.
Space-saving sink tricks I love
- Use a high-arc faucet with a pull-down sprayer so you can fill buckets and rinse without splashy gymnastics.
- Add a sink cover (wood or HDPE) to create temporary counter space. Just keep it removable for access and drying.
- Mount a towel bar on the side of the sink cabinet or wall for drip control.

Build a folding table
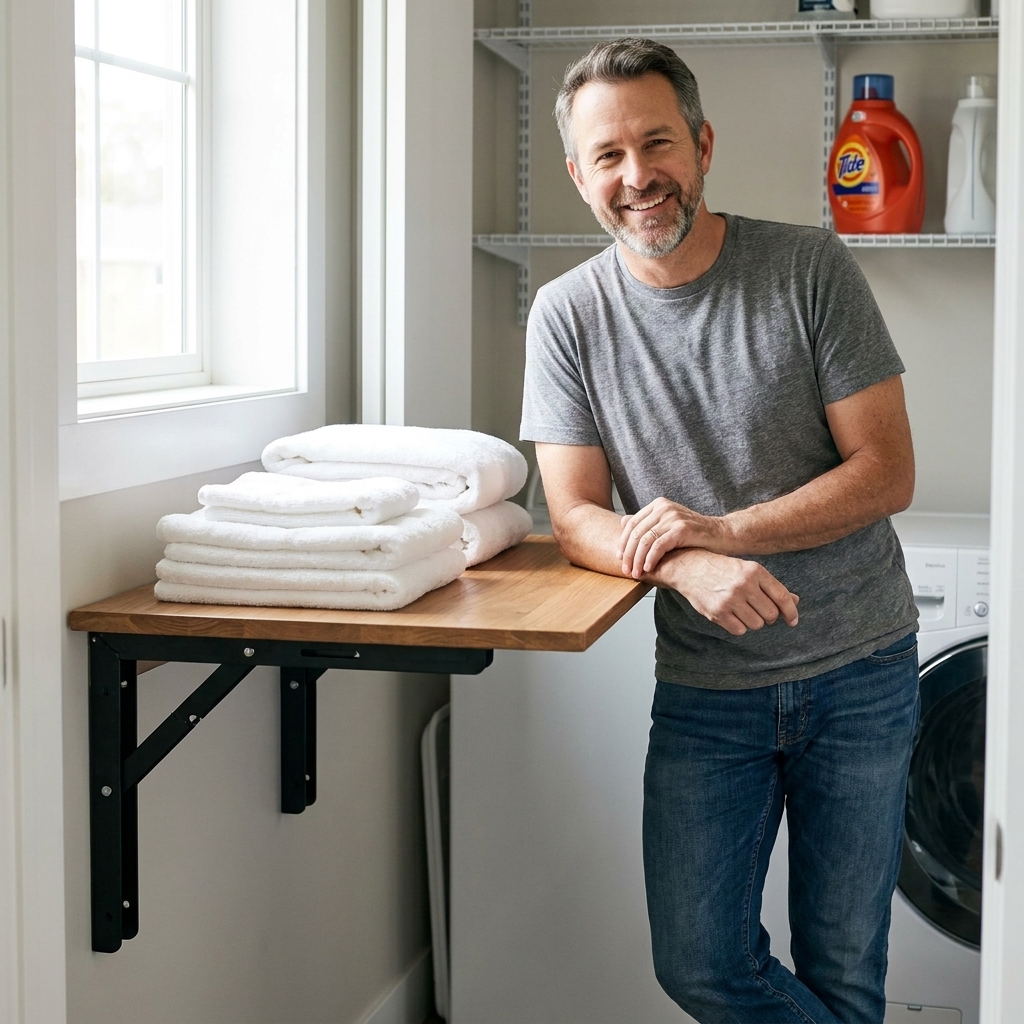
If you have ever folded laundry on top of a warm dryer while trying not to knock detergent behind the machine, you already understand the value of a dedicated folding surface. In a small laundry room, a wall-mounted folding table is the sweet spot: big when you need it, gone when you do not.
Two designs that work
- Hinged wall table with folding brackets: Fast to build, strong, and clean looking.
- Drop-leaf table with a single swing leg: Great if the wall is not ideal for heavy brackets, but it needs floor space when open.
Simple hinged folding table (my go-to build)
Typical size: 16 to 20 inches deep, 36 to 48 inches wide, depending on your wall space.
Materials:
- 3/4-inch plywood or a solid wood panel for the top
- 1x2 or 1x3 cleat board
- Piano hinge or sturdy door hinge
- Two heavy-duty folding shelf brackets rated for the load
- Screws long enough to hit studs (or appropriate anchors if studs are not possible, though studs are best)
- Edge banding or simple trim for a finished edge
Build steps:
- Find studs and mark them clearly. This is not the place for “close enough.”
- Install a wall cleat level, screwed into studs.
- Attach the hinge to the back edge of the tabletop, then to the cleat.
- Mount folding brackets into studs under the table. Confirm they lock firmly when open.
- Seal the surface with polyurethane or a durable paint. Laundry rooms are humid and spills happen.
Pro tip: Round over the front corners. Your hips will thank you.
Use vertical storage
When floor space is limited, the walls and the space above the machines become prime real estate. The goal is to keep the “daily grab” items easy to reach and push the rarely used stuff up high.
High-impact upgrades
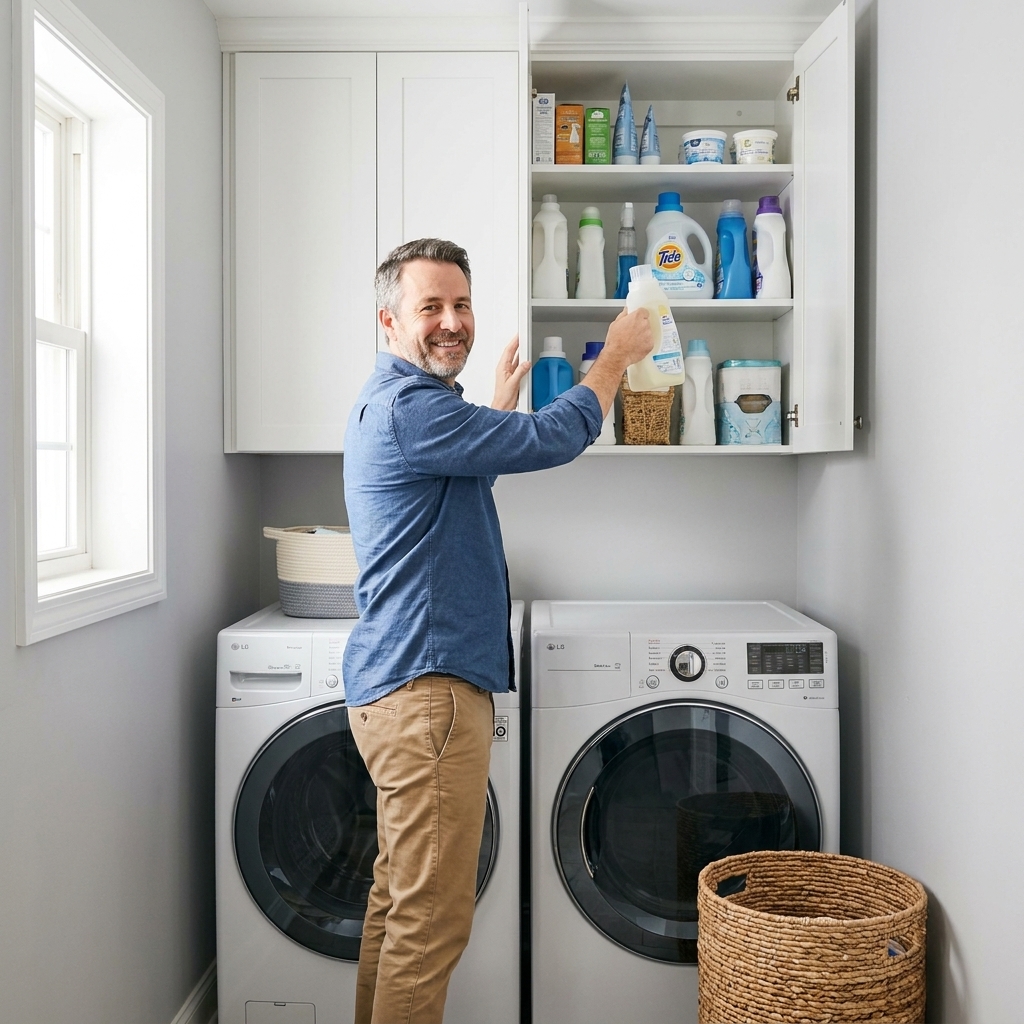
- Cabinets over the washer and dryer: Shallow uppers are often enough for detergent, dryer sheets, and stain removers.
- Open shelving with bins: Cheaper and flexible. Use matching bins so it looks intentional, not like a yard sale.
- Wall rail system: Hooks for lint brush, small dustpan, and a drying rack that flips down.
- Back-of-door storage: Slim racks can hold spray bottles and clothespins if the door clears.
Ergonomics that keep it usable
Store your most-used supplies between about knee and shoulder height. Too low becomes a constant squat workout, and too high becomes a step-stool hobby.
Where people waste space
The gap between machines and the wall is usually a lost cause for anything but dust bunnies. Instead, look for unused air above eye level, and make sure your storage does not interfere with venting, shutoff valves, or service access.
Make the setup work smarter
Sometimes the best space-saving move is not building anything. It is swapping one awkward accessory for a better one.
Small changes with big payoff
- Wall-mounted drying rack: Flip-down racks are great for delicates and air-dry items.
- Pull-out hamper: If you have a sink cabinet or base cabinet, a tilt-out or pull-out hamper keeps clothes off the floor.
- Magnetic lint bin: Sticks to the side of the dryer so lint does not pile up on the shelf.
- Stacking laundry baskets: Two smaller baskets stack better than one giant hamper that blocks your path.
- Hanging rod or retractable clothesline: For shirts, uniforms, and “I swear it is clean” jackets.
Ventilation and airflow
Closet-style laundry setups need breathing room. Make sure the space has adequate airflow for the machines, and do not block intake vents with boxes, bins, or an overstuffed shelf. If the area tends to stay damp, a small dehumidifier or better exhaust ventilation can make the whole room feel less musty and more usable.
Lighting
A small laundry room with dim lighting feels cramped and frustrating. A bright LED flush-mount fixture or a shop-light style LED can make the room feel bigger instantly. If you have cabinets, add simple under-cabinet LED strips to light the folding surface.
Budget-friendly mini projects
Once your layout and the big pieces are set, these smaller upgrades are where you steal back day-to-day breathing room. They are quick, affordable, and they add up fast.
- Replace a bulky shelf with a shallow one: A 10 to 12 inch deep shelf can hold plenty without stealing elbow room.
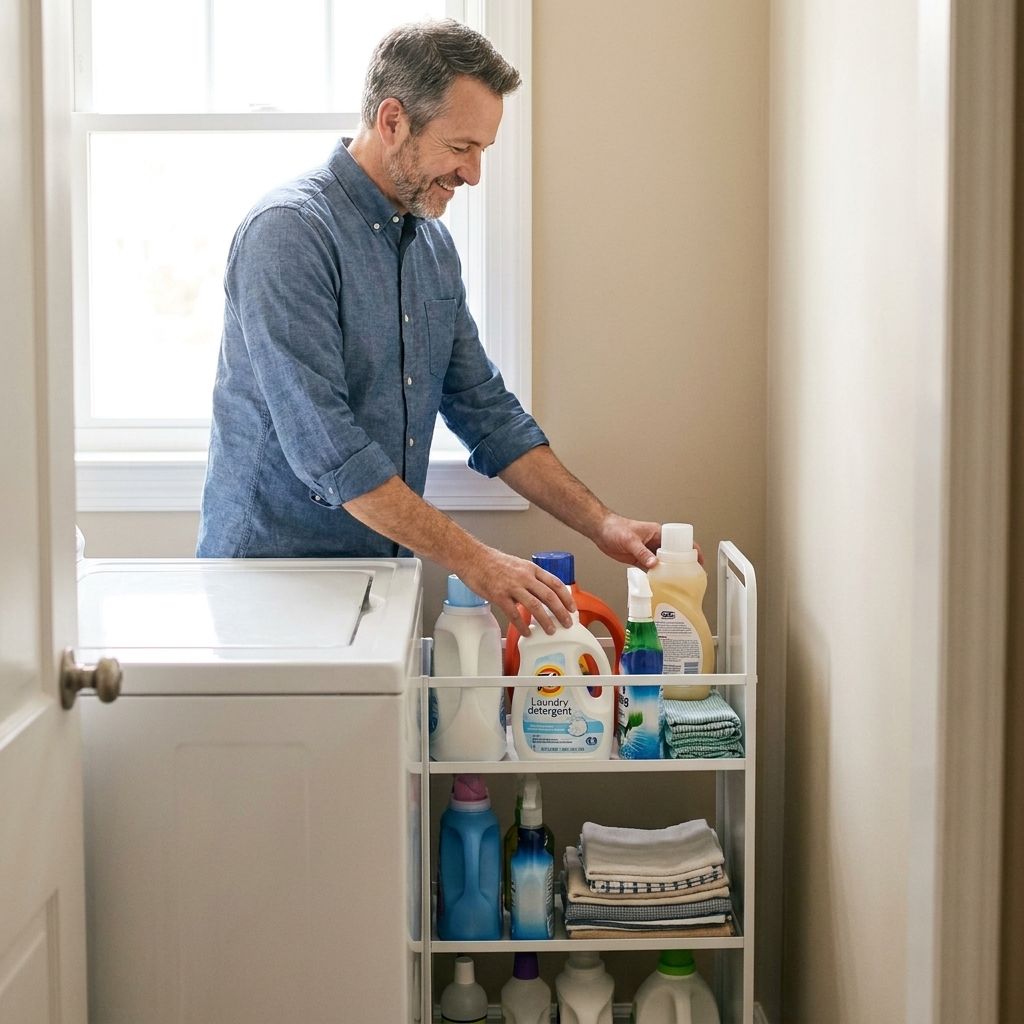
- Add a narrow rolling cart: Measure first. Some “slim” carts still need more clearance than your laundry room can spare.
- Install a mop and broom holder: Gets long handles off the floor.
- Build a bridge shelf over front-loaders: A sturdy shelf that spans the gap between machines can hold baskets and supplies, as long as it does not block controls, detergent drawers, or needed airflow.
Safety and code basics
Laundry rooms mix water, electricity, and heat. That is a trio that deserves respect.
- GFCI protection: GFCI outlets are often required in laundry areas, especially near sinks, but local rules vary by jurisdiction and code edition. When in doubt, treat “water nearby” as a GFCI moment.
- AFCI protection: Some areas also require AFCI protection for laundry circuits. Check local requirements before you button up drywall.
- Dryer venting: Keep runs as short and straight as possible, and clean the vent regularly. Also check your dryer manual and local rules for maximum vent length and allowed turns. Lint is not a “maybe” fire hazard.
- Shutoff access: Do not bury water shutoffs behind built-ins you cannot reach.
- Drain pan: Consider a washer drain pan, especially on an upper floor.
- Load ratings: Use brackets and anchors rated for the weight you are putting on them. Studs beat drywall anchors every time.
Small laundry room FAQ
Is it worth adding a utility sink in a tiny laundry room?
If you do any pretreating, hand washing, paint cleanup, or pet cleanup, yes. Choose a compact wall-mounted or corner sink so you keep floor space, and plan the drain connection correctly so you do not create a slow-drain science project.
Can I stack any washer and dryer?
No. Use a manufacturer-approved stacking kit that matches your models, and follow the installation instructions. This is about stability, vibration, and safe attachment, not just size.
What is the best depth for a folding table in a narrow laundry room?
For most tight spaces, 16 to 20 inches deep is the sweet spot. It is enough for folding without turning the walkway into a sideways shuffle.
How do I add storage without making the room feel cramped?
Go up, not out. Use upper cabinets or shelves, keep them shallow, and store daily-use items at arm height. Use bins to keep visual clutter down.
A simple weekend plan
If you are staring at your laundry room right now thinking, “Where do I even start?” do it in this order:
- Declutter and relocate anything that does not belong in the laundry room.
- Decide on stacking (or not) based on your layout, hookups, and what your machine manuals allow.
- Claim wall space with shelves or cabinets above machines.
- Add a folding surface with a wall-mounted table.
- Then consider the sink once you know exactly what space is left and where plumbing can realistically go.
Small rooms reward careful planning. Do that, and your laundry room will stop feeling like a closet full of chores and start acting like a hardworking little workshop for clean clothes.