Stop winter from turning small problems into big repairs. Here are 10 fall maintenance tasks that protect your roof, pipes, heating system, and wallet.
home improvement and DIY
DIY HVAC Filter Maintenance

Marcus Hayes
Marcus Hayes is a lifelong DIY enthusiast and former residential carpenter who has spent the last decade renovating his 1970s fixer-upper. Through Tinksmith, he shares his hands-on experience to help fellow homeowners tackle repairs, choose the right tools, and build spaces they love without breaking the bank.
Published October 17, 2026
Updated October 17, 2026
If your HVAC system had a “most likely to ruin your weekend” award, a neglected air filter would be wearing the crown. The good news is that filter maintenance is one of the cheapest, easiest ways to help your furnace or AC run better, last longer, and keep your house more comfortable.
In this guide, I’ll break down MERV ratings in plain English, how long filters really last, and the exact step-by-step process to replace or clean them without turning your return duct into a dust cannon.

What your HVAC filter does
Your HVAC filter sits in the return air path, where your system pulls air back in to be heated or cooled. The filter’s job is to catch airborne particles before they coat your blower wheel, clog your evaporator coil, and generally gum up the works.
A clean filter helps:
- Airflow, so your system can move the right amount of air
- Efficiency, so you are not paying to push air through a felt blanket
- Indoor air quality, by capturing dust, pollen, and other junk
- Equipment protection, especially the blower motor and cooling coil
A filter does not fix poor duct design, leaky ductwork, or an oversized system. But it is the low-hanging fruit that keeps everything else from getting worse.
MERV ratings in plain English
MERV stands for Minimum Efficiency Reporting Value. In normal-person terms: it is a standardized scale that tells you how well a filter captures particles of different sizes. Higher MERV usually means better filtration, but it can also mean more resistance to airflow.
One important nuance: fit and filter surface area matter just as much as the number on the package. A “better” filter that leaks around the edges or starves the system for air is not actually better.
Quick MERV cheat sheet
- MERV 1 to 4: Typically low-efficiency panel filters, often fiberglass. Mostly catch big lint and dust bunnies. Cheap, but not great at protecting equipment or air quality.
- MERV 5 to 8: Good “everyday” pleated filters. Solid balance for most homes.
- MERV 9 to 12: Better at smaller particles like finer dust and some allergens. Great in many homes, but you must make sure your system can handle it.
- MERV 13+: Captures a higher fraction of very small particles, including more smoke and fine aerosols. Can be too restrictive for many residential systems unless the filter area is large enough, like a deep media cabinet.
My practical recommendation: for most standard 1-inch filters, MERV 8 to 11 is usually the sweet spot. If your home has allergy concerns, pets, or you live in a dusty area, step up carefully and watch for airflow issues.
Can a MERV rating be too high?
Yes. If you install a high-MERV filter in a system that cannot breathe through it, you can reduce airflow enough to cause problems like:
- Frozen evaporator coil on AC (ice buildup, poor cooling)
- Overheated furnace (short cycling, limit switch trips)
- Noisy returns and whistling filter slots
- More wear on the blower motor
If you want MERV 13 performance, the right way is often more filter surface area, like a 4-inch or 5-inch media filter cabinet, not just a “tighter” 1-inch filter.
How often to change your filter
The honest answer is: it depends. The box might say 90 days, but your house, your pets, your duct leakage, and your runtime get a vote too.
Replacement schedule (rule of thumb)
- Fiberglass (flat) filters: about monthly
- 1-inch pleated filters: about every 60 to 90 days
- Homes with pets: about every 30 to 60 days
- Allergies or asthma: about every 30 to 60 days (and consider a slightly higher MERV if airflow allows)
- Heavy HVAC use (very hot or very cold seasons): check monthly, replace as needed
- Deep media filters (4 to 5 inch): commonly 6 to 12 months per manufacturer guidance, but still check every few months
The best test: look at it
Holding the filter up to a light can be one quick clue, but it is not foolproof because some media is thicker or darker even when clean. Better indicators are:
- A visible gray “mat” of dust across the pleats
- Weak airflow from vents across multiple rooms
- Return grille noise getting louder, including sucking sounds or whistling
- Longer run times to heat or cool
If you have a manometer or your HVAC tech has checked static pressure before, that is the gold standard, but most homeowners do just fine with visual checks plus symptom awareness.
One more dad-level tip: write the install date on the cardboard frame with a marker. Your future self will thank you, and your future self is notoriously forgetful.
Before you start: know your setup
Most homes have one of these setups:
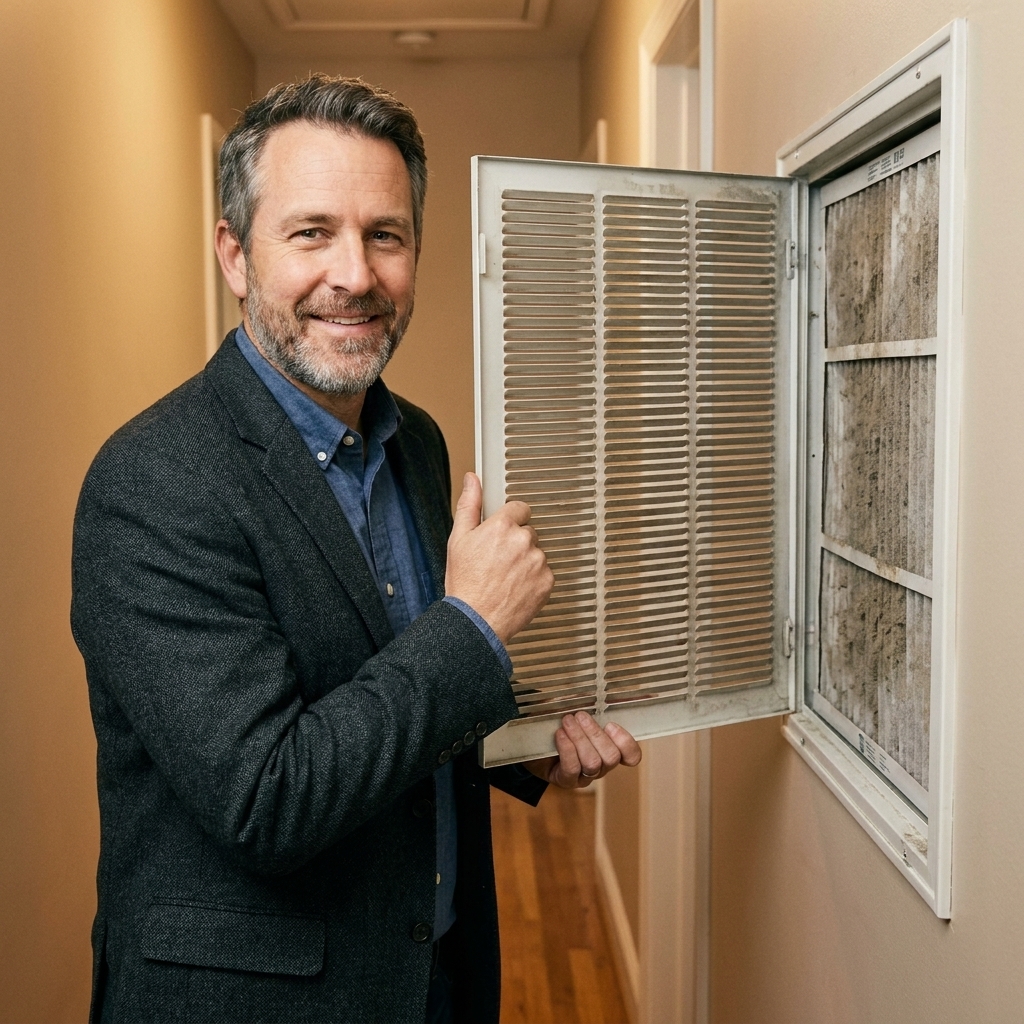
- Return grille filter: Filter is behind a large grille in a hallway wall, ceiling, or central area.
- Furnace or air handler filter slot: Filter slides into a slot near the blower compartment.
- Media cabinet: A larger box attached to the furnace with a 4-inch or 5-inch thick filter.
Some homes have multiple return grilles with filters, while others have a single filter at the air handler. You generally do not want to double-filter by stacking filters at returns and at the unit unless the system was designed for it, because it can seriously restrict airflow.
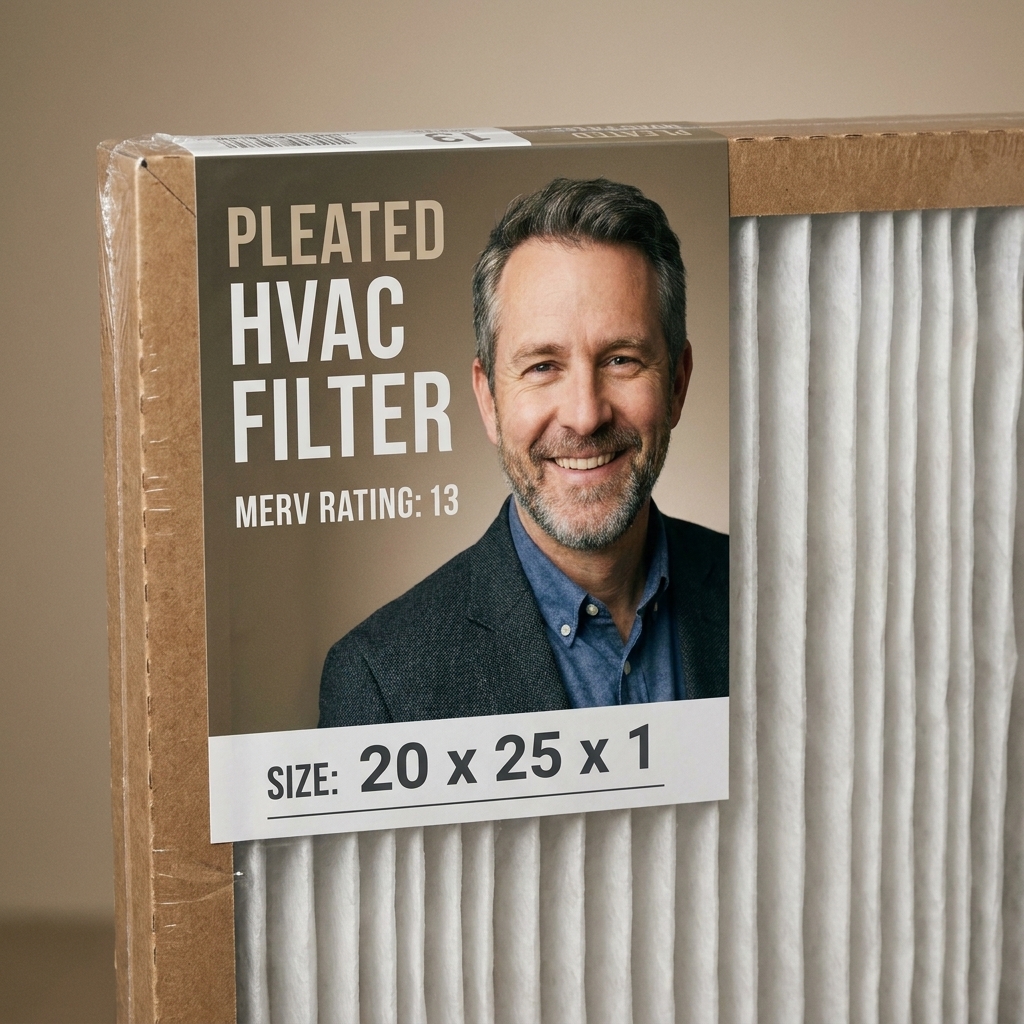
Your filter size is printed on the frame, usually like 16x25x1 or 20x20x1. That is nominal sizing. The actual size is often a little smaller (for example, a 16x25x1 might measure around 15.5x24.5 and slightly under 1 inch thick). That is normal. Match the printed size, and if a new filter fits too loose, try another brand that seals better.
Compatibility note: if you have an uncommon setup like a high-velocity system, a tight duct system that already struggles with airflow, or you are never sure where the filter actually lives, check the equipment manual or ask a tech before jumping to a higher MERV.
How to replace the filter
This is one of those jobs where “close enough” is not close enough. A backwards filter or a filter that does not seal well can let dust bypass straight into your system.
Tools and supplies
- New filter (correct size and MERV)
- Marker (optional, for dating the filter)
- Vacuum with a hose attachment (optional but helpful)
- Flashlight
1) Turn the system off
Set the thermostat to Off. If you are working at the furnace filter slot, I also like flipping the furnace switch or breaker off, especially if the filter slot is right next to wiring or you have a curious helper (human or canine).
2) Remove the old filter carefully
Open the return grille or pull the filter from the slot. Keep it level so you do not dump dust into the duct. If it looks like it has been in there since the disco era, go slow.
3) Check airflow direction
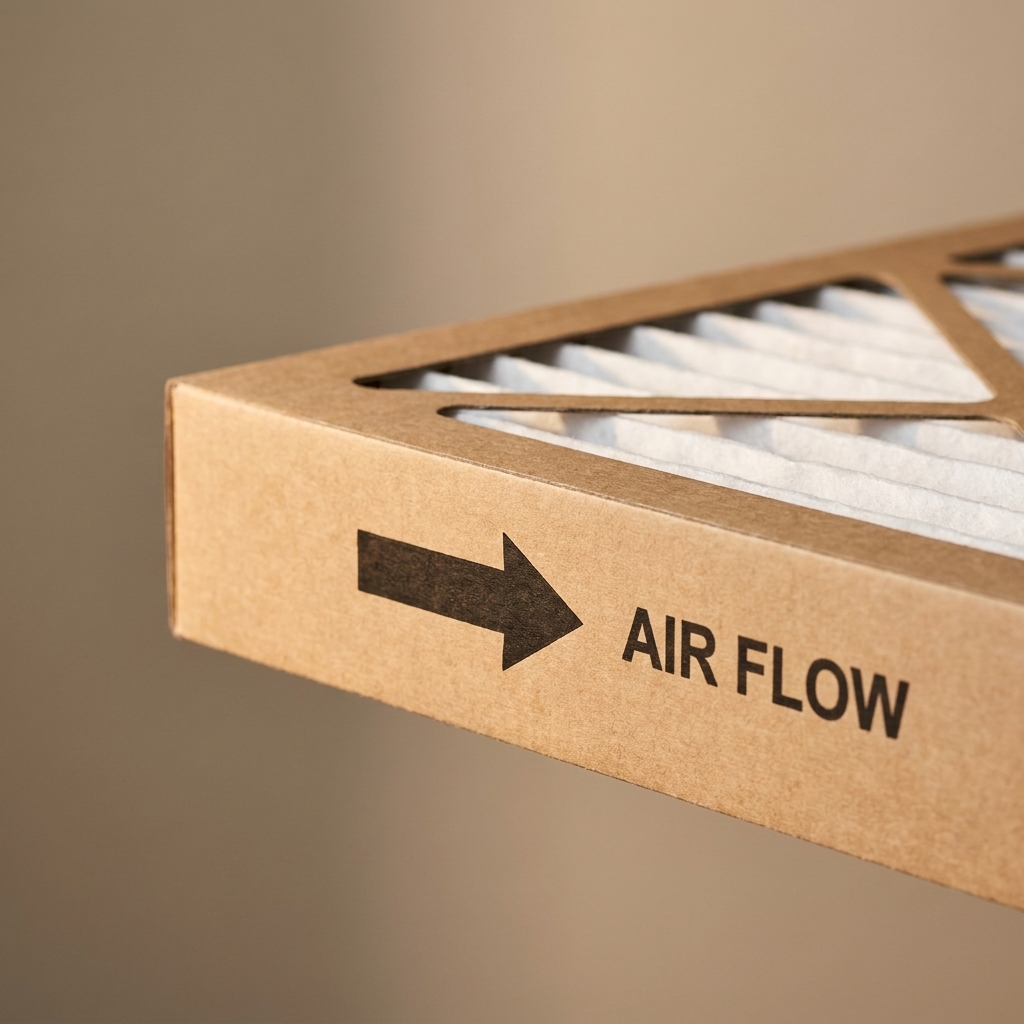
Every filter has an arrow on the frame showing airflow direction. That arrow should point toward the furnace or air handler, meaning toward the blower.
If the filter is in a return grille, airflow is going from the room into the duct, so the arrow points into the duct.
4) Quick cleanup (optional but worthwhile)
Vacuum loose dust around the filter slot or inside the return grille cavity. Do not go digging deep into ductwork unless you know what you are doing, but cleaning the immediate area helps keep dust from being pulled in around the edges.
5) Install the new filter snugly
Slide it in without crushing the pleats. Make sure it seats fully and is not bowed. Close the grille or access panel.
6) Date it and turn the system back on
Write the date on the frame, turn the system on, and listen for anything weird. A sudden whistle can mean the filter is too restrictive or not seated properly.
Washable filters
Washable filters sound great in theory. In practice, I am picky about them.
Pros
- Reusable, so less waste
- No store runs when you forget to buy filters
Cons
- Many washable filters have lower filtration performance than a good pleated disposable
- If you reinstall it even slightly damp, you are inviting mold and musty smells
- People often do not wash them thoroughly or often enough
If you use a washable filter, wash it outside with gentle water flow (not a pressure washer), let it dry completely, and stick to the manufacturer’s instructions. Personally, for most homes, I prefer a quality pleated filter replaced on schedule.
Choosing the right filter
If you are standing in the aisle staring at a wall of filters, here is a simple way to decide.
Pick your size first
Match the size printed on your current filter. Remember, that printed size is nominal, so do not panic if a tape measure says it is a half-inch smaller in each direction. If your filter fits loosely, consider trying a slightly different brand that fits tighter. Gaps around the filter can let air and dust bypass.
Then choose a MERV range
- Budget and basic protection: MERV 6 to 8
- Most homes: MERV 8 to 11
- Allergies, pets, dusty area: MERV 11 to 13 only if airflow stays strong and your system is designed for it
Consider thickness
A thicker filter generally has more surface area, which can mean better airflow and longer life. If your system can accept a 4-inch or 5-inch media filter cabinet, it is often an upgrade worth discussing with an HVAC pro.
Common mistakes
- Installing the filter backwards: follow the airflow arrow every time.
- Forgetting there are multiple returns: some homes have filters in more than one return grille.
- Double-filtering by accident: if there is already a filter at the air handler, do not also add filters at every return unless the system is designed for it.
- Buying the “best” filter without checking airflow: higher MERV is not always better for your system.
- Letting the filter slot leak: if the filter is loose, consider foam tape on the filter rack door (only where it will not get sucked into the blower).
- Ignoring weird symptoms: frozen coil, burning smell, or repeated system shutoffs are not “filter problems” you should power through.
When to call an HVAC pro
Filter maintenance is DIY-friendly. But if you replace the filter and you still notice any of the following, it is time to bring in a professional:
- Ice on the refrigerant line or indoor coil
- Furnace shutting off quickly after starting
- Persistent burning or electrical smell
- Major airflow differences between rooms
- Filter getting dirty unusually fast (could indicate duct leakage, construction dust, return issues, or other airflow problems)
Also keep in mind: repeated freezing or overheating can have causes beyond the filter, like low refrigerant, a dirty coil, a failing blower, or duct problems. A clean filter is step one, not the whole diagnosis.
Quick FAQ
Is it okay to run HVAC without a filter for a day?
I would avoid it. Unfiltered air can start depositing dust on the blower and coil quickly, and that is a mess you do not want to create on purpose. If you are in a pinch, buy a basic pleated filter today and upgrade later.
Should I change my filter more often in wildfire smoke season?
Yes, typically. Smoke particles can load filters quickly. Check weekly during heavy smoke and replace when airflow starts to drop or the filter darkens noticeably.
Why does my filter get dirty so fast?
Common causes are lots of runtime, pets, leaky returns pulling in dusty attic or crawlspace air, and recent remodeling. If it is clogging in a few weeks repeatedly, investigate return duct leaks or talk to an HVAC tech.
Can I vacuum a disposable filter to reuse it?
I do not recommend it. Vacuuming can damage the media and does not restore the filter’s structure. If it is dirty, replace it.
My simple routine
Here’s the low-stress method that has kept my own 1970s fixer-upper HVAC humming along:
- Check filters on the first weekend of every month.
- Replace 1-inch pleated filters about every 60 days, or sooner if they look loaded.
- Keep 2 spares on a shelf so I am never “temporarily” running a filter that looks like it was used to bread chicken.
Keep the airflow up, keep the system clean, and your HVAC will usually return the favor with fewer breakdowns and lower bills.