
Build a reliable homeowner tool kit with these 15 hand-tool essentials. Includes what to buy, what to skip, and the repairs each tool handles best.
home improvement and DIY
Silence Squeaky Hardwood Floors

Marcus Hayes
Marcus Hayes is a lifelong DIY enthusiast and former residential carpenter who has spent the last decade renovating his 1970s fixer-upper. Through Tinksmith, he shares his hands-on experience to help fellow homeowners tackle repairs, choose the right tools, and build spaces they love without breaking the bank.
Published October 17, 2026
Updated October 17, 2026
Squeaky hardwood floors have a special talent for waiting until the house is quiet. Then they announce your midnight snack run like a drum solo. The good news is most squeaks come from a few predictable culprits, and you can fix many of them without ripping up flooring.
In this guide, I will walk you through reliable DIY fixes from above (the room side) and below (from a basement or crawl space). We will start with the least invasive methods and work up to the heavy hitters like shimming, blocking, and breakaway screws.
Before you start
Two quick checks save a lot of frustration:
- Know what floor you have: Solid and engineered hardwood are often nailed or stapled down and can usually be tightened. Floating floors (common with laminate and some engineered click-lock systems) are designed to move, so driving screws through the finish layer can create new problems. If you are not sure, pull a floor register and look at the edge or check from below.
- Know your layers: The right screw length depends on hardwood thickness plus subfloor thickness. Common combos are 3/4-inch hardwood over 5/8-inch to 3/4-inch subfloor, but there are plenty of variations. If you can, measure at a vent or threshold before you commit to fasteners.
Why hardwood floors squeak
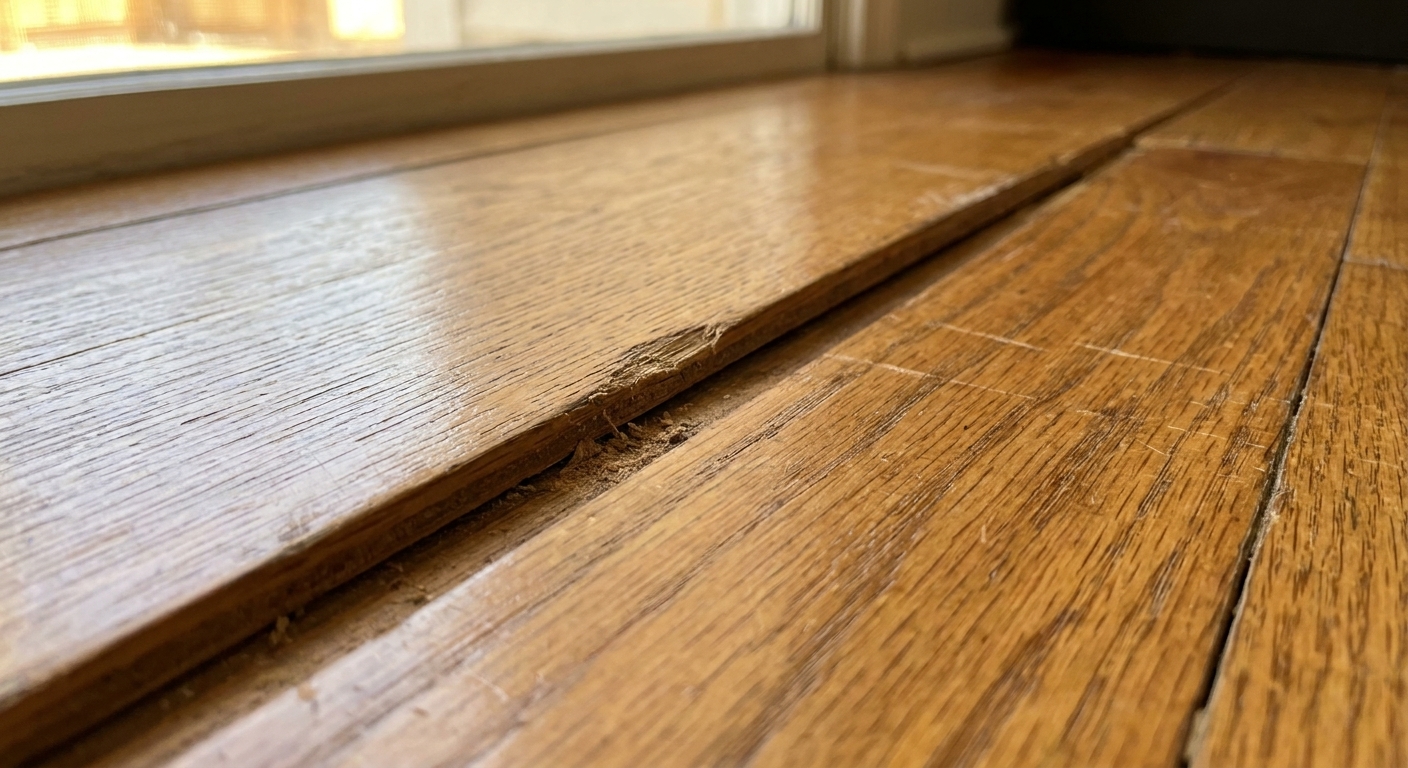
A squeak is almost always friction or movement. Hardwood expands and contracts with seasons, fasteners loosen over time, and subfloors flex. The common sources are:
- Board to board rubbing: two hardwood boards move and scrape each other.
- Board to subfloor rubbing: the finish floor shifts against the layer under it.
- Subfloor flexing on joists: nails or staples loosen, and the subfloor lifts and drops as you step.
- Gaps at joists: the subfloor does not sit tight to the joist, so it squeaks when it moves.
The fix is simply matching the method to the movement.
Find the squeak
Step 1: Map the noise
Have one person walk slowly while another listens. Mark the squeak spot with painter’s tape. Try stepping from different angles and with different foot placement. The squeak hot spot is not always exactly where you hear it.
Step 2: Check access below
If there is an unfinished basement or crawl space under the room, you can often solve squeaks more permanently from below. If the ceiling is finished or you are on a slab, stick with from-above methods.
Step 3: Find joist direction
Finish boards are often installed perpendicular to joists, but layouts vary, especially around hallways, additions, and repairs. Verify joist direction with a stud finder on deep scan, by looking from below, or by locating fasteners.
Fix squeaks from above
From-above fixes are about reducing friction and locking boards down. Start simple.
Talcum powder or graphite
If your squeak sounds like a squeal or chirp and seems to come from between boards, lubrication can work surprisingly well.
- What to use: powdered graphite or a specialty floor squeak powder are my first picks. Talcum powder can work too, but it can cake in wider seams and can be messy on some finishes. In a pinch, cornstarch can help.
- Where it works: small gaps between boards where wood rubs wood.
How to do it:
- Vacuum the area so grit is not part of the problem.
- Sprinkle a light line of powder over the seam where the squeak is.
- Work it into the crack with a soft brush or an old toothbrush.
- Lay a towel over the area and walk on it to help the powder settle.
- Vacuum up the excess.
My honest take: This can be a quick win, especially in winter when floors shrink and gaps open. It is also the most temporary fix on this list, but it is cheap, clean, and worth trying first.
Re-set nails or refasten
If you can see a board edge that is slightly proud or you feel a little click underfoot, it may need to be pulled tight.
- For face-nailed floors: you can carefully drive the nail a hair deeper with a nail set and hammer. Then fill the tiny hole with color-matched wood putty or wax filler.
- For hidden-fastened floors: it is trickier from above, which is where breakaway screws shine.
Top-down screws into joists
If the squeak feels like the whole floor system is moving, one of the most reliable fixes from above is to pull the subfloor tight to the joist with screws driven down through the hardwood and subfloor into the joist.
Best for: squeaks caused by subfloor flexing on joists, especially when nails have loosened over time.
Before you screw anything: This method is for floors that are meant to be fastened down. If you have a floating floor system, do not do this.
How to find the joist from above: Use a stud finder on deep scan, look for a faint line of nail or staple marks, or use a magnet to find fasteners in the subfloor line. If you can confirm from below, even better.
Screw length matters: Rather than chasing a magic number, aim for this: the screw should go through the hardwood and subfloor and embed roughly 1 inch into the joist, without being so long that it risks contacting wiring, plumbing, or HVAC below. In many common assemblies, that often lands in the 2-inch to 2-1/2-inch range, but measure your layers first and choose accordingly.
How to do it (clean and accurate):
- Find the joist. Confirm from below if you can.
- Pre-drill a small pilot hole to reduce the risk of splitting and to make driving straighter.
- Countersink so the screw head sits just below the surface.
- Drive the screw straight down at the squeak point into the joist. Stop as soon as the floor pulls tight. Do not over-torque it.
- Fill the countersink with color-matched wood filler or a wax repair stick.
- Re-test. If needed, add a second screw a couple inches away along the joist line.
Reality check: This works great, but it is not invisible unless you are very good at filling and matching. If you want a near-hidden fastener, use a breakaway screw kit instead.
Breakaway screws
Breakaway screw kits are made specifically for squeaky floors. The screw grabs the subfloor or joist and pulls the hardwood tight. Then the head snaps off below the surface so you are not left with a screw head staring at you forever.
Best for: squeaks caused by the hardwood and subfloor moving together, especially when you cannot access from below.
Quick caution: These are generally intended for nailed or stapled hardwood (solid or engineered). If you have a floating floor, skip this method and focus on friction fixes and underlayment or perimeter issues.
Tools and supplies:
- Breakaway screw kit with depth control guide
- Drill or driver
- Stud finder (deep scan) if you need to hit joists
- Painters tape, vacuum
How to use breakaway screws (step by step):
- Mark the squeak location with tape.
- If possible, locate the joist. Hitting a joist is the strongest hold, but many kits can also work into subfloor depending on thickness.
- Set the depth control guide on the screw per the kit instructions.
- Drive the screw straight down at the squeak point. Go slow and steady so you do not strip it.
- When the screw reaches the preset depth, keep driving until the head snaps off.
- Vacuum and test the spot. If it still squeaks, add a second screw 1 to 2 inches away.
Avoid these common mistakes:
- Missing the joist repeatedly: you end up drilling extra holes for no benefit. Take time to find joists or use below access if you have it.
- Driving too close to board ends: hardwood can split. Stay a couple inches away from ends and cracks.
- Overdoing it: you do not need a screw every inch. Start with one or two, then retest.

Fix squeaks from below
If you can see the underside of the subfloor, you have an advantage. Below-floor repairs usually last longer because you can tighten the structure instead of just pinning the finish floor down.
Basement safety
- Wear eye protection. Debris loves falling directly into eyeballs.
- Use a headlamp so you can keep both hands free.
- Watch for wiring, plumbing, and HVAC before driving screws.
- If you see signs of moisture or rot, address that first. A wet floor system will squeak again no matter how many shims you install.
Shims
One classic cause of squeaks is a tiny gap between joist and subfloor. Every step makes the subfloor flex and rub a fastener, which squeaks.
What you need: thin wood shims, construction adhesive (optional but helpful), utility knife, hammer.
How to shim correctly:
- Have a helper stand on the squeaky spot above so you can see movement from below.
- Identify the gap between joist and subfloor at or near the squeak.
- Slide a shim into the gap gently.
- Tap it just until snug. Do not crank it in. Over-shimming can lift the floor and create a new problem.
- If you want extra staying power, put a dab of construction adhesive on the shim before seating it. Use an adhesive rated for subfloors.
- Trim off excess shim length with a utility knife once the adhesive sets.
Pro tip: If you are dealing with a wide gap, stack shims carefully or cut a filler strip to size. A single fat shim forced too hard is how you create mystery humps.
Blocking or bridging
If your floor feels springy or the squeak shows up along a line, you may have joist flex. Adding bridging or solid blocking can stiffen the joist bay and reduce movement that causes noise.
Two common options:
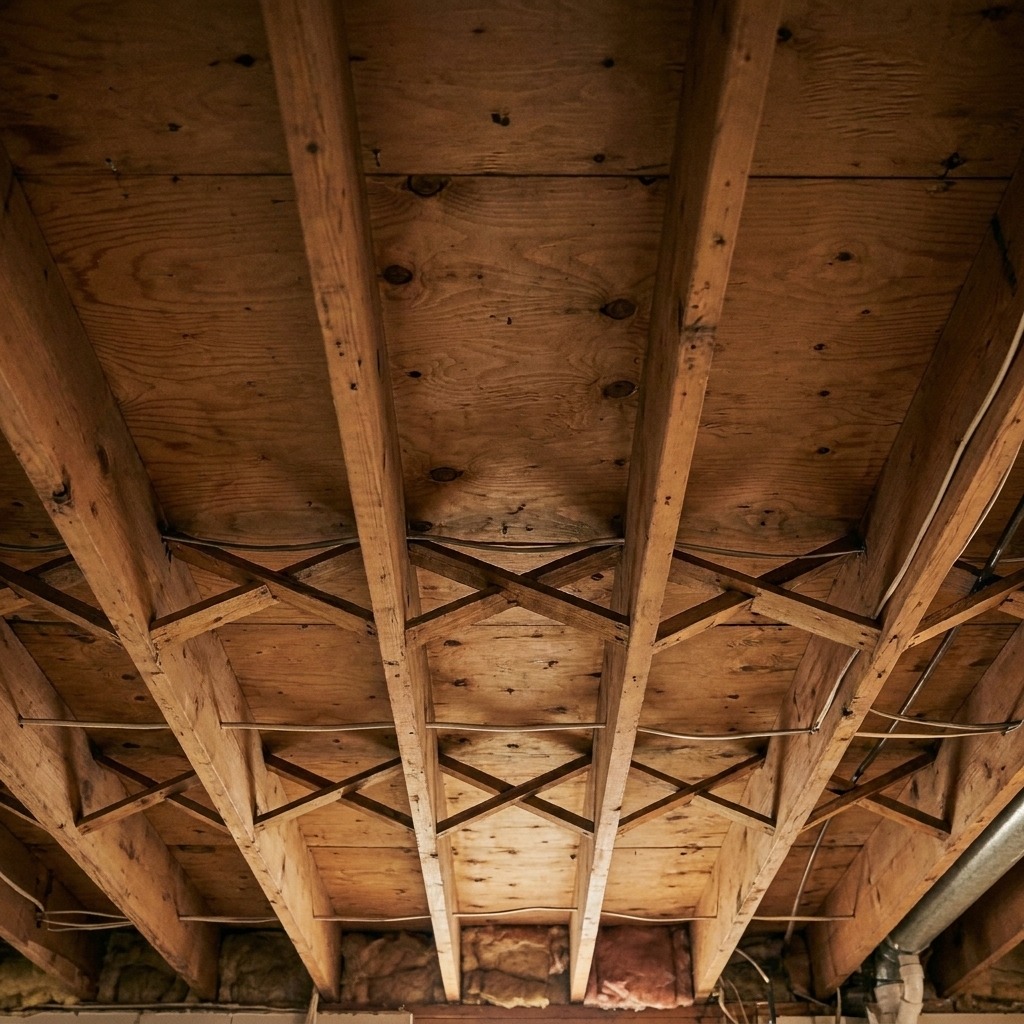
- Solid blocking: short pieces of 2x lumber installed between joists.
- Cross bridging: diagonal braces between joists (common in older homes).
How to add solid blocking (simple approach):
- Measure the joist spacing (often 14-1/2 inches for 16-inch on-center framing, but measure your actual bay).
- Cut blocks from the same depth lumber as your joists (2x8, 2x10, etc.).
- Position the block snug between joists near the squeak area.
- Fasten through the joists into the block with screws or nails. Screws are easier overhead and hold tight.
- If the goal is to pull subfloor tight, add a bead of construction adhesive along the top edge of the block before pushing it into place. Use a subfloor-rated adhesive.
When blocking helps most: long spans, older framing, or any spot where you can feel the floor bounce. Stiffening the system often quiets multiple squeaks at once.

Fasten from below
This is where people get into trouble, so let’s be clear. You generally should not drive long screws straight up through the subfloor from the basement. The screw can punch through the finished hardwood, leaving you with a sharp metal surprise in the room above.
From below, the reliable goal is to remove the gap between subfloor and joist, or clamp them together with hardware that does not risk a blow-through.
Option 1: Toe-screw the subfloor
If you want to use screws from below, the method that actually makes sense is toe-screwing, meaning you drive the screw at an angle through the side of the joist near its top edge so the screw bites into the subfloor above. You are not trying to go up through the full height of the joist.
Best for: a squeak right at a joist where you can see the joint open and close as someone steps above.
Get the length right: Measure or confirm your subfloor thickness first (common is 5/8 inch or 3/4 inch). Choose a screw that will penetrate into the subfloor by roughly 1/2 inch to 3/4 inch after passing through the joist edge at an angle, but still has no chance of reaching the finish flooring. Because the screw travels on a diagonal, it effectively reaches “higher” than you might expect, so err on the cautious side if you cannot confirm the layers.
How to do it without causing new problems:
- Have a helper stand on the squeaky spot above to load the floor.
- Use a sturdy coarse-thread wood screw. Many DIYers land around 1-5/8 inches to 2 inches depending on framing and subfloor thickness, but the rule above matters more than the number.
- Start the screw through the upper side of the joist at a steep angle so it catches the subfloor. Pre-drill helps a lot overhead and reduces splitting.
- Drive until snug. You are trying to pull the subfloor down tight, not strip wood.
If you are not confident about thickness or utilities: skip this option and use a bracket kit instead. It is not worth guessing from below.
Option 2: Use a cleat
If you have a visible gap between joist and subfloor and you cannot get a good pull with screws alone, a cleat can pull things together safely.
What to use: a straight 1x2 or 2x2 cleat (or a short piece of 2x lumber), a construction adhesive rated for subfloors, and 2-1/2 inch wood screws for fastening the cleat into the joist (not into the floor above).
How to do it:
- Have a helper stand on the squeaky spot above to load the floor.
- Run a bead of construction adhesive along the top edge of the joist where the gap is.
- Press the cleat up against the underside of the subfloor, tight to the joist, spanning the squeak area.
- Pre-drill the cleat to prevent splitting, then screw the cleat into the side of the joist using multiple screws so it clamps firmly. The cleat presses the subfloor down without any screw pointing toward the finished floor.
- Let the adhesive cure, then re-test.
Option 3: Squeak repair brackets
There are commercial joist-to-subfloor bracket kits designed for exactly this situation. They typically screw into the joist and use a short screw to pull the subfloor down without punching through the finish floor. Follow the kit’s screw-length guidance. This is one of the safest ways to get a strong pull from below.
What to try first
- Squeak seems between boards and no bounce: graphite or squeak powder.
- Squeak is in one spot and you cannot access below: breakaway screws, or top-down screws into the joist if you do not mind a filled spot.
- You have basement access and see a gap at the joist: shims, then a cleat or bracket if needed.
- The floor feels bouncy or multiple squeaks in a zone: blocking or bridging.
If you want a practical weekend order of operations: powder first, then tightening from below (shims and clamping methods), and breakaway screws as the cleanest from-above permanent-ish option.
If squeaks come back
If you fix a squeak and it returns a few weeks later, that usually means the wood is moving seasonally or the structure is still flexing.
- Check humidity: very dry winters shrink boards and open gaps. A whole-home humidifier, or even a portable unit, can reduce movement.
- Look for fastener failure: older nails can loosen. Screws generally hold better.
- Watch for subfloor issues: thin or damaged subfloor can flex too much to stay quiet.
If the squeak is paired with sagging, cracked plaster, or doors that suddenly will not latch, it is worth getting a pro opinion. Floors do talk, but sometimes they are trying to tell you something bigger.
FAQ
Will baby powder damage hardwood floors?
Used sparingly and cleaned up, it is generally safe for sealed hardwood. The key is to avoid leaving a heavy residue, especially in textured grain or wide gaps. If your floor has a wax finish or is unfinished, test in an inconspicuous spot first.
Do breakaway screws work on engineered hardwood?
Often, yes, as long as you follow the kit instructions and you are confident about what is underneath (subfloor thickness and joist location). Engineered surfaces can be thinner than solid hardwood, so depth control matters even more. If your engineered floor is floating, do not use this method.
Can I just use regular screws from above?
You can, but you will see the heads unless you countersink and fill, and you risk splitting boards if you do not pre-drill. Breakaway screw systems exist for a reason: they are designed to pull the floor tight without leaving a visible fastener.
Should I use construction adhesive from below?
Adhesive can help when paired with blocking, cleats, or shims, but do not rely on glue alone to fix movement. Mechanical fastening is what stops squeaks long term.
Final walk test
After any fix, do the slow walk again. Step with your weight shifting forward and back. If the squeak is gone, celebrate quietly so you do not jinx it. If it is still there, do not get discouraged. Squeaks can be stubborn, but they are usually logical once you track down what is moving.