
A step-by-step, weekend-friendly guide to measuring, calculating spacing, and installing a board and batten feature wall, plus corner tips, safety notes, cau...
home improvement and DIY
Custom Interior Window Trim (Craftsman Style)

Marcus Hayes
Marcus Hayes is a lifelong DIY enthusiast and former residential carpenter who has spent the last decade renovating his 1970s fixer-upper. Through Tinksmith, he shares his hands-on experience to help fellow homeowners tackle repairs, choose the right tools, and build spaces they love without breaking the bank.
Published October 17, 2026
Updated October 17, 2026
If your windows feel a little… builder-basic, you are not alone. The fastest way I know to make a room look “finished” is upgraded interior trim. Craftsman-style casing is especially forgiving for DIYers because it leans on clean, straight cuts instead of fussy profiles. Do it right and people will assume you hired someone with a van full of nail guns.
This walkthrough covers how to measure, cut, and install custom Craftsman window trim, including a proper stool and apron for windows with drywall returns. I will keep the jargon light, the details tight, and the dad jokes safely sheathed.

Before you start: choose your layout
“Craftsman-style” usually means flat stock trim with square edges and slightly beefier proportions. There are a few common layouts:
- Simple Craftsman casing: flat side casings plus a flat head casing on top, all the same thickness.
- Craftsman with head cap: flat side casings, a thicker head casing, and an additional top cap (sometimes with small returns).
- Full Craftsman with stool and apron: add a window stool (the interior ledge) and an apron below it.
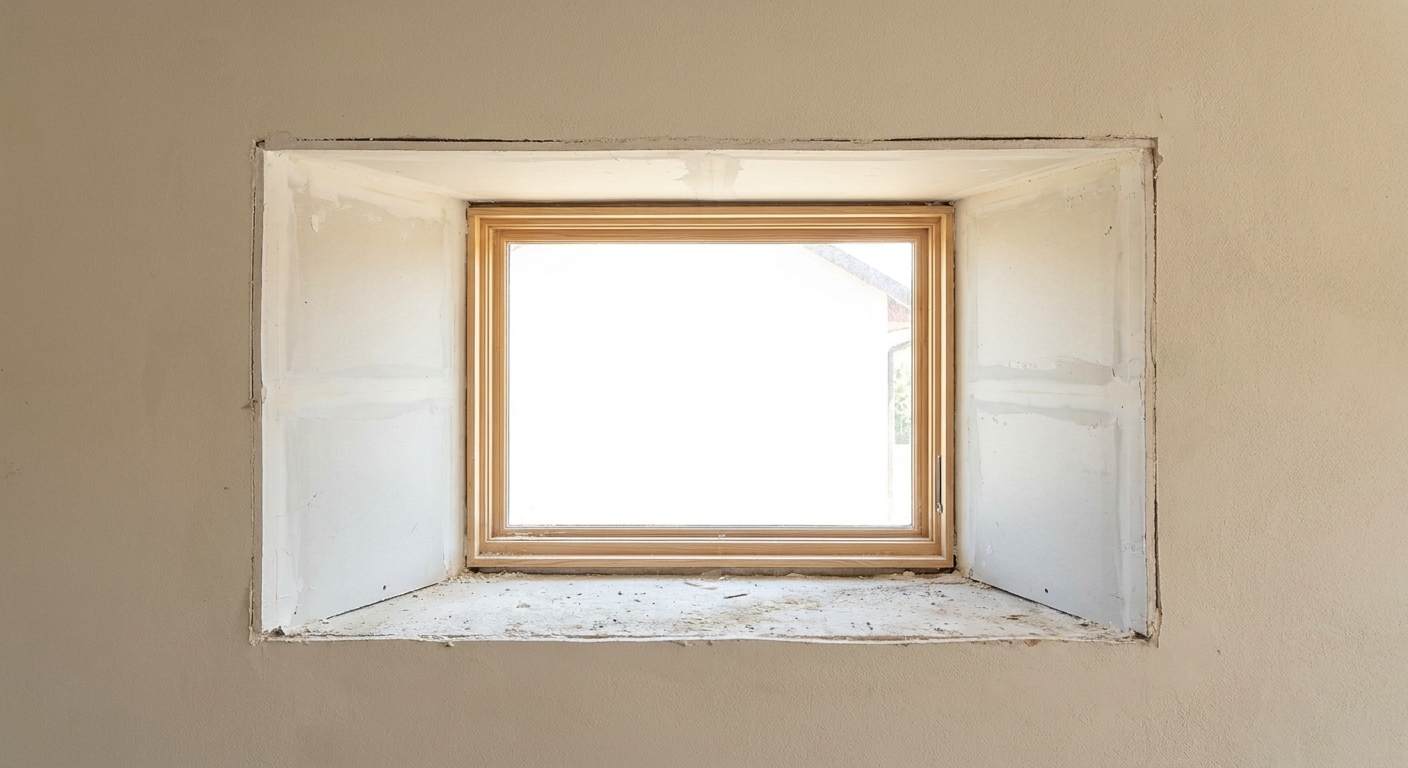
Quick definitions that save headaches: The window frame is the actual window unit (often vinyl, fiberglass, or wood) you can touch. The jamb is the surround at the inside edge of the window opening. Sometimes it is factory-made as part of the window, and sometimes you build it out with an extension jamb to bring the window out to the wall plane so trim has something solid to land on. With drywall returns, there is usually no visible wood jamb at all, just drywall wrapping into the opening to meet a recessed window frame. That is why adding a stool and apron often makes the whole thing look more “traditional.”
Tools and materials
Tools
- Miter saw (a 10-inch compound saw is often plenty for typical 1x casing)
- 18-gauge brad nailer and compressor or cordless nailer
- 16-gauge finish nailer (optional, but helpful for thicker stock and sketchy backing)
- Finish nails for hand-nailing (optional for tight spots)
- Tape measure and combination square
- Level (2-foot is fine) or a straightedge
- Pencil, painter’s tape, and a sharp utility knife
- Stud finder (helpful, not required)
- Caulk gun
- Block plane or sanding block (120 and 180 grit)
- Safety glasses and hearing protection
Materials
- Flat stock casing (common: 1x4 or 1x5; “1x” is about 3/4 inch thick)
- Stool material (often 1x6 or 1x8, depending on depth)
- Apron (often matches casing width, like 1x4)
- Construction adhesive (for gaps or mixed materials)
- Wood glue (for tight wood-to-wood joints like small returns)
- Wood filler (paint-grade, for trim boards and nail holes)
- Lightweight spackle (optional, for drywall-only dings and repairs)
- Paintable caulk (acrylic latex)
- Shims (thin cedar or composite)
- Primer and paint (or stain and clear coat)
Budget tip: Paint-grade poplar is my sweet spot for Craftsman trim. It cuts cleanly, stays fairly straight, and costs less than clear hardwoods.
Old-house caution: If you are working in a pre-1978 home and you will be sanding old paint, take lead-safe precautions.
Step 1: Set your reveal
The reveal is the small border of jamb or window frame you leave visible between the window opening and the casing. This shadow line is what makes trim look crisp instead of “slapped on.”
Common reveals are 3/16 inch or 1/4 inch. The right choice depends on how square the opening is. If your edges are wavy or inconsistent, a slightly larger reveal can help you hide sins.
How to mark reveals fast
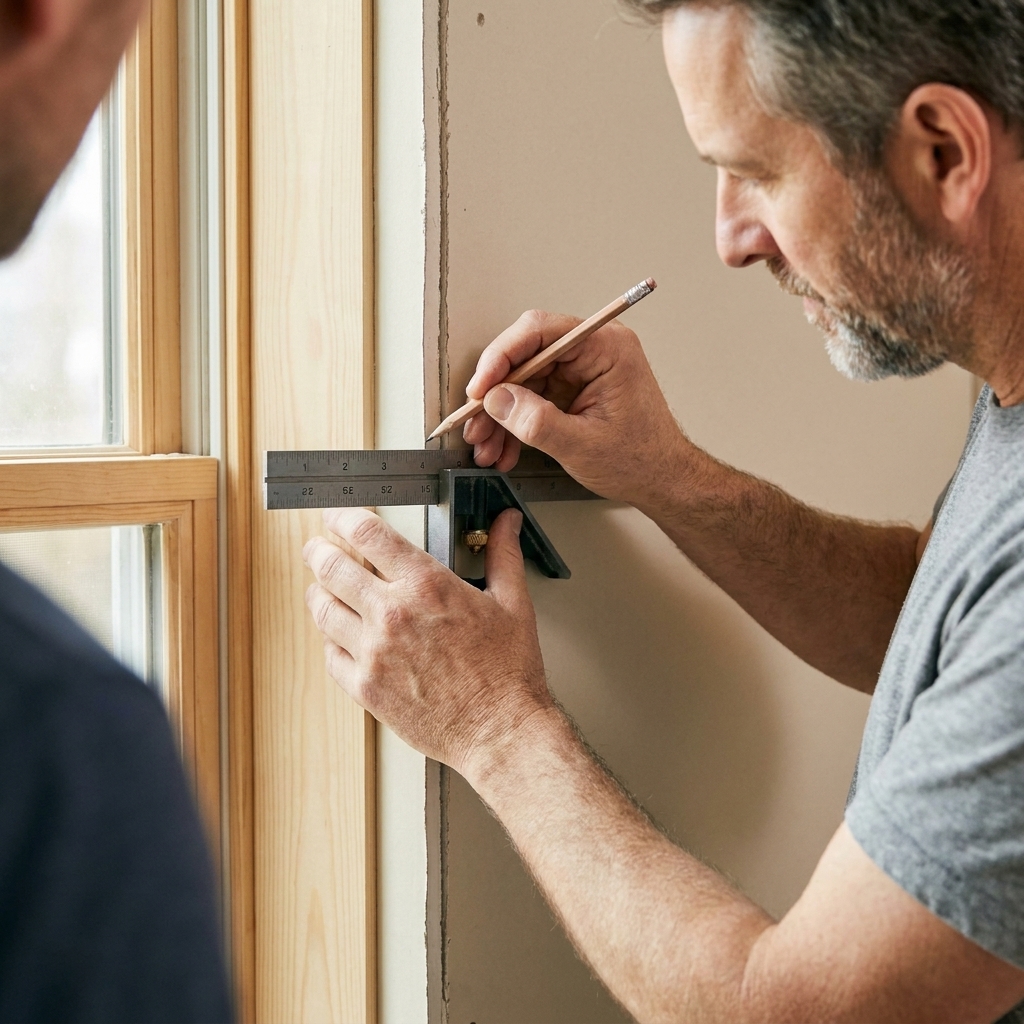
- Set a combination square to your reveal (say 1/4 inch).
- Run it around the inside edges of the opening, making small pencil ticks every 8 to 12 inches.
- Connect the ticks with light pencil lines or short segments where your casing will land.
My rule: The reveal should be consistent even if the window is not. Your eye forgives out-of-square trim more than it forgives inconsistent shadow lines.
Step 2: Measure with confidence
Trim measuring goes smoother when you measure between reveal lines, not between drywall corners.
For side casings
- Measure from the top reveal line to the bottom reveal line on each side.
- If you are installing a stool, the side casing usually lands on top of the stool. In that case, measure from the top reveal down to where the casing will sit on the stool.
For head casing
- Measure between the left and right reveal lines at the top.
- Then add length based on your corner style.
One-line examples: For butt-joint style where the head casing sits on top of the side casings, head length is usually outside-to-outside of the side casings (so you add two casing widths to the reveal-to-reveal measurement). For mitered corners, you typically cut the head to the long points so it matches your layout lines at the outside edges.
Real talk from a 1970s fixer-upper: Your left and right measurements may differ. That is normal. Cut pieces to fit their specific side instead of forcing “matching” lengths.
Step 3: Cut and dry-fit
Craftsman trim is often installed with square butt joints (no miters) or with 45-degree miters on the corners. Both work. Butt joints are simpler and tend to stay tight over time. Miters look traditional but can open up seasonally if your house has big humidity swings.
Option A: Butt joints
- Install the side casings first, then cut the head casing to sit on top (classic Craftsman).
- Or install the head casing first, then run the side casings up to it. This can be easier if your stool and apron are already locked in and you want the top perfectly level.
Option B: Mitered corners
- Cut 45-degree miters on the top of each side casing and both ends of the head casing.
- Dry-fit all three pieces together before nailing anything. If there is a gap, tweak the saw angle slightly (sometimes 44.5 or 45.5 degrees is the truth).
Dry-fit tip: Use painter’s tape to hold pieces in place while you check reveals and squareness. It is like having a third hand, minus the opinions.

Step 4: Build the stool
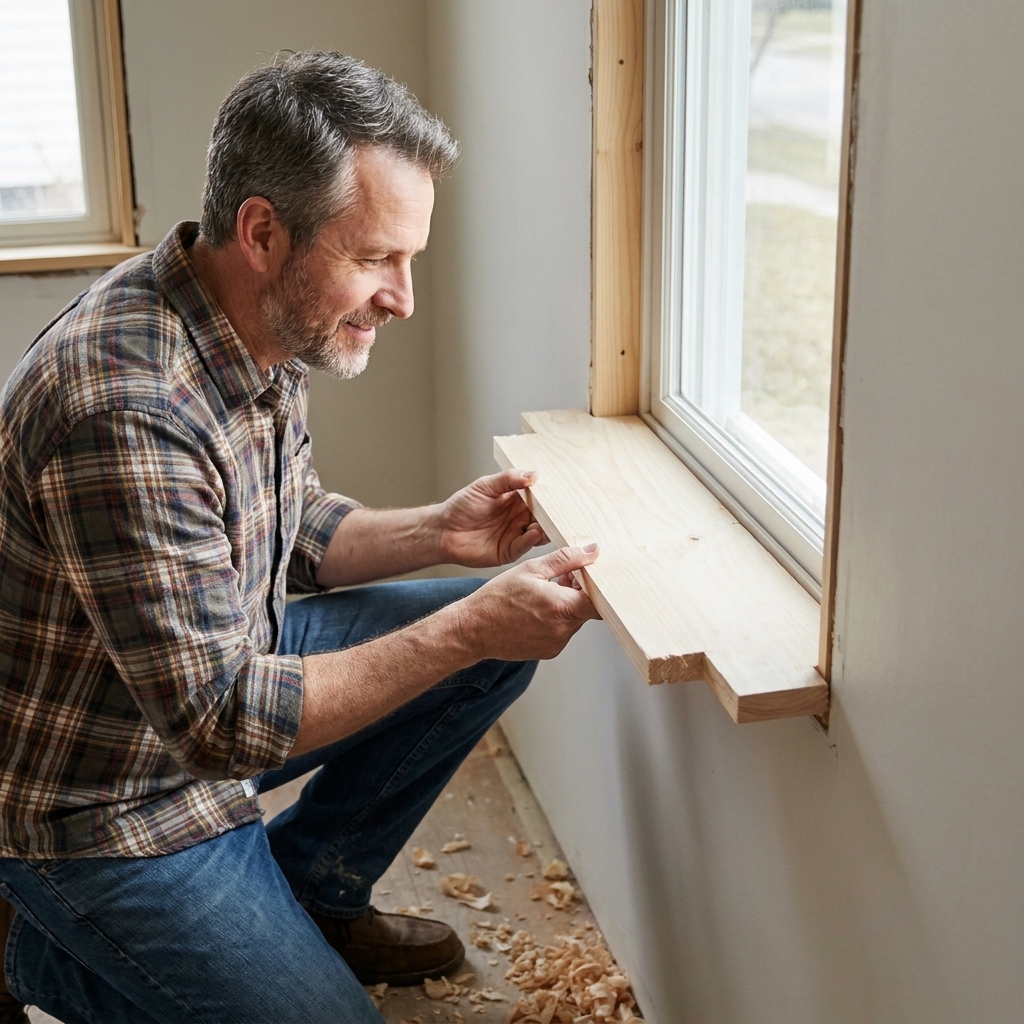
If your window does not already have a wood sill you like, adding a stool is what makes the trim feel “custom.” A stool is the horizontal ledge at the bottom of the window opening, and it often has small “ears” that stick past the side casings.
Material movement note: Let boards acclimate indoors for a few days when you can. In humid areas, priming all sides of a paint-grade stool (especially the underside and end grain) helps reduce cupping.
Measure stool depth
- Measure from the window frame to the face of the drywall at the bottom return.
- Before you commit, lay a straightedge across the wall near the window and confirm what plane you actually want the stool to die into. Drywall can bow, and that “face” measurement is not always the controlling truth.
- Add whatever overhang you want past the wall surface, typically 3/4 inch to 1 inch.
- Quick check: make sure your depth does not interfere with blinds, shades, or interior shutters.
Measure stool length
You have two easy ways to get stool length without guessing.
- Method 1 (layout lines): Mark your side casing outside edges on the wall (based on your reveal and casing width). Measure outside-to-outside between those lines, then add your ears (often 3/4 inch to 1 inch per side).
- Method 2 (simple math): Stool length = opening width between reveal lines + (2 × casing width) + (2 × ear).
Notch for drywall returns
Most drywall-return windows need two small notches so the stool can slide into the opening while still extending past the casing.
- Dry-fit your side casing locations with pencil lines.
- Transfer those lines onto the stool blank.
- Cut the notches with a jigsaw or handsaw and clean up with a chisel or sanding block.
Pro move: Aim for a snug fit but do not force it. If the stool has to be hammered into place, it will usually crack paint and push your reveals off.
Install the stool
- Test-fit, then shim underneath if needed so it sits level and does not rock.
- If the rough opening is out of level, level the stool anyway. Let the trim adjust to the stool, not the other way around.
- Use construction adhesive where you have gaps, mixed materials, or questionable contact. Use wood glue only where you have tight wood-to-wood contact.
- Nail the stool down into framing where possible. If you are using an 18-gauge brad nailer, 1 1/2 inch to 2 inch brads are common for this, depending on what you are actually hitting. If the stool is thick, hardwood, or you need more bite, a 16-gauge nailer is often the better call.
- If you are nailing near ends or into hardwood, predrill or move nails in from the edge to reduce splitting.
Pre-finish tip: If you are adding a cap with returns later, or your stool has tight inside corners, a quick coat of primer on the underside and end grain before install can save you from trying to paint raw edges in place.
Step 5: Install the apron
The apron is the vertical trim piece below the stool. It hides the rough edge where the wall meets the stool and gives the whole window some visual weight.
- Cut the apron to match the stool length or slightly shorter, depending on your style. I usually match the stool length for a bold Craftsman look.
- Check that the stool is level, then hold the apron tight underneath.
- Before nailing, find studs if you can. If you cannot find framing behind the apron area (common with some window layouts), do not count on angled brads magically finding wood in the void. In that case, use construction adhesive plus fasteners that make sense for your wall. An 18-gauge nailer can work, but a 16-gauge nailer with longer nails is often a better choice for thicker stock and sketchy backing.
- If the stool is level but the wall below it is not, scribe the top edge of the apron to fit tight to the underside of the stool, or accept a small caulkable gap on paint-grade work.
Gap note: If there is a small gap between apron and wall because the drywall bows, do not panic. That is what caulk is for.
Step 6: Install side casings
With the stool in place, side casings get easier because you have a solid reference point.
- Hold the casing on your reveal line.
- Check it for plumb with a level. If the window is out of plumb, keep the casing aligned to your reveal line and let the reveal do the visual work.
- Nail along the outside edge into studs when possible, then nail the inside edge to the jamb area. With drywall returns, you may not always have solid wood behind the inner edge, so use shims at nail points and do not be afraid to add a small bead of construction adhesive where appropriate.
Nailing that stays flat
- Start with a couple nails near the top, then one in the middle, then work down.
- Use shims behind the casing if the wall dips and you can feel the trim flex when you press it.
- Fastener rule of thumb: Use nails long enough to get at least 1 inch into solid wood when you can.
- Gauge reality: 18-gauge is great for typical 1x paint-grade casing into solid backing. If you are dealing with thicker built-up Craftsman assemblies, hardwood, or inconsistent backing, stepping up to 16-gauge for key pieces can keep things tighter over time. Predrill near ends if splitting is a risk.

Step 7: Install head casing
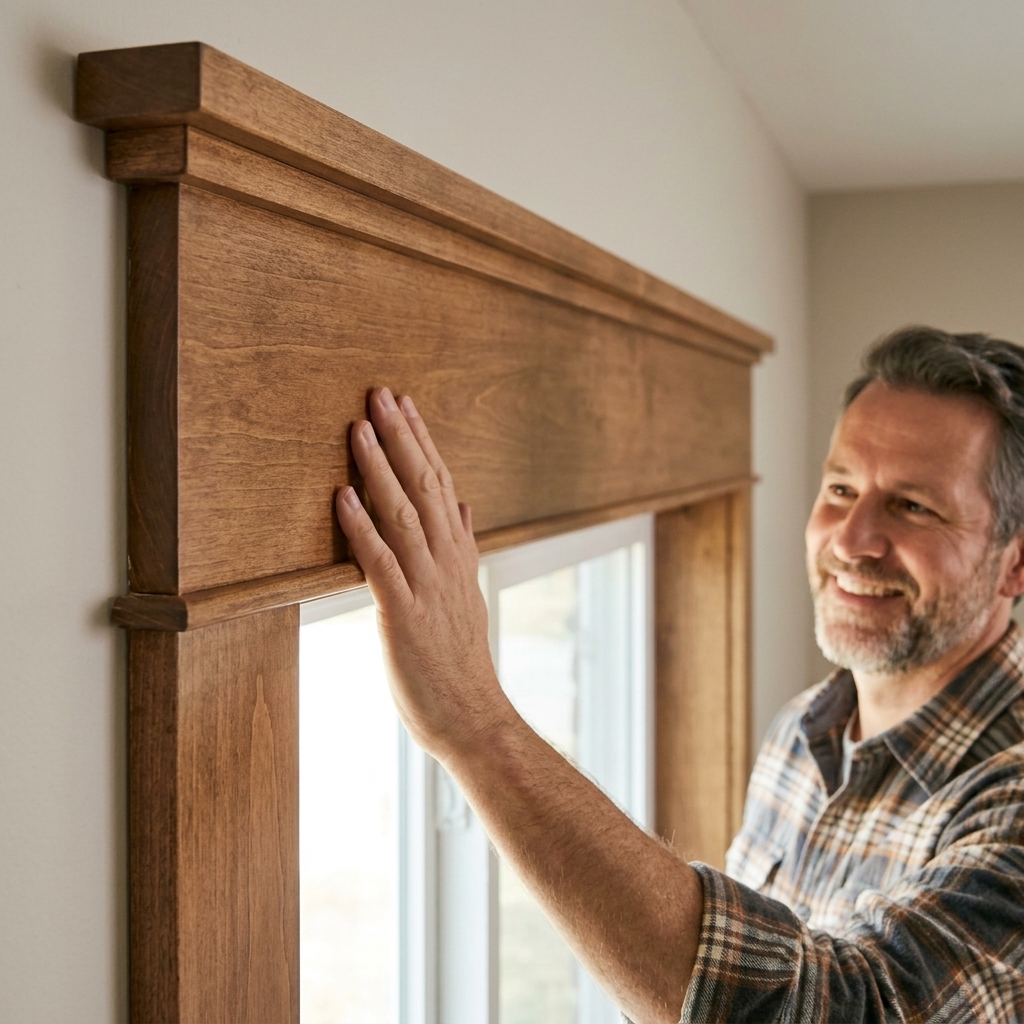
For simple Craftsman trim, the head casing is just another flat piece across the top. For a beefier look, add a cap or backband on top.
Head casing basics
- Cut the head casing to fit your layout (butt-joint style or mitered style).
- Dry-fit, confirm reveal, then nail it in place.
- If your head casing is wider or thicker stock, or you are nailing into less-than-perfect backing, a couple well-placed 16-gauge nails can help it stay put. If you are using 18-gauge near board ends or into hardwood, predrill to avoid splitting.
Add a cap with returns
A cap is a thin piece that sits on top of the head casing and extends a bit past each side, often with tiny returns on the ends so you do not see end grain.
- Cut the cap length to extend past the head casing (often 1/2 inch to 1 inch per side).
- For returns, cut two small pieces with 45-degree miters that wrap back to the wall.
- Glue returns on (wood-to-wood), pin with a couple brads, and let dry before installing the cap.
Return tip: Hold tiny return pieces with needle-nose pliers while nailing. Your fingers will thank you.
Pre-finish tip: It is a lot easier to prime the ends of cap pieces and returns before install than to try to chase raw end grain after everything is up.
Step 8: Fill, caulk, paint
Most “professional” trim jobs are won or lost right here.
Fill nail holes
- Use paint-grade wood filler for trim boards and nail holes.
- Save spackle for drywall repairs, not wood trim.
- Overfill slightly, let it dry, then sand smooth with 180 grit.
Caulk the right seams
- Caulk between trim and wall where there are small gaps.
- Caulk trim-to-trim seams if they are visible.
- About that stool: on some exterior walls, people avoid caulking the back bottom edge of the stool to reduce the chance of trapping moisture if that area ever gets damp. It is not a universal rule, and air sealing can matter too.
- If the window has a history of condensation, the wall assembly is unknown, or you are unsure, prioritize drying potential and follow local best practices. In practice, that often means keeping caulk to the room-side seams you can see, and not trying to seal every hidden edge.
Prime and paint
- Prime bare wood and filled spots.
- Use a quality trim enamel for the finish coat. Satin or semi-gloss are common for durability.
Brush tip: A good angled sash brush is cheaper than redoing trim. Cut in the edges, then lay off long strokes with light pressure for fewer brush marks.
Common problems
Miters do not close
- Check that your boards are flat and not bowed.
- Fine-tune your miter angle. Houses rarely live at exactly 90 degrees.
- If the joint is close, a touch of wood glue and a brad nail “clamp” can pull it tight.
Casing is tight on one end
- The opening is out of square. Keep your reveal consistent, then cheat the outer edge slightly.
- Use caulk sparingly on the wall side, not the reveal side.
Wavy wall makes trim rock
- Shim behind the trim at nail points.
- If the gap is small, caulk is fine. If it is huge, shims plus a wider casing can save the day.
Gaps at stool notches
- Small gaps get caulk (paint-grade) or color-matched filler (stain-grade).
- Big gaps usually mean the notch layout is off. Scribe and trim the stool or remake it. It hurts once, then you forget about it forever. Mostly.
Trim sizing cheat sheet
These are not laws. They are just a good first swing of the hammer.
- Side casing: 1x4 for small windows, 1x5 for larger rooms or taller ceilings
- Head casing: same as sides, or go one size wider for emphasis
- Stool: 1x6 to 1x8 depending on depth and how much ledge you want
- Apron: match side casing width (1x4 or 1x5) for a consistent Craftsman look
- Reveal: 3/16 inch to 1/4 inch
FAQ
Install trim before or after painting?
If you are replacing trim, install the trim first, then caulk, then paint trim and walls. If the walls are already painted, you can still install trim, just be neat with caulk and touch-ups. For paint-grade work, pre-priming cut ends, returns, and the underside of stools can make finishing faster and cleaner.
Can this be done without a nail gun?
Yes. Use 6d or 8d finish nails for casing, predrill near board ends to prevent splitting, and set nails with a nail set. It is slower, but totally doable.
Do you need to hit studs?
It helps, especially on the outer edge of casing. But even when you cannot hit studs consistently, fasteners into the jamb area plus a few solid framing hits usually hold fine. Shimming at nail points reduces movement and future cracks.
How do you hide end grain on cap returns?
Use returns. Glue them, pin nail them, and lightly sand the joint. For paint-grade, a bit of filler and sanding makes the seam disappear.
Wrap-up
Custom interior window trim is one of those projects where the carpentry part is pretty straightforward and the patience part does the heavy lifting. Focus on consistent reveals, dry-fit everything, level the stool, and do not skip the fill and caulk stage. Your house will look sharper, your windows will feel bigger, and you will catch yourself admiring your own work like a proud weirdo. Welcome to the club.