A practical, weekend-friendly guide to building a smokeless stone fire pit using pavers, a steel insert, and simple masonry tools, plus safety and airflow tips.
home improvement and DIY
Build a Concrete Block Retaining Wall

Marcus Hayes
Marcus Hayes is a lifelong DIY enthusiast and former residential carpenter who has spent the last decade renovating his 1970s fixer-upper. Through Tinksmith, he shares his hands-on experience to help fellow homeowners tackle repairs, choose the right tools, and build spaces they love without breaking the bank.
Published October 17, 2026
Updated October 17, 2026
Retaining walls look like a “stack some blocks and call it a day” project. And then the first spring rain shows up and tries to redecorate your yard. The secret isn’t fancy tools. It’s the unglamorous stuff: a proper trench, a dead-level base, and drainage that gives water somewhere to go besides shoving your wall outward.
This guide walks you through building a small to medium interlocking concrete block retaining wall the way I do it at my own 1970s fixer-upper: slow at the bottom, steady all the way up.
Before you start: scope and limits
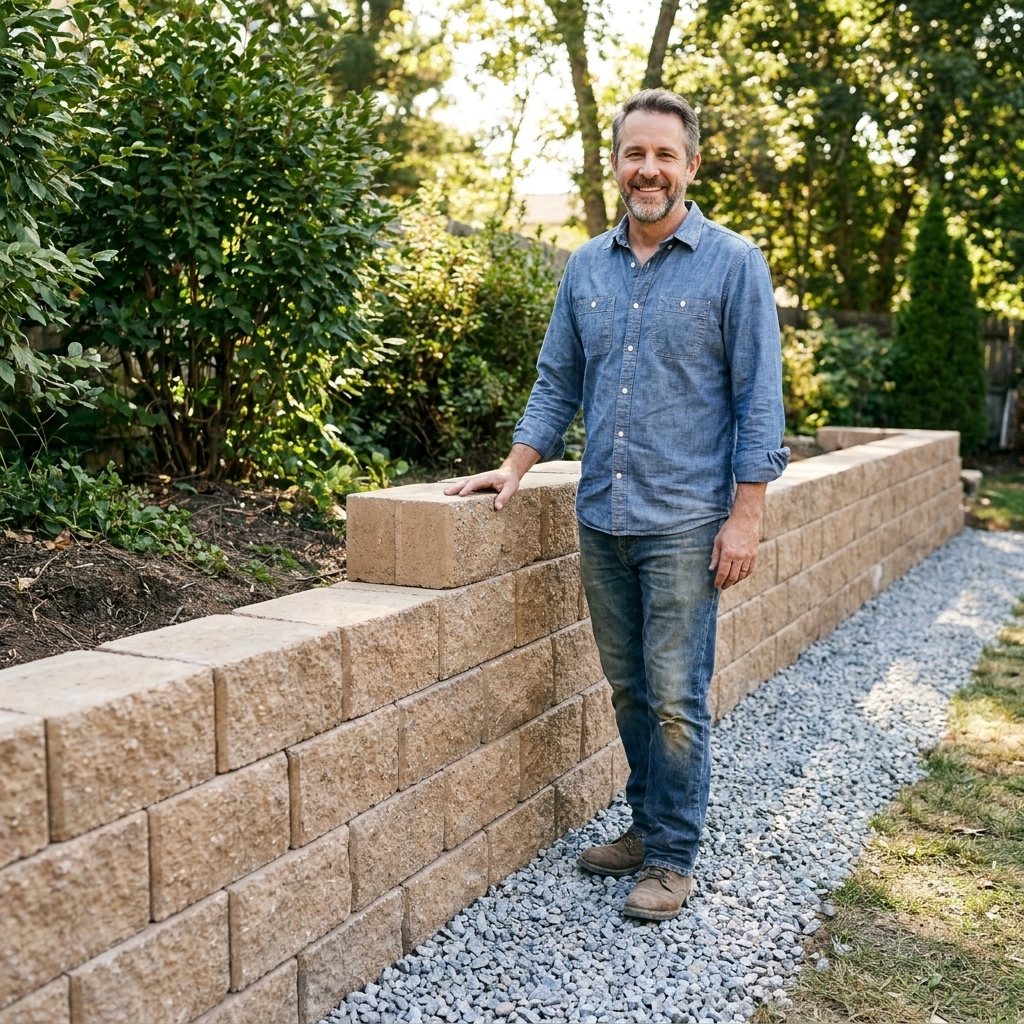
This is for segmented retaining wall blocks, the kind that interlock with a lip or pin system and stack with a slight setback. They are forgiving, strong, and DIY-friendly.
Good DIY range: often feasible for walls up to around 3 feet tall on reasonably stable soil, with no steep slope above and no driveway, patio, or other heavy load right behind it. But height is not the only factor. Soil type, groundwater, slopes, and “surcharge” loads (cars, sheds, hot tubs, stacked firewood) can change everything. Check local rules and your specific block system’s unreinforced height limits. Many areas require permits and engineered plans around the 3 to 4 foot range, sometimes lower depending on conditions.
Call before you dig
In the U.S., call 811 a few days ahead. Hitting a utility line is the kind of surprise that ruins weekends and budgets.
Quick safety note
Blocks are heavy and awkward. Wear gloves, protect your eyes, and do not be a hero with your back. If your blocks are the big ones, have help on hand.
Tools and materials
Tools
- Shovel and a trenching spade (or a mattock if your soil is spicy)
- Wheelbarrow
- Hand tamper or plate compactor (renting a plate compactor is worth it)
- 4-foot level (and a torpedo level)
- Rubber mallet
- String line and line level (or a laser level if you have one)
- Tape measure
- Landscape rake
- Dead blow hammer and cold chisel (for small adjustments)
- Block splitter or masonry saw with diamond blade (for cleaner cuts, optional but nice)
- Safety gear: gloves, eye protection, hearing protection, dust mask when cutting
Materials
- Interlocking retaining wall blocks (and matching caps if you want a finished top)
- Base material: 3/4-inch minus crushed stone, also sold as “road base” or “paver base”
- Drain stone: clean 3/4-inch crushed stone (no fines)
- Geotextile landscape fabric (non-woven is ideal for drainage areas)
- Perforated drain pipe (4-inch) and fittings (recommended for most walls)
- Construction adhesive rated for masonry (for caps)
- Stakes and string
Skip the pea gravel under the first course. You want crushed stone that locks together when compacted.
Plan the wall
1) Set the line and height
Mark the face of your wall with marking paint or a garden hose for curves. Measure the total run length.
For height, count courses based on block height. Plan to bury the first course partially below grade. A common approach is to embed at least one full course. Many systems also target roughly 10 percent of the wall height, with a practical minimum around 6 inches, but your block manufacturer may call for something different. Follow the system specs when they disagree with rules of thumb.
2) Watch the water
Notice where water goes now. Your finished wall should not create a dam that traps water behind it. Drainage is what keeps a wall from bowing or leaning.

Step 1: Dig the trench
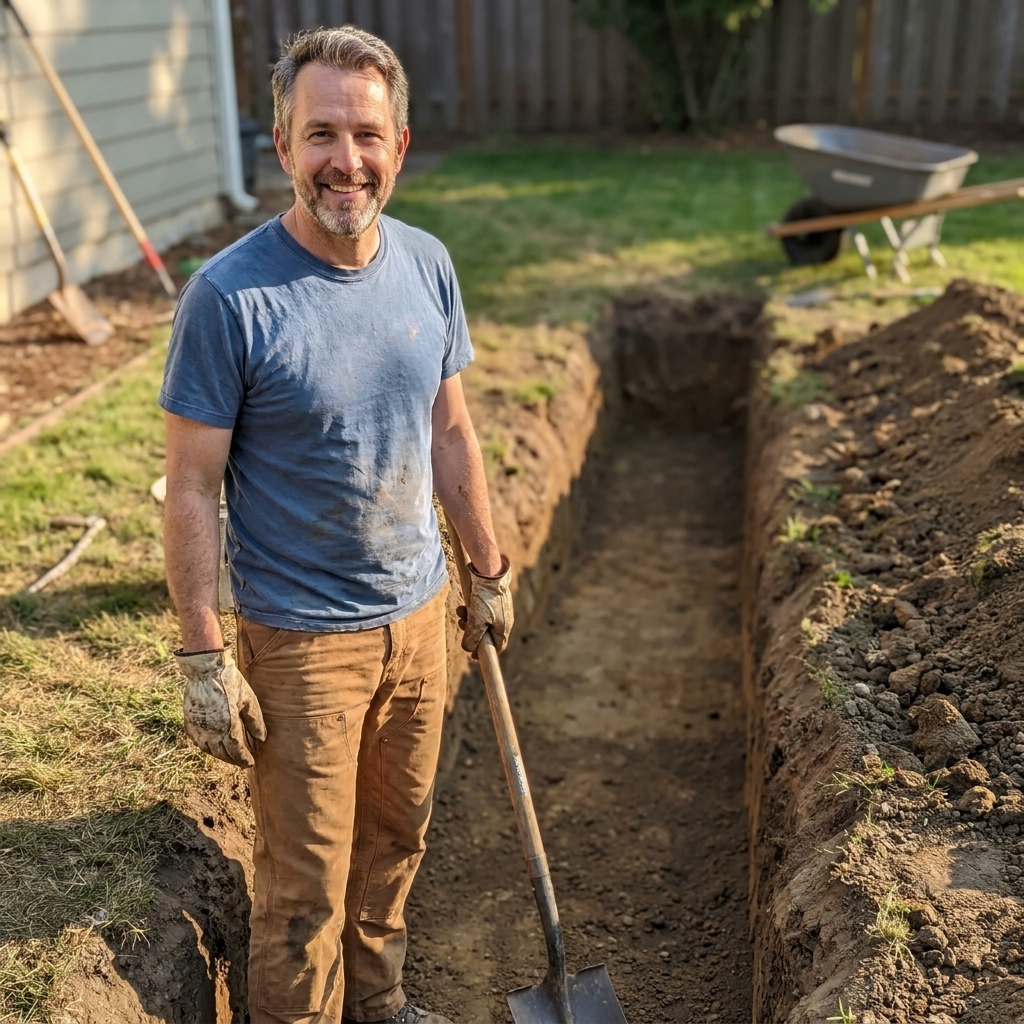
The trench is where DIY walls are made or broken. If the base isn’t wide, level, and compacted, the blocks will settle and your nice straight line will turn into a wave.
Trench width
Dig the trench wide enough for:
- The block depth
- Plus at least 6 inches of space behind the block (measured from the back of the block to the trench wall) for drain stone
- Plus a little wiggle room to work
For many common blocks, that lands in the 18 to 24 inch range. Wider is easier to build and drains better.
Trench depth
Depth should allow for:
- Base stone thickness per your block system (often 4 to 6 inches compacted for small walls on decent soil, but some systems call for 6 to 8 inches or more)
- The buried portion of the first block course
In cold climates, follow local guidance for frost conditions. These walls rely on a flexible, well-drained base rather than deep frost footings, but drainage becomes even more important where freezing happens.
Pro tip: dig to firm soil
If you hit loose fill, roots, or mushy soil, keep going until you reach firm ground. Remove roots and organic material. A wall built on top of old topsoil will settle like a lawn chair in wet grass.
Step 2: Build the base
1) Add base stone in lifts
Pour in 3/4-inch minus base material. Spread it in layers about 2 inches thick, then compact each layer. Keep adding until you reach your planned base thickness based on the block system and your soil conditions.
If you dump it all at once and tamp the top, the bottom stays loose. Loose base equals future settling.
2) Level the base
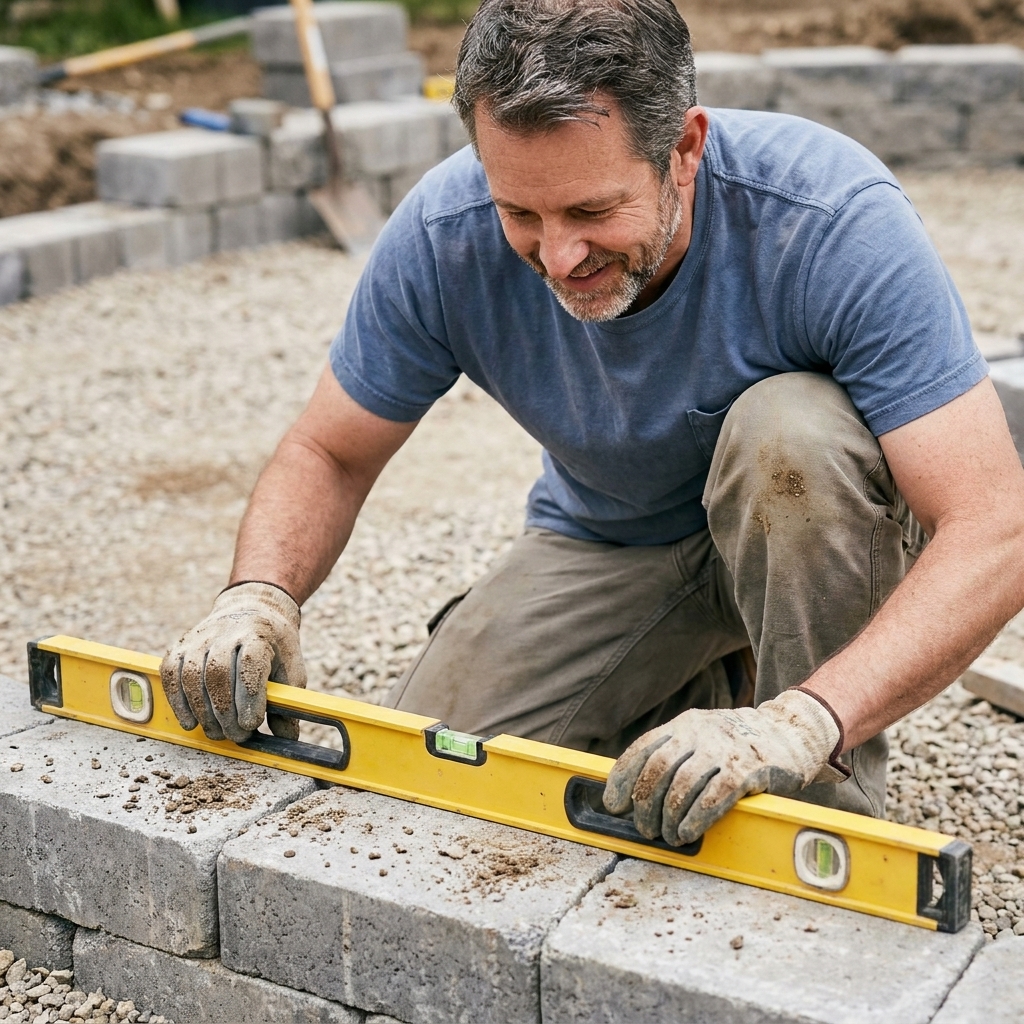
Use a rake, then a long level on a straight 2x4 or screed board to check for high and low spots. You want the base level front-to-back and left-to-right where the first course will sit.
Important: the wall can step up or down with the yard, but each section’s base must be level. Do not run the first course on a slope.

Step 3: Set the first course
The first course is the foundation. If it’s perfect, the rest feels like stacking big LEGO. If it’s not, you’ll fight every block like it owes you money.
1) Place the first block
Start at the lowest point of the wall. Set the first block on the base, then check:
- Level side-to-side
- Level front-to-back
- Straight with the string line
Tap gently with a rubber mallet to adjust. If a block is too low, lift it out and add base material, then recompact. Do not “shim” with loose gravel on top without compacting.
2) Finish the first row
Set the rest of the first-row blocks tight together. Check level every block or two, and check the whole run with your long level or string line.
Keep the faces clean. Knock off gravel stuck under block edges. A single stone under one corner can throw your course off and multiply errors as you stack higher.
Step 4: Drainage and backfill
Water is the bully behind most failed retaining walls. Drainage is how you take away its leverage.
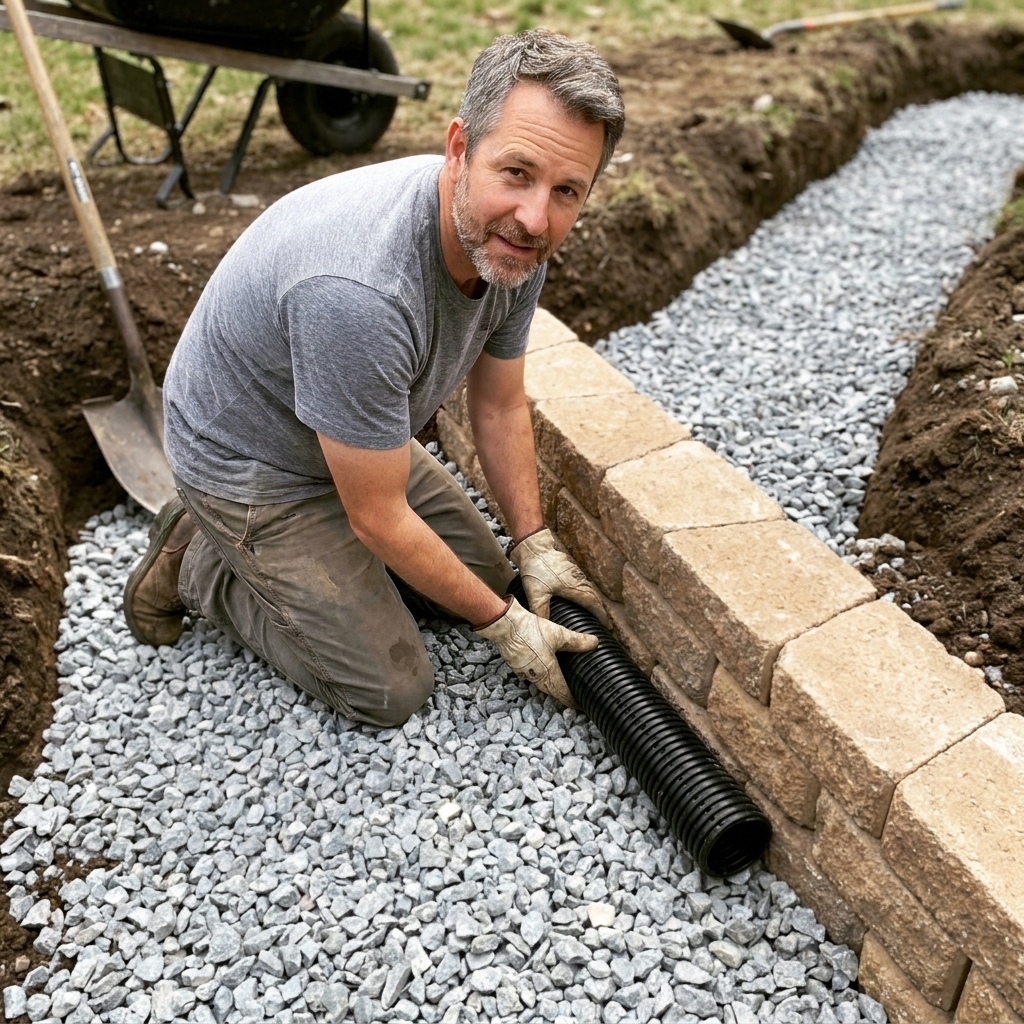
1) Lay fabric
Line the soil side behind the wall with geotextile fabric. This keeps fine soil from migrating into the drain stone and clogging it over time.
2) Add a drain pipe (recommended)
Place 4-inch perforated pipe at the base behind the first course. Hole orientation varies by product and local standard, so follow the pipe and block system guidance for your area. The big picture is what matters: keep the pipe fully surrounded by clean drain stone and separated from soil with fabric, and give it a reliable outlet.
Slope the pipe slightly to daylight or to a proper outlet. A common target is about 1 percent slope (roughly 1/8 inch per foot), but follow local and manufacturer recommendations.
Outlet tip: Do not send water where it will create a problem, like onto a neighbor’s lot or across a sidewalk. When you daylight the pipe, use erosion control (riprap, a splash pad, or a pop-up emitter) so you do not wash out your yard.
3) Backfill with drain stone
Fill behind the blocks with clean 3/4-inch drain stone. For most DIY walls, 8 to 12 inches of drain stone behind the wall is common, and 12 inches is a good target when you have the space, unless the block system specifies otherwise.
Compact lightly in thin lifts, and keep soil out of your stone zone. Fold fabric over the top of the drain stone before you cap it with soil. That fabric wrap is what keeps the drainage layer draining.
Step 5: Stack courses
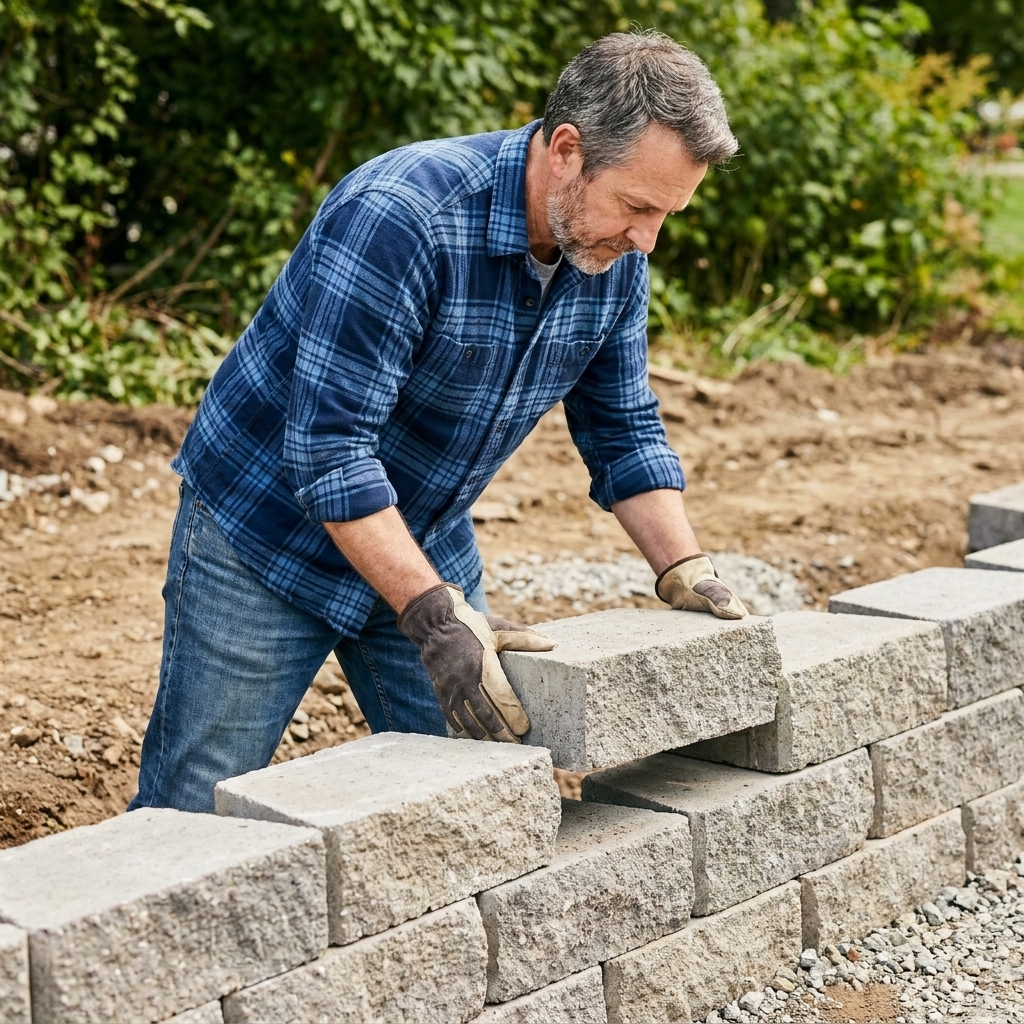
1) Clean the tops
Before placing a new block, sweep the block below it. A thin layer of grit can keep blocks from seating fully.
2) Stagger the joints
Like brickwork, you want each block centered over the joint below whenever possible. This ties the wall together and looks better.
3) Use the built-in setback
Most interlocking systems naturally lean back slightly as you stack. That setback is on purpose. It helps the wall resist the soil pressure behind it. Do not fight it to make the wall perfectly vertical unless the manufacturer’s system is designed that way.
4) Check often
Every course, check:
- Level across the course
- Alignment along the face (string line helps)
- Overall batter (the slight lean) looks consistent
If something drifts, fix it now. Walls have a funny way of becoming “close enough” right up until the last course, when you realize you have invented a new shape.
Step 6: Steps and curves
Stepping up or down
If your yard slopes, you typically step the base and first course in level sections rather than running blocks on a slope. Each stepped section starts with its own properly compacted, level base.
Make steps in full block height increments so the pattern looks intentional and the courses still lock together the way the system expects.
Corners
Use the system’s corner blocks if available. Otherwise, you can cut blocks to fit, alternating the overlap each course for strength. Take your time dry-fitting. A good corner is part strength, part puzzle.
Curves
For gentle curves, many blocks can be fanned slightly. Keep the faces tight and the back gaps consistent, then fill behind with drain stone. For tighter curves, you may need to split blocks or use a block style made for curves.

Step 7: Cap the wall
Caps make the wall look finished and help shed water away from joints.
1) Dry fit first
Lay cap blocks without adhesive to check spacing and cuts. If you need cuts, mark them now.
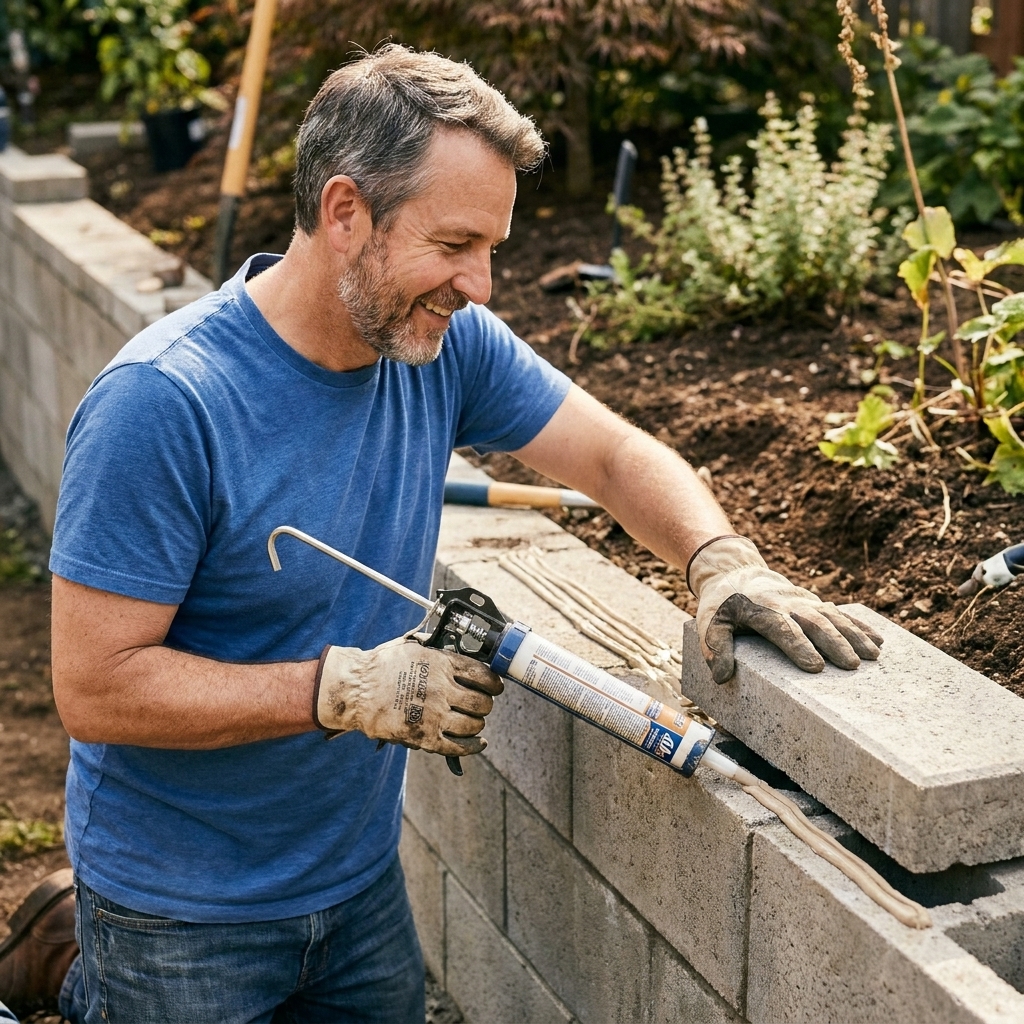
2) Glue caps down
Use a masonry construction adhesive and apply a few generous beads per cap. Press in place and align the front edges.
Tip: Do caps last on a dry day. Adhesive and wet dust are not friends.
Finishing touches
Grade for drainage
Finish backfilling with soil above the fabric-wrapped drain stone. Then grade the soil so surface water flows away from the wall, not toward it.
Plant smart
A little landscaping goes a long way. Just avoid deep-rooted shrubs right against the wall that could push blocks over time. Groundcovers and shallow-rooted plants are usually a safer bet.
Clean up
Sweep off dust and rinse if needed. Skip harsh acids. They can discolor concrete blocks.
When you need geogrid
If your wall is approaching your system’s unreinforced limit, or if your site has any of the following, plan on using geogrid and following a specific engineered or manufacturer detail:
- A slope above or below the wall
- Soft, wet, or questionable soils
- Heavy loads behind the wall (driveway, patio, shed, parked vehicle areas)
- Limited room for proper drainage and backfill stone
Geogrid is not a mystery product. It is just reinforcement that ties the wall into the soil behind it. But it only works when it is installed at the right lengths and elevations for your wall system and site.
Common mistakes
- Skipping compaction: Compact the base in thin lifts, and compact backfill stone lightly as you go.
- Using the wrong base material: Pea gravel rolls around. Use 3/4-inch minus for the base.
- Not embedding the first course: Bury at least one course, or per system specs.
- No drainage: At minimum, use drain stone and fabric. A drain pipe is cheap insurance when you can give it a proper outlet.
- Letting the first course slide: If course one is off, everything above it will be off. Fix it early.
- Building beyond the system limits: Taller walls and tricky sites often need geogrid, engineered specs, and inspections.
FAQ
How deep should the gravel base be?
Base depth depends on the block system, wall height, and soil. For many small DIY block walls on competent soil, a 4 to 6 inch compacted base of 3/4-inch minus crushed stone is common. Some systems call for 6 to 8 inches or more. Check your block manufacturer’s requirements.
Do I need a drain pipe?
I recommend it for most walls unless the site is exceptionally well-drained and the wall is very short. A perforated drain pipe at the base, surrounded by drain stone and wrapped with fabric, helps prevent water pressure from building up behind the wall.
Can I use standard concrete blocks?
Use retaining wall system blocks, not standard hollow concrete masonry units (CMU) meant for building walls with mortar. Interlocking retaining wall blocks are designed to stack dry with setback and to work with drainage and reinforcement options.
How do I keep the wall straight?
Use a string line for straight runs, check alignment every course, and keep block faces clean so each block seats fully. Most “crooked wall” problems start as a tiny bump of gravel under a block in the first course.
One last tip
If you only have the energy to be picky about one thing, be picky about the base and the first course. A retaining wall is basically a story about gravity, water, and patience. Write a good first chapter and the rest reads a lot easier.