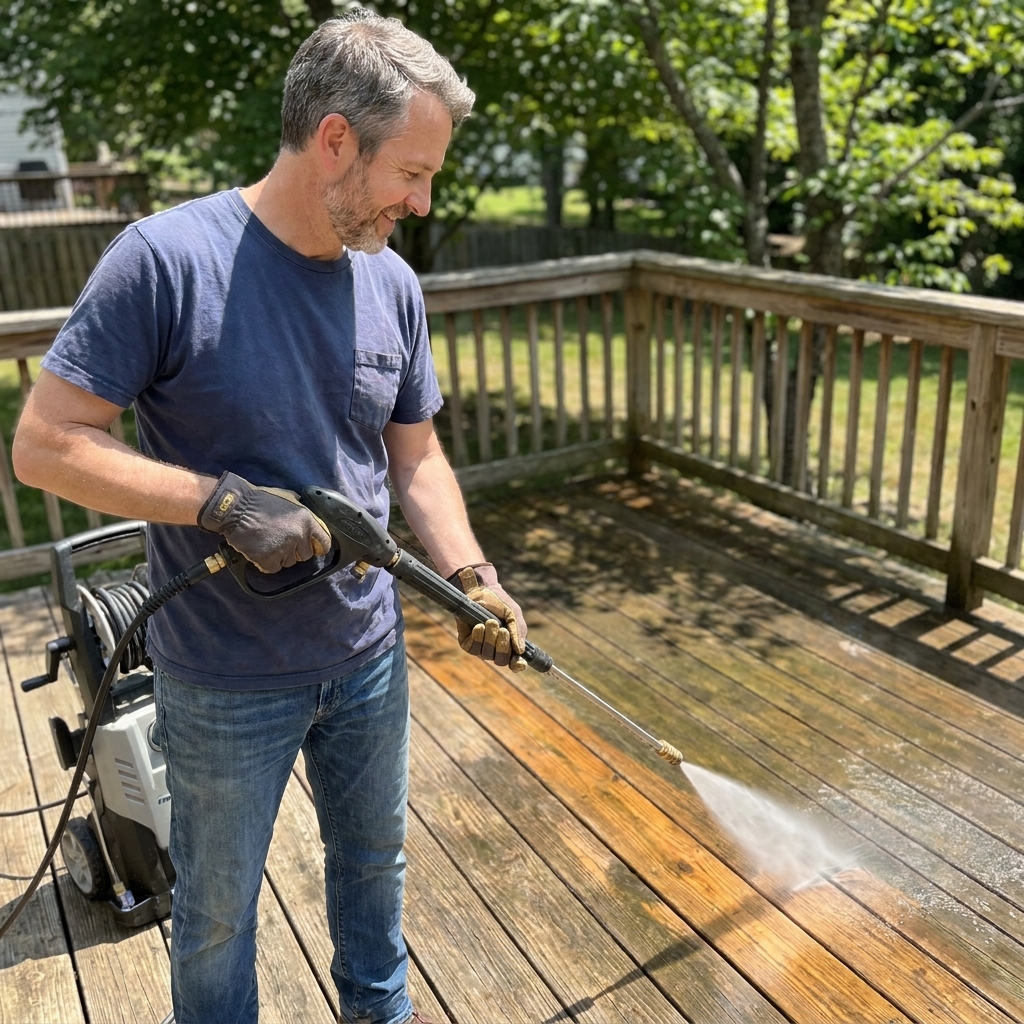
A step-by-step deck refresh you can do in a weekend: nozzle choice, stripping old stain, safe pressure washing, drying, and sealing for a clean, protected fi...
home improvement and DIY
Prep, Sand, and Restain a Weathered Deck

Marcus Hayes
Marcus Hayes is a lifelong DIY enthusiast and former residential carpenter who has spent the last decade renovating his 1970s fixer-upper. Through Tinksmith, he shares his hands-on experience to help fellow homeowners tackle repairs, choose the right tools, and build spaces they love without breaking the bank.
Published October 17, 2026
Updated October 17, 2026
There are two kinds of deck owners: the ones who stain on schedule, and the rest of us who look out the back door one spring and think, “Huh. When did my deck turn the color of old cereal?” The good news is most weathered decks are totally restorable if the boards are still sound. The trick is doing the steps in the right order and not rushing the dry times. Wood has a long memory, and it holds grudges.
This is my go-to process for prepping, sanding, and restaining a tired wooden deck so it looks clean, rich, and even. We will cover washing without shredding your boards, sanding like you mean it, and staining in a way that actually lasts.

Start with a reality check
Before you buy stain or rent a sander, make sure your deck is worth saving. A finish will not fix rotten structure.
Quick inspection checklist
- Probe the wood: Use an awl or small screwdriver on a few boards, especially near stairs, posts, and where the deck meets the house. If it sinks in easily or the wood feels spongy, plan on replacing those boards.
- Look for cupping and splintering: Mild cupping is fine. Severely crowned or splintered boards may need replacement or aggressive sanding.
- Check fasteners: Popped nails and proud screws will destroy sandpaper and bare feet. Plan to reset or replace them.
- Check the structure too: Pay attention to joists, beams, posts, and the ledger at the house. If the framing is soft, cracked, or pulling away, stop and address that first.
- Watch for ledger and flashing issues: If the connection to the house looks sketchy, address that first. Water management beats cosmetics every time.
Rule of thumb: If a large portion of the decking boards are rotten (say, around 20 to 25 percent), it can be more cost-effective to re-deck than to refinish. But the real deal-breaker is structural lumber. If joists or the ledger are compromised, refinishing is not the project you need.
Tools and materials I actually reach for
You do not need a contractor trailer full of gear, but the right tools will save your back and your weekend.
Cleaning and prep
- Broom and stiff scrub brush
- Putty knife or paint scraper for gunk in corners
- Deck cleaner and or wood brightener (more on that below)
- Pump sprayer (handy for applying cleaner evenly)
- Garden hose with spray nozzle
- Pressure washer (optional, but useful if used gently)
- Plastic and painter’s tape for siding, doors, nearby concrete, and pavers
Sanding
- Deck sander or floor buffer with sanding screen for big, flat areas
- Random orbit sander for edges, stairs, and spot fixes
- Detail sander for tight corners (optional)
- Sandpaper: 60 or 80 grit for initial leveling, then 80 or 100 for finishing passes
- Hearing and eye protection, dust mask or respirator
- Shop vac and a nozzle for cracks between boards
Staining
- Exterior wood stain (transparent, semi-transparent, semi-solid, or solid)
- Stain pad on a pole or quality brush for edges
- 3/8-inch nap roller (optional, used carefully and back-brushed)
- Clean rags for wipe-ups
- Nitrile gloves
Safety note: Oily stain rags can spontaneously combust. Spread rags flat to dry outdoors, then dispose of them per your local guidance.

Step 1: Clear, protect, and fix the obvious
This is the unglamorous part, but it makes the rest go smoother.
- Remove everything from the deck: grills, planters, rugs, furniture. If you leave it, you will stain around it. Your future self will notice.
- Cover nearby plants with breathable fabric or light plastic during cleaning, then uncover them afterward so they do not cook.
- Mask what you do not want splashed: Siding, doors, and anything below the deck like concrete, pavers, or a patio. Some cleaners and brighteners can spot or etch, and stain drips have a way of finding the one thing you forgot.
- Protect metal parts: If you have metal balusters, brackets, or flashing near where you will apply cleaner or brightener, be careful with overspray and rinse well. Some products can discolor metals if left sitting.
- Reset fasteners: Drive proud screws down slightly below the surface. Replace stripped screws. If you have nails backing out, consider swapping to exterior deck screws in problem spots.
- Before you sand with a buffer: Walk the deck and sink every screw head you can find. A single proud fastener will chew up sanding screens fast.
- Replace bad boards now, not after you stain. New boards will take stain differently, but it is still better than trying to blend a repair later.
Step 2: Clean it like you mean it
Stain does not like dirt, mildew, or old sunscreen. Cleaning also reveals what you are really working with.
Cleaner vs stripper vs brightener
- Deck cleaner removes dirt and mildew. Great for maintenance coats and lightly weathered wood.
- Stain stripper helps remove failing stain or paint. If you have thick, peeling coating, you may need stripper plus sanding.
- Wood brightener (often oxalic-acid-based) neutralizes cleaners and strippers and helps restore a more uniform tone. I like it when wood looks gray or blotchy after washing.
If your old stain is mostly gone and the wood is just gray, a good cleaner plus brightener is usually enough before sanding. If stain is patchy and clinging on, plan on sanding it off rather than trying to chemically nuke the whole deck.
Quick surface ID that saves time: If water tends to bead up and you can see a shiny film in spots, you may have a sealer or a higher-build coating still hanging on. That usually means you will need more removal work (sanding and or stripping) before a new stain will soak in evenly.
How to wash a deck without damaging it
You can clean with a pressure washer, but you must treat it like a tool, not a weapon.
- Pre-wet the deck with a hose so cleaner spreads evenly.
- Apply cleaner per the label, ideally with a pump sprayer. Keep the surface wet for the dwell time so it can work.
- Scrub high-traffic areas (grill zone, stairs, near doors). A brush does more than extra PSI.
- Rinse thoroughly from top to bottom. Do not leave cleaner residue.
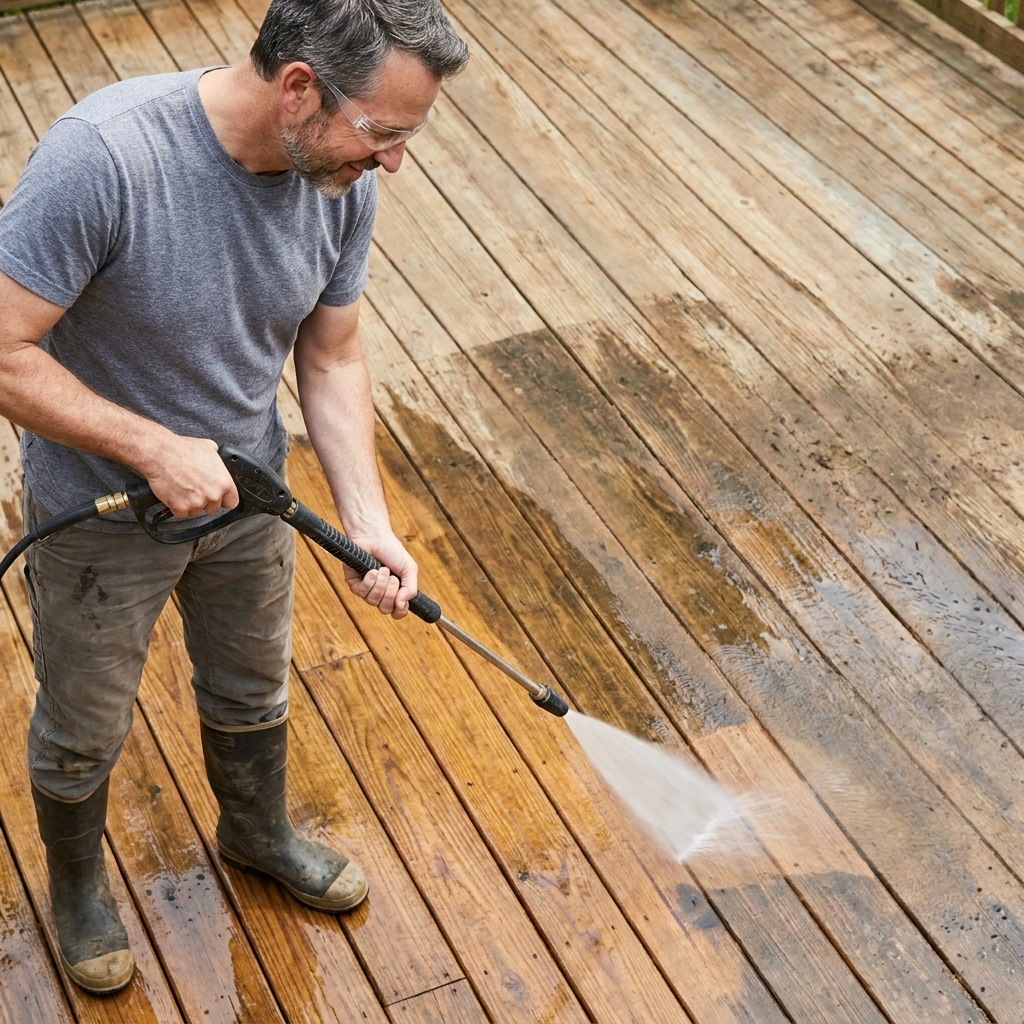
If you use a pressure washer, start gentle
- Tip: A 40-degree fan tip is the safest place to start. Avoid zero-degree tips.
- Pressure: Start low and increase only as needed. Different woods (and even different boards) react differently, and the machine rating is not what actually hits the wood. If your stain or deck cleaner manufacturer gives guidance, use that.
- Distance: Start 12 to 18 inches away, then adjust. If you see fuzzy wood fibers lifting, you are too close or using too much pressure.
- Technique: Sweep with the grain, keep the wand moving, and overlap passes. Never pause in one spot.
The goal is clean wood, not scalloped wood. If the washer leaves “tiger stripes,” that is your sign to back off and rely more on chemistry and scrubbing.
Step 3: Let it dry
This is where most deck jobs go sideways. Stain needs dry wood to soak in properly. If you trap moisture, the finish can turn blotchy, peel early, or grow mildew underneath.
Dry time guidelines
- After cleaning: Give it at least 48 hours of good drying weather. Cooler temps, shade, or humid air can push this to 72 hours or more.
- After rain: Wait until the deck has had time to dry fully. One sunny afternoon is rarely enough.
The best way to check dryness
If you want to be precise, use an inexpensive moisture meter. Follow your stain manufacturer’s spec. Many call for roughly 12 percent moisture content or lower, and some allow a little higher. If you do not have a meter, do a simple water test on a sanded or well-cleaned spot: sprinkle a little water on a board. If it quickly darkens and soaks in, the surface is generally absorbent. If it sits on top for a while, that can mean leftover coating, tight grain, or wood that is still holding moisture. Treat it as a clue, not a verdict.
Step 4: Sand for smoothness and absorption
Sanding is not just about looking nice. It opens the pores, removes raised grain from washing, and evens out leftover stain so your new coat looks consistent.
Which grit should you use?
- Start with 60 or 80 grit if you have rough boards, stubborn stain remnants, or raised fibers.
- Finish with 80 or 100 grit for a smooth surface that still accepts stain.
Avoid polishing the deck with very fine grits (like 150 and up). It can burnish the wood and reduce stain penetration, which shortens lifespan.
My sanding order
- Main field boards: Use a deck sander or floor buffer with sanding screens, moving with the grain and keeping it flat.
- Edges and perimeter: Random orbit sander.
- Stairs: Random orbit for treads, hand sand for tight corners.
- Railings: Usually a random orbit plus hand sanding. If railings are heavily weathered, consider replacing balusters instead of trying to resurrect splintered ones.
Buffer basics (so you do not gouge anything)
- Keep it moving. If you park a buffer in one spot, it will try to dig in.
- Let the machine do the work. Forcing it usually creates swirl marks and low spots.
- Check your screen often. When it clogs, it stops sanding and starts burnishing.
Do not forget these details
- Feather transitions where old stain remains so you do not get obvious outlines.
- Knock down splinters on board edges where feet and hands will touch.
- Vacuum thoroughly and then blow out cracks between boards. Dust left behind becomes grit in your stain.

Step 5: Pick the right stain
This is where homeowners get burned, sometimes literally, when they pick a product that looks great for one season and then starts peeling like a bad sunburn.
Transparent to solid
- Transparent: Best on newer or recently sanded wood where you want to show grain. Shorter lifespan, more maintenance.
- Semi-transparent: My default for most decks. Good balance of color and grain visibility, typically wears more gracefully.
- Semi-solid: Great when boards are mismatched or you need more hiding power but still want some grain.
- Solid: Most coverage, looks more like paint. Can peel if applied over poor prep. Best when you need to hide lots of imperfections and you are committed to future recoats.
Water-based vs oil-based
- Water-based: Easier cleanup, lower odor, often quicker dry. Many modern formulas perform well, but they can be less forgiving if applied too thick.
- Oil-based: Traditionally excellent penetration and an even look, longer dry times, more odor, mineral spirits cleanup. Availability varies by location.
Big compatibility rule: Do not assume you can apply any stain over any old stain. If you are not sure what is on your deck, sanding back to clean wood makes compatibility much less of a guessing game.
Paint, stain, sealer: If the deck is painted or has a thick film coating, this whole job turns into removal first, pretty second. If it is a penetrating stain (most semi-transparent deck stains), you can usually refinish with cleaning, sanding, and a compatible recoat. If it is a clear sealer, you still need to remove or heavily abrade it so stain can actually absorb.
New replacement boards: If you swapped in fresh pressure-treated lumber, do not rush it. New PT boards can be too wet to stain well. Let them dry and season, and use a moisture meter if you can. When the boards are in the range your stain manufacturer allows, then coat them. Yes, it is annoying. It is also how you avoid blotchy color and early peeling.
Step 6: Apply stain the smart way
Staining is straightforward, but small technique tweaks make the difference between “Wow” and “Why is it blotchy?”
Pick your weather window
- Temperature: Follow your stain label. In general, mild temps are your friend.
- Sun: Avoid staining in hot, direct sun if you can. It can flash-dry the surface before it penetrates.
- Rain: Give yourself a dry window long enough for the product to cure. “Dry to the touch” is not the same as cured.
- Wind and pollen: If your neighborhood is currently donating pollen to every flat surface, wait if possible.
My application method
- Stir, do not shake the stain. Shaking adds bubbles. Bubbles become texture.
- Cut in first with a brush along rail posts, edges, and tight spots.
- Work in small sections of 2 to 3 boards at a time.
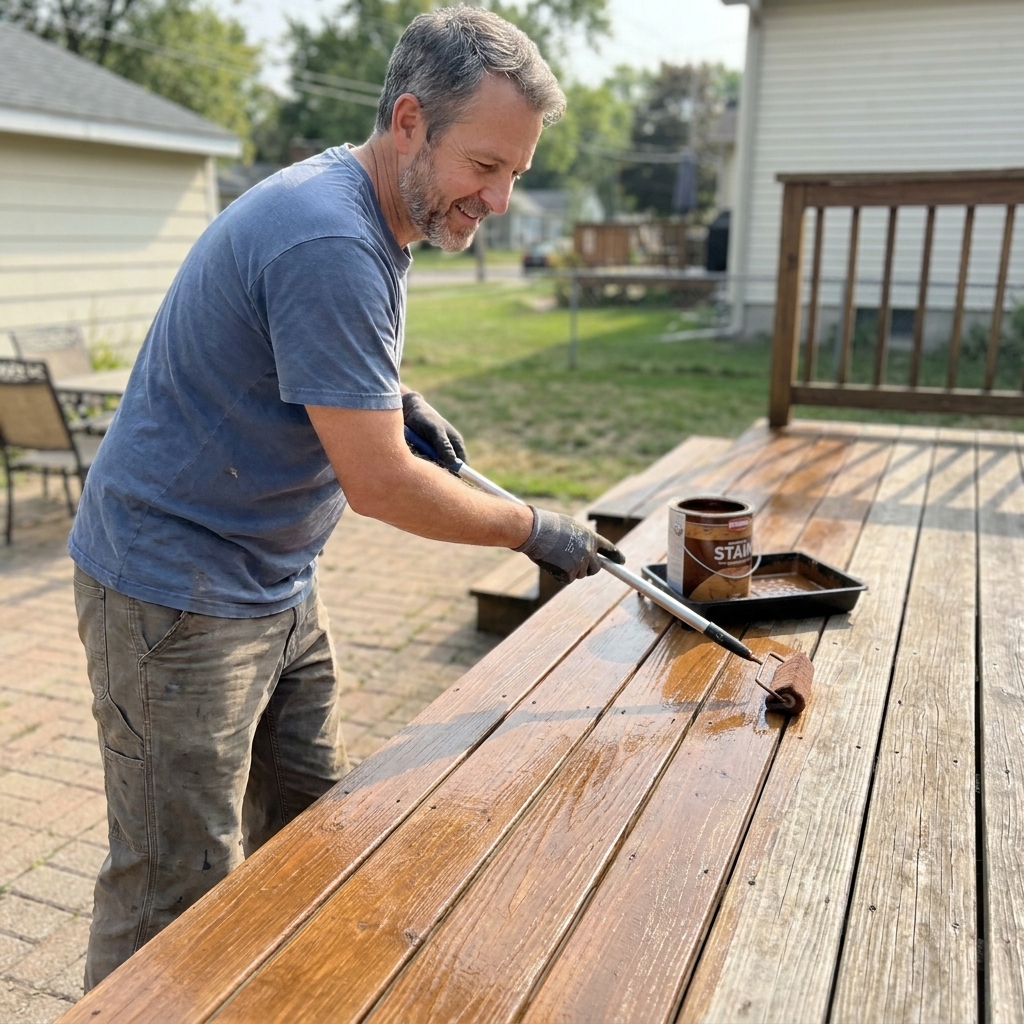
- Apply with a stain pad (or roller) and then back-brush to push stain into the grain and even out lap marks.
- Maintain a wet edge so you do not get overlap lines.
- Finish full board lengths whenever possible. Stopping mid-board is a recipe for a visible seam.
If your stain is designed to be one coat, do not get tempted to “make it last longer” by slapping on a second heavy coat. Too much product can lead to tackiness and premature failure. If the label allows two coats, apply them exactly as directed with the right timing.
Note on railings: Railings and spindles do not take the same beating as horizontal decking, but they show runs and lap marks more easily. Work top to bottom, wipe drips as you go, and do not expect the exact same wear pattern as the deck floor.
How much stain do you need?
Coverage varies by product and how thirsty your wood is, so check the can. As a rough planning number, many penetrating deck stains land somewhere around 150 to 300 square feet per gallon on decking, while thicker semi-solids and solids can be lower. Buy a little extra so you can keep the color consistent, especially if you are staining railings too.
Step 7: Cure time
This is the part where you pretend you do not own patio furniture for a few days.
- Light foot traffic: Follow the label, but often 24 to 48 hours is typical.
- Furniture and rugs: Wait longer. Rugs can trap moisture and imprint the finish. I like to give it several days if weather allows.
- Planters: Put them on feet or trays so water does not sit under them.
If it rains unexpectedly before the stain has had enough time, do not panic. Let it dry and see how it looks. Some finishes recover just fine. Others may need light sanding and touch-up in spots.
Common mistakes
- Using too much pressure when washing: If you “fuzz” the wood, you will be sanding more than you wanted. Start gentle, keep moving, and let chemistry do its job.
- Skipping dry time: Staining damp wood is the fastest way to a finish that fails early.
- Sanding too fine: Super smooth is not always better. You want absorption, not a polished tabletop.
- Overapplying stain: More is not better. Apply evenly, back-brush, and follow the label.
- Staining in harsh sun: Flash drying causes lap marks. Work in shade when possible.
- Not testing color: Always test in an inconspicuous area or on a scrap board. Deck stain can look very different once it hits your wood.
FAQ
Do I have to sand before staining?
If the deck is rough, splintery, or blotchy with remaining stain, sanding is the best path to an even finish. If the deck is in good shape and you are doing a maintenance coat over a compatible stain, you may be able to clean well and recoat without full sanding. When in doubt, sand high-traffic areas at minimum.
Can I stain the same day after pressure washing?
Almost never. The surface might look dry, but the wood fibers hold moisture. Wait at least 48 hours of good drying weather, longer if it is humid or shaded. A moisture meter takes the guesswork out.
Should I stain railings and spindles too?
If they are the same wood and finish as the deck, yes, it usually looks best as a full set. Just know railings take time. If your weekend is limited, prioritize the deck floor first and do railings as a second phase.
What if my deck was painted?
If it is paint (not solid-color stain), switching to stain typically means stripping or sanding back to bare wood, which can be a bigger job than most people expect. If paint is failing badly, sometimes the most durable route is to repaint with a quality porch and floor coating after proper prep.
Simple maintenance plan
Once your deck looks good, keep it that way with small habits:
- Sweep regularly so leaves and dirt do not hold moisture against the boards.
- Rinse pollen and grime off occasionally.
- Do a quick yearly inspection for popped fasteners and soft spots.
- Plan on a light clean and maintenance coat when water stops beading and the finish starts looking dry in high-traffic lanes.
Take it from a guy who has refinished the same deck more than once because he got impatient with dry time: slow down, prep well, and your stain will reward you with years of backyard peace.