A step-by-step, weekend-friendly guide to measuring, calculating spacing, and installing a board and batten feature wall, plus corner tips, safety notes, cau...
home improvement and DIY
Patching Large Drywall Holes

Marcus Hayes
Marcus Hayes is a lifelong DIY enthusiast and former residential carpenter who has spent the last decade renovating his 1970s fixer-upper. Through Tinksmith, he shares his hands-on experience to help fellow homeowners tackle repairs, choose the right tools, and build spaces they love without breaking the bank.
Published October 17, 2026
Updated October 17, 2026
If you have ever stared at a drywall hole big enough to wave at the neighbors through, you are in good company. Large holes look intimidating, but the fix is mostly about giving the patch something solid to grab, then building up thin layers of mud until the wall forgets anything ever happened.
This guide covers the two best homeowner methods for large drywall holes: a backing-board patch (my go-to for most big holes) and a drywall insert (great when you want maximum strength). I will also show you how to use mesh tape and joint compound in a way that avoids the dreaded “mounded square” that telegraphs through paint forever.
What counts as a large drywall hole?
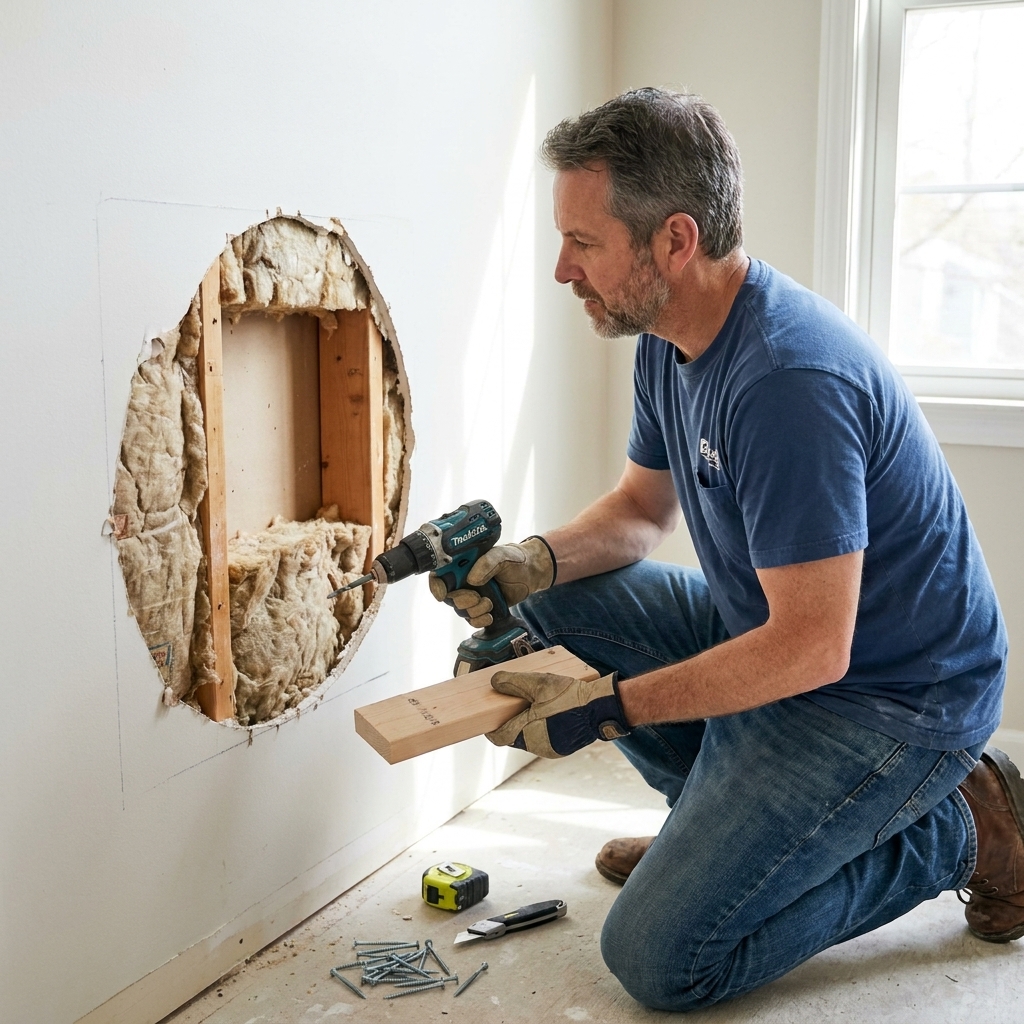
Drywall repairs are often sorted by size. Consider this a rule of thumb, not a universal law:
- Small: nail holes and tiny dings. Spackle and done.
- Medium: up to about 6 inches. Patch kits can work.
- Large: bigger than about 6 inches, or any hole where the drywall around it is cracked, crumbly, or missing support.
Once the hole is large, you typically need backing behind the drywall so the patch cannot flex. Flex is the enemy. Flex creates cracks. Cracks create weekend projects you did not schedule.
Tools and materials
You can do a professional-looking repair without buying half the drywall aisle. Here is a sensible kit.
Materials
- Drywall piece matching thickness (interior walls are typically 1/2 inch; many ceilings are commonly 5/8 inch, but older homes may vary)
- Backing boards (1x2, 1x3, or scrap plywood strips work great)
- Drywall screws (commonly 1-1/4 inch for 1/2 inch drywall; commonly 1-5/8 inch for 5/8 inch drywall). The goal is solid holding power, ideally around 1 inch of bite into wood.
- Mesh tape (self-adhesive fiberglass) for flat seams
- Paper tape (optional, but excellent for strength and crack resistance)
- Joint compound
- Setting-type compound (powder you mix, like 20/45/90 minute) for filling and first coats
- All-purpose or lightweight compound for final coats and easier sanding
- Primer (PVA drywall primer is the budget-friendly, reliable choice). For torn drywall paper, a sealing primer like shellac-based or oil-based spot primer can save your sanity.
Tools
- Utility knife with sharp blades
- Drywall jab saw or oscillating multi-tool
- Drill or impact driver
- 6 inch and 10 or 12 inch taping knives
- Mixing knife or mud pan
- Sanding sponge (medium and fine) or pole sander
- Shop vacuum or dust brush
- Flashlight or work light (side lighting is a cheat code)
Budget tip: If you only buy one nice drywall tool, make it a 10 or 12 inch taping knife. Wider knives help you feather edges so the repair disappears.
Safety checks
Before you start cutting anything bigger, do a quick reality check:
- Turn off power to the room if the hole is near outlets, switches, or you suspect wires. Better safe than learning a lesson the hard way.
- Look and feel inside the cavity with a flashlight. Check for wires, plumbing, ducting, or insulation.
- Wear eye protection. Drywall dust has a special talent for aiming straight at eyeballs.
- Mind the dust. Close doors, cover returns, and keep a vacuum handy.
Backing-board patch
This method works when the surrounding drywall is mostly intact, but you have a hole too big for a patch kit. Backing boards give you something to screw the new piece into, so the patch becomes part of the wall, not a sticker on top of it.
Step 1: Square up the hole
Irregular holes are hard to patch cleanly. Use a utility knife and a drywall saw or oscillating tool to cut a neat square or rectangle. Cut back until you hit solid drywall with no crumbling edges.
Quick prep that prevents bubbles: If you have torn drywall paper around the opening, trim loose fuzz with a sharp knife. If the brown paper face is exposed or frayed, spot-prime that area with a sealing primer and let it dry before you mud. Mud over torn paper can blister and lift.
Pro move: If you can, center the opening so you have room to feather mud around it. A patch right against a door casing or inside corner is doable, just fussier.

Step 2: Add backing boards
Cut two pieces of 1x2 or similar so they are about 4 to 6 inches longer than the opening is wide. Slip them into the hole and hold them tight to the back side of the existing drywall, oriented like hidden vertical rails behind the left and right edges of the opening.
- Start by driving one screw through the drywall into the board to “catch” it, then add the second screw. This makes the board much easier to control.
- For a wider patch, add a third board in the middle.
Screw through the existing drywall into each backing board using two screws per side. Keep screw heads slightly dimpled, not tearing paper.
Step 3: Cut and fasten the drywall patch
Cut a drywall piece to fit the opening. Aim for a snug fit, but do not force it so hard that it breaks the surrounding edges.
Set the patch in place and screw it to the backing boards. Place screws about every 6 to 8 inches on each backing board line, and keep screws roughly 3/8 inch in from edges to avoid breaking the gypsum core.
If you have a wide gap: It is better to pre-fill gaps with setting-type compound than to try to bridge a canyon with one coat. Thin, supported fills shrink less and crack less.
Step 4: Tape the seams
You will see a seam all the way around the patch. That seam needs reinforcement.
- Mesh tape: Stick it over the seam, centered so it overlaps both sides evenly. Mesh is fast, but it performs best when your first coat is setting-type compound.
- Paper tape: Spread a thin bed of compound over the seam, press the tape into the wet mud, then wipe gently with your knife to squeeze out excess while leaving enough compound behind it to bond.
My rule: For walls, mesh can work well when paired with setting-type compound and solid backing. For ceilings, corners, or patches that might move, paper is worth the extra minute.
Drywall insert method
If the hole is very large, or the drywall edges are beat up, you can patch like a mini new-install: a drywall insert that spans to framing.
When to choose it
- The hole is wide enough to reach a stud on at least one side.
- You want extra rigidity, like behind a door knob impact area.
- The surrounding drywall is cracked beyond the immediate hole.
How it works
Expand the cutout so the edges land on framing, then screw a new drywall piece directly to the framing. The key detail is this: cut to the center of the studs, not the inner edge. That way the existing drywall keeps half the stud, and your new patch gets the other half, so both have something solid to screw into.
This is essentially new drywall work, just on a small scale. Tape and mud the seams the same way.
Joint compound strategy
Most “I can still see the patch” problems come down to one thing: the mud was not feathered out wide enough. The fix is not more sanding. The fix is better layering.
Pick the right mud
- Setting-type compound (20/45/90): hardens by chemical reaction, shrinks less, and is great for the first coats over mesh tape and for filling gaps. Harder to sand, so apply neatly.
- All-purpose: good bonding and versatile, decent for taping.
- Lightweight topping: easiest sanding, great for the final skim coats.
Coat 1: Embed tape and fill
Apply a thin layer over the seam using a 6 inch knife.
- If you used mesh: Press firmly enough to force compound through the mesh and flatten it, but do not scrape it dry.
- If you used paper: Bed it into a thin, wet layer, then wipe excess so the tape lays tight with compound behind it.
If there are any gaps between patch and wall, fill them now with setting-type compound.
Coat 2: Widen the repair
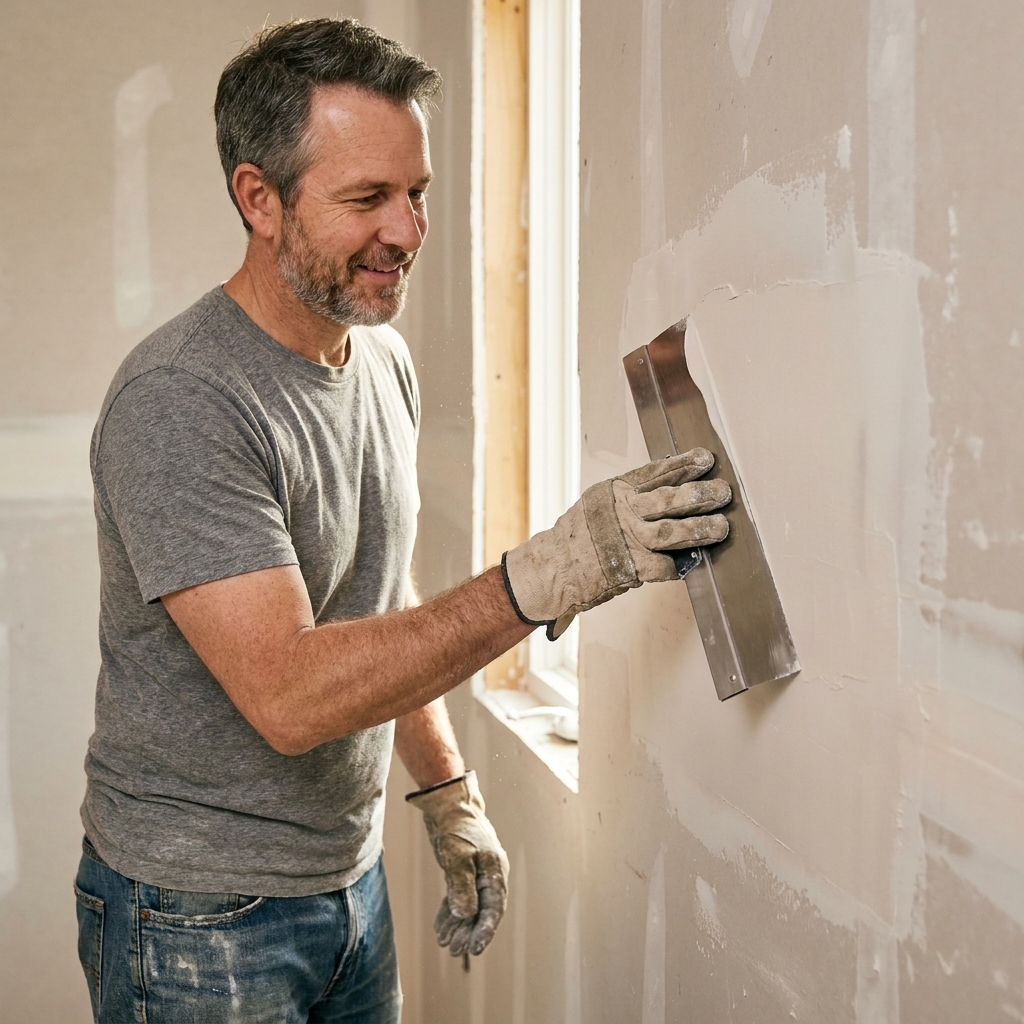
Once coat 1 is dry or set, apply a wider coat using a 10 or 12 inch knife. Your goal is to start creating a gentle ramp from wall to seam, not a speed bump.
Feather the outside edges by holding the knife slightly tighter on the outer edge than the inner edge. You are basically convincing the mud to taper out instead of piling up.
Coat 3: Final skim
Apply a thin finishing coat even wider than coat 2. For large patches, do not be shy about going 12 to 18 inches beyond the seam on all sides if you have the wall space. Paint reflects light. Light reveals sins.
Dry time reality check
Drying depends on humidity, temperature, and how thick you applied mud. Thin coats dry faster and sand easier.
- Premixed compound: If you can still see darker gray areas, it is usually not dry yet.
- Setting-type compound: It can be ready to recoat once it is hard, even if it has not fully “dried” in the color-change sense. Follow the bag time and do the fingernail test. If it dents easily, give it more time.
Sanding
Sanding is where good patches become great, or where great patches become “why is there a crater?”
My sanding rules
- Sand between coats just to knock off ridges and tool lines, not to reshape everything.
- Use a sanding sponge for control, especially near edges.
- Keep it flat. Let the sanding surface ride the wall. Do not dig into the center of the patch.
- Use side lighting. Shine a flashlight along the wall. Imperfections pop immediately.
Quick test: Close your eyes and run your hand lightly over the repair. Your fingertips find what your eyes miss.
Texture matching
If your wall is textured, a perfectly flat patch can still stand out. Matching texture is its own mini-project, but it is manageable.
Common textures and approaches
- Orange peel: Use a spray texture can. Practice on cardboard, then mist the patch lightly. Build up slowly.
- Knockdown: Spray texture, let it set slightly, then lightly drag a knockdown knife to flatten peaks.
- Hand troweled: Use a taping knife and small amounts of mud to mimic the existing pattern.
Always extend texture slightly beyond the patch area so it blends. Then prime before paint.
Priming and painting
Fresh joint compound is porous. Paint hits it differently than painted drywall. If you skip primer, you often get flashing, which is a shiny dull mismatch that appears when light hits the wall at an angle.
Do this instead
- Dust off the wall after sanding.
- Prime the patched area with PVA drywall primer (or a quality stain-blocking primer if the wall had water stains). If you sealed torn paper earlier with shellac or oil primer, you can still prime the whole patch area after mudding for uniform sheen.
- Paint using the same sheen as the rest of the wall. Sheen differences shout louder than color differences.
Blending tip: If you cannot repaint the whole wall, feather your topcoat outward from the patch and keep a wet edge. But if the paint is old or sun-faded, the only perfect match is often repainting the full wall corner to corner.
Troubleshooting
The patch cracks later
- Cause: Movement, not enough backing, or mesh tape with air gaps underneath.
- Fix: Cut out loose material, add backing if needed, retape (paper is great here), and use setting-type compound for the first coat.
I can see a square outline after painting
- Cause: Mud was not feathered wide enough, primer was skipped, or texture does not match.
- Fix: Skim a wider area, sand lightly, prime, repaint.
The patch feels soft or bouncy
- Cause: Not enough screws or no solid backing.
- Fix: Add backing boards or rework as a drywall insert that lands on studs.
Raised tape edges or bubbles
- Cause: Tape not embedded properly, too-dry coat, or a dusty or torn-paper surface.
- Fix: Cut out bubbles, recoat with fresh compound. For paper tape, embed into a thin wet bed and press firmly. If torn paper is the culprit, seal it, let it dry, then recoat.
How long does it take?
Working time is usually fast. Waiting time is what tests your character.
- Cutting and backing: 30 to 60 minutes
- Hanging the patch: 15 to 30 minutes
- Mud coats: 3 coats, 10 to 20 minutes each (plus set or drying time)
- Sanding and touch-ups: 20 to 45 minutes
- Prime and paint: 1 to 2 hours active time
If you use setting-type compound for early coats, you can often finish faster. If you use premixed compound for everything, plan on spreading the work across a couple days so each coat dries properly.
When to call a pro
I am all for DIY, but a few situations deserve backup:
- The hole is from water damage and the source is not fixed.
- You suspect electrical or plumbing damage in the wall.
- The wall has asbestos risk (some older textures and joint compounds can be suspect). If your home is older and you are unsure, test before sanding, and follow local rules for testing and disposal.
- You need a perfect texture match across a large, highly visible wall and you are on a deadline.
Quick checklist
- Cut a clean square opening
- Trim loose paper and seal torn areas if needed
- Add solid backing (or land on studs and cut to stud centers)
- Screw the patch tight, dimple heads slightly
- Tape the seam (mesh is easy, paper is strong)
- Use thin coats of compound and feather wide
- Sand lightly with side lighting
- Match texture if needed
- Prime before paint
Do those steps, and your wall will go right back to doing its main job: existing quietly in the background while your family finds new ways to test its durability.