From skipping subfloor prep to botching project order, these common DIY renovation mistakes can get expensive fast. Here’s how to avoid them and build it r...
home improvement and DIY
Installing Luxury Vinyl Plank in a Basement

Marcus Hayes
Marcus Hayes is a lifelong DIY enthusiast and former residential carpenter who has spent the last decade renovating his 1970s fixer-upper. Through Tinksmith, he shares his hands-on experience to help fellow homeowners tackle repairs, choose the right tools, and build spaces they love without breaking the bank.
Published October 17, 2026
Updated October 17, 2026
Basement floors have a way of humbling confident DIYers. You think, “It’s just a big flat slab,” and the slab replies, “Cute.” Moisture, dips, old adhesive, and mystery cracks all show up to the party.
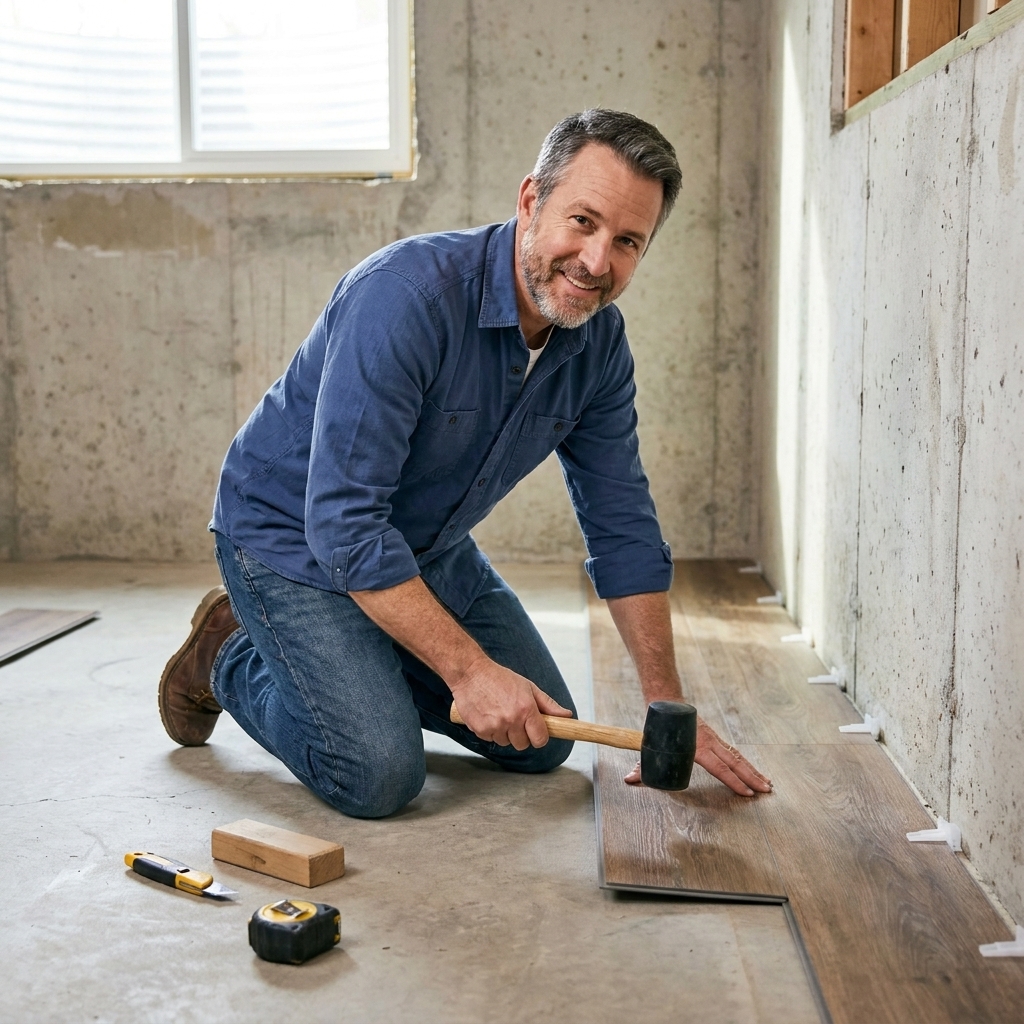
The good news: luxury vinyl plank (LVP) is one of the most basement-friendly floors you can install yourself. It’s dimensionally stable, comfortable underfoot, and more forgiving than tile or hardwood. This guide walks you through concrete prep, moisture management, and a clean LVP install, step by step.
Before you start: confirm it’s a good fit
LVP can handle basement life, but it cannot fix an active water problem. Do these quick checks first:
- Bulk water: If you ever get puddles from seepage, flooring is not the first step. Address grading, gutters, downspouts, and drainage.
- Humidity: Basements often need a dehumidifier. Many people find 30% to 50% comfortable, but the big goal is to keep it under about 60% to reduce mold risk. (What “feels right” varies by season and climate.)
- Concrete condition: Minor cracks are normal. Significant heaving, crumbling, or ongoing movement needs evaluation.
Also, read the LVP manufacturer’s installation guide. It will specify moisture limits, acceptable flatness, temperature requirements, and whether an underlayment or vapor barrier is required. In basement work, those instructions are not “suggestions,” they’re your warranty.
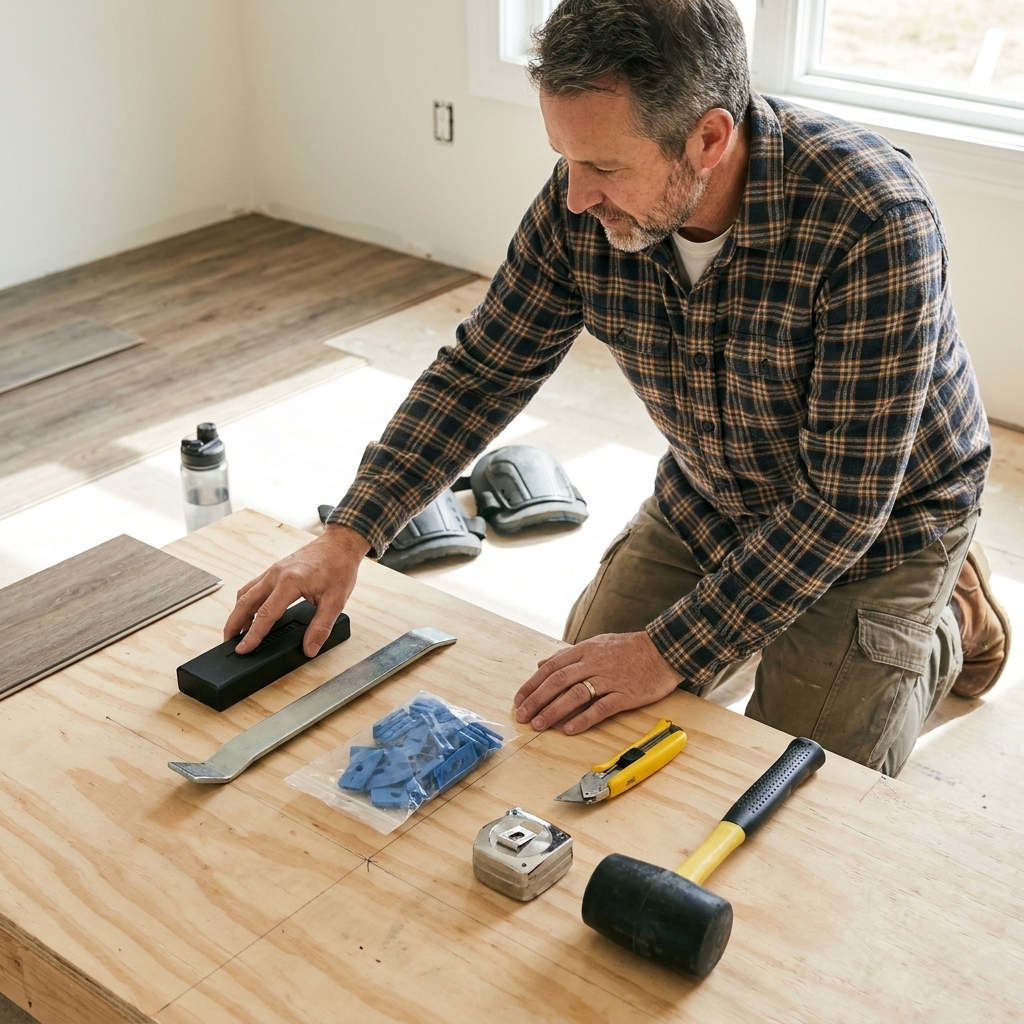
Tools and materials
Tools
- Tape measure, pencil, chalk line
- Utility knife with extra blades (or LVP cutter)
- Speed square or carpenter’s square
- Oscillating multi-tool (great for door jamb undercuts)
- Rubber mallet and tapping block (approved for your flooring)
- Pull bar (for the last row and tight spots)
- Spacers for expansion gap
- 4 to 6 foot straightedge or level (for flatness checks)
- Shop vac and broom
- Safety glasses, knee pads, hearing protection
Materials
- LVP planks (add 10% for waste, or 15% for angled layouts)
- Vapor barrier or underlayment as required (often 6 mil poly, or an attached-pad product)
- Concrete patch or self-leveling underlayment (as needed)
- Concrete primer (if required for self-leveler)
- Transition strips (doorways) and matching moldings (shoe, quarter-round, etc.)
- Appropriate adhesive only if the transition or trim calls for it
Step 1: Acclimate and clear the room
Most modern LVP does not need days of acclimation like hardwood, but you still want it in the basement and at normal living conditions before installing. Follow your product directions. As a common DIY rule of thumb, bring the boxes down and let them sit 24 to 48 hours with your HVAC and dehumidifier running like they normally will.
Also pay attention to temperature. Many products want the room and subfloor in a typical living range (often roughly 65°F to 85°F, but your flooring may differ) during installation and for a period after. This matters for how the floor expands and how the locking system behaves.
Clear the floor completely. Remove existing baseboards if you can. It’s cleaner than trying to undercut everything perfectly, and you get a better finished look.
Step 2: Test and manage moisture
Concrete is porous, and basements are naturally moisture-prone. LVP itself is water-resistant, but moisture can still cause problems like mold under the floor, mineral deposits, or failure of underlayment tapes and some adhesives.
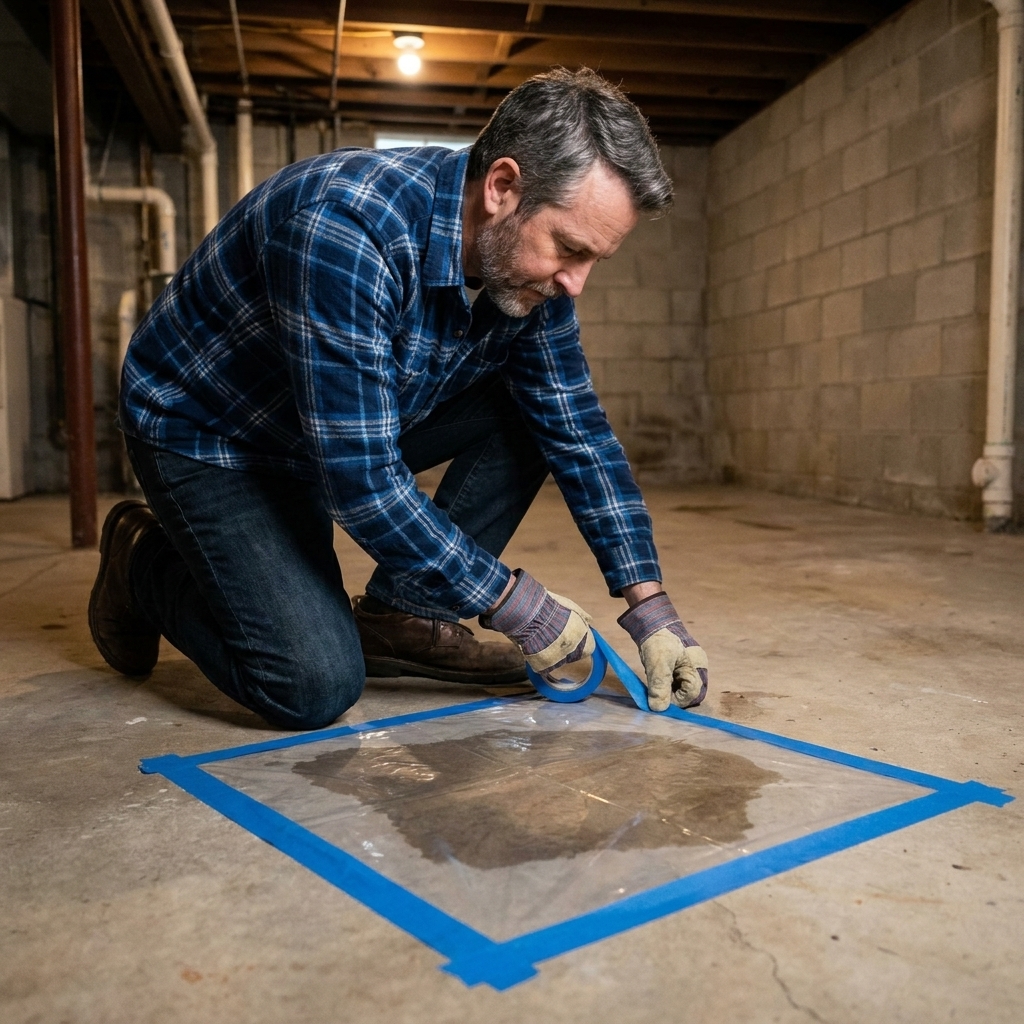
Quick screening only: taped plastic squares
- Cut a few squares of plastic sheeting (about 2 feet by 2 feet).
- Tape all four edges tightly to the concrete in a few different areas (near an exterior wall, near a drain, center of room).
- Leave for 24 to 48 hours.
- If you see condensation under the plastic or darkened concrete, you have moisture vapor moving through the slab.
This is a screening test, not a pass or fail for warranty. It can miss problems or make harmless moisture look scary. But it’s still a useful early warning in basements.
If you find moisture
- Run a dehumidifier and address obvious exterior water issues.
- Use the vapor control method your LVP requires. Many floating LVP installs over concrete call for a vapor barrier (commonly 6 mil polyethylene) unless the plank has specific attached-pad instructions that say otherwise.
- Know what your warranty requires. If the manufacturer calls for a quantitative test, it usually means ASTM F2170 (in-slab relative humidity) or ASTM F1869 (calcium chloride). Do it or hire it out. It’s cheaper than redoing a whole floor.
- If readings exceed limits: Stop and switch plans. Use a manufacturer-approved moisture mitigation system (often an epoxy or urethane barrier), change products, or choose a different flooring type. Do not improvise layers and hope for the best.
Important: Never trap a wet slab under non-approved layers. Use only the barrier or system the flooring manufacturer allows.
Step 3: Prep the concrete
If I could tattoo one sentence on every DIYer’s tool belt it would be this: flooring only looks as good as the floor under it.
Clean hard
- Sweep and vacuum thoroughly.
- Scrape off paint drips, drywall mud, or old adhesive ridges.
- Degrease any oily spots. (Garages converted to basements, old shop areas, and utility rooms can be sneaky.)
One more basement reality: sealers, curing compounds, and old cutback adhesive can interfere with patch and self-leveler bond. Follow the patch or leveler manufacturer’s prep instructions, and do a bond test if you are unsure.
Check flatness
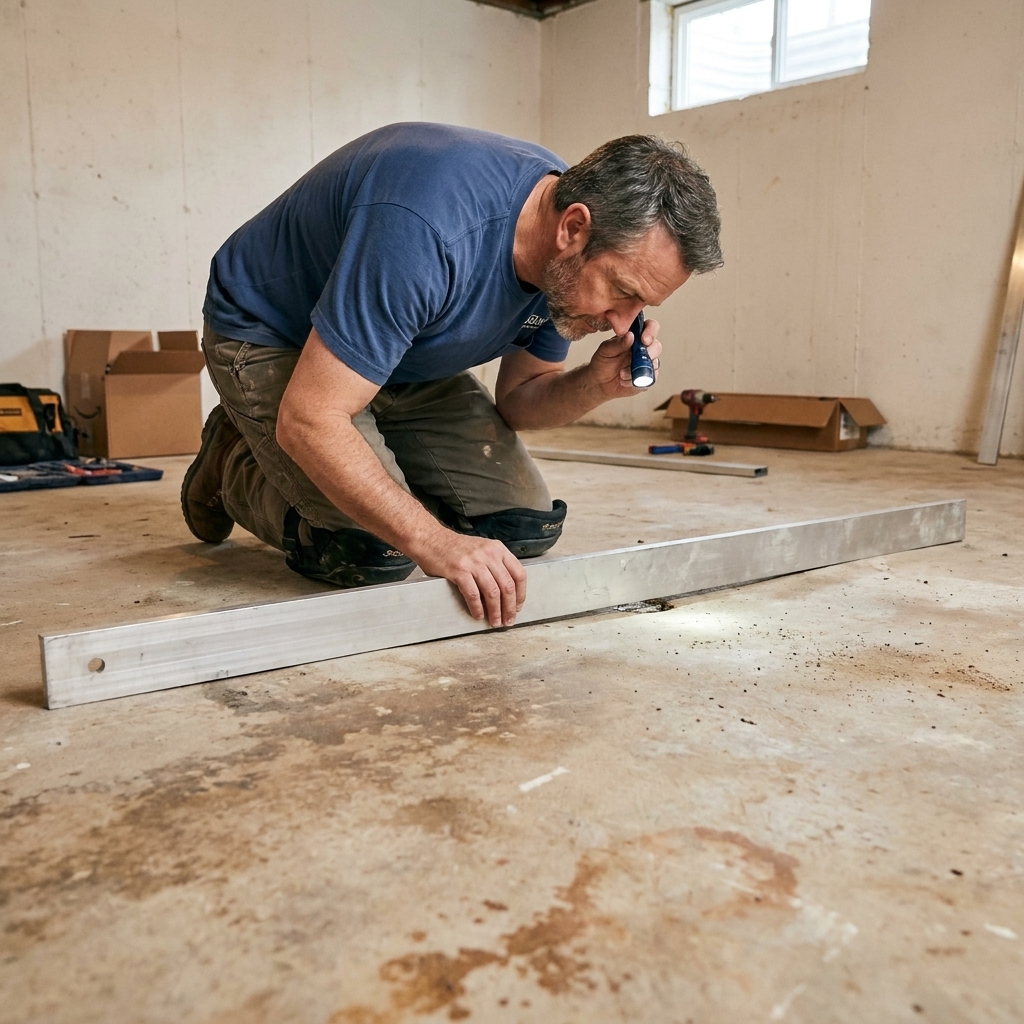
LVP does not need the slab to be perfectly level, but it does need it to be flat. A common manufacturer spec is something like no more than 3/16 inch variation over 10 feet (or 1/8 inch over 6 feet). Confirm your product’s spec and use the stricter number if you see multiple requirements.
- Lay a long straightedge on the slab.
- Mark high spots and low spots.
- Pay extra attention to control joints and old patch areas.
Fix dips and high spots
- High spots: Grind them down with a concrete grinder or cup wheel (use proper dust control and a respirator).
- Low spots: Fill with a cementitious patch or use a self-leveling underlayment for larger areas. Prime if the product requires it.
Let patches cure fully. Rushing this step is how you end up with soft spots and separating seams later.
Cracks and control joints
- Hairline shrinkage cracks: Usually fine after flattening and cleaning.
- Wider cracks: Use an appropriate concrete crack filler or patch product. Your goal is flatness, not structural repair.
- Control joints: Don’t fill them with rigid patch unless your leveling product says it’s OK. Many slabs are meant to move at those joints. Your LVP is floating, so it can bridge minor movement, but keep everything flat and follow manufacturer guidance.
Step 4: Plan the layout
A little planning keeps you from finishing with a 1-inch sliver of plank along one wall, which screams “I eyeballed it.”
Pick a direction
- Many people run planks parallel to the longest wall or toward the main light source for a natural look.
- In long basement hallways, running lengthwise can make the space feel even longer.
- If you have a walkout basement with big windows, consider running planks toward the view.
Measure and avoid skinny last rows
- Measure the room width (perpendicular to plank direction).
- Divide by the plank width to see what your last row will be.
- If the last row is going to be too narrow (often under 2 inches is the “ugh” zone), rip the first row narrower so both sides look balanced.
Watch maximum run limits
Many click-lock floors have a maximum length or width you can run in one continuous floating section (and sometimes require breaks at certain doorways). Check your flooring instructions for maximum run limits and required transitions or expansion breaks.
Stagger the seams
Use the manufacturer’s minimum end-joint stagger (commonly 6 inches to 8 inches or more). Mix planks from multiple boxes so the pattern looks natural.
Step 5: Install vapor barrier or underlayment
On concrete slabs, many floating LVP installs call for a vapor barrier. Some planks have an attached pad and still require vapor protection on concrete. Others specifically say “no additional underlayment.” Read your box and install sheet.
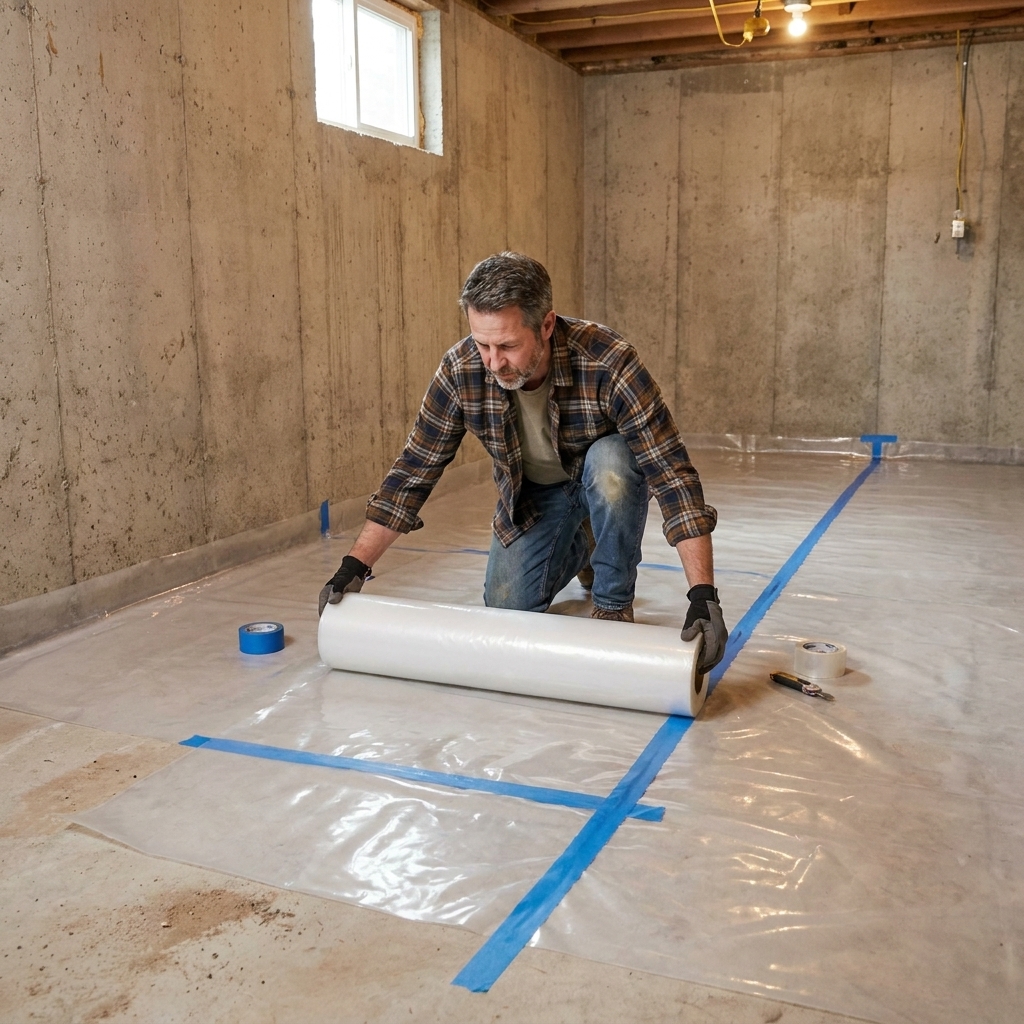
Typical 6 mil poly basics
- Roll it out flat over the slab.
- Overlap seams per instructions (often 6 to 8 inches).
- Tape seams with an appropriate tape.
- Run the plastic a couple inches up the wall. You’ll trim it later behind baseboard.
Do not use a cushy foam underlayment not approved for LVP. Too much squish can stress click-lock joints and cause separation.
Step 6: Door jambs and transitions
Clean doorways are one of those little details that make a DIY install look pro.
Undercut jambs
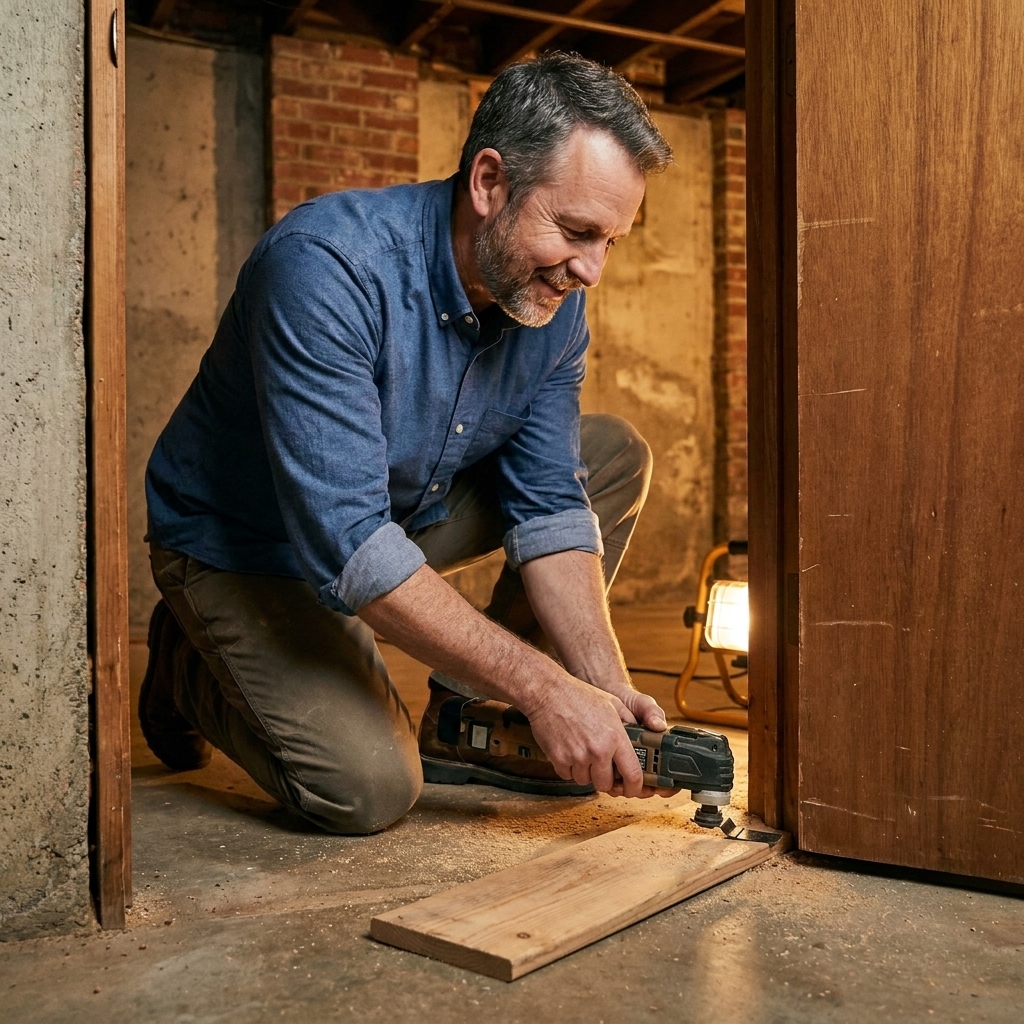
- Lay a scrap piece of LVP (and underlayment if used) next to the jamb as a height guide.
- Use an oscillating multi-tool to undercut the casing and jamb so the plank slides underneath.
- Vacuum the dust so nothing holds the plank up.
Plan transitions
Plan how you’ll meet adjacent flooring at doorways, stairs, and utility rooms. Buy the transition pieces ahead of time and confirm whether you need a track, screws, or adhesive. Basements often have odd thresholds, so this is not a “figure it out later” moment.
Step 7: Lay the first row
The first row sets the tone for the whole floor. Get it straight and the rest goes smoother.
- Snap a reference line if your walls are wavy (many basement walls are). You can run the first row off a chalk line and leave a consistent expansion gap at the wall.
- Place spacers to maintain the expansion gap recommended by your manufacturer (often 1/4 inch, sometimes more).
- Start with the tongue side or groove side per your specific locking system instructions.
- Check straightness every couple of planks. Small errors multiply fast.
If your planks require trimming the tongue off the edge that faces the wall, do it neatly with a utility knife and straightedge.
Step 8: Install the field
Click and lock
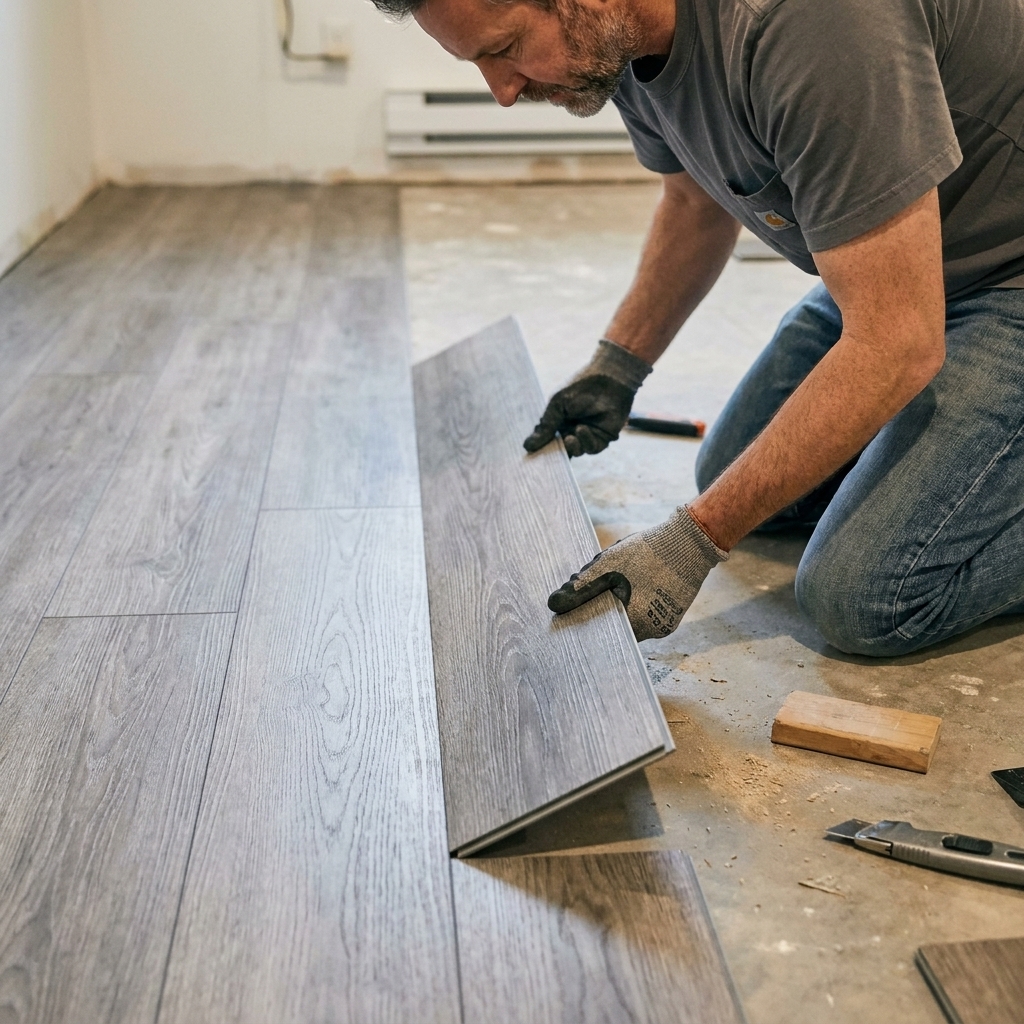
Most floating LVP uses an angle-and-click system.
- Angle the plank into the previous row’s long edge.
- Lower it to engage the lock.
- Connect end joints per the system. Some require sliding in, some require angling, some allow a light tap with a block.
Use only tools approved by the flooring manufacturer. A rubber mallet and tapping block are common, but you never want to beat on a click-lock like you’re driving a fence post.
Stagger end joints
Use offcuts from the previous row to start the next row when possible, as long as you maintain the minimum stagger. This saves material and keeps the pattern random.
Keep it clean
Vacuum grit frequently. Tiny debris under a plank can create a high spot that stresses joints and telegraphs through the floor.
Step 9: Cut planks cleanly
You’ll make a lot of cuts in a basement: around posts, at doorways, and along the last row.
Straight cuts
- Score and snap: For many LVP products, you can score the wear layer with a sharp utility knife along a straightedge, then snap the plank.
- LVP cutter: Fast and clean for repetitive cuts.
- Jigsaw or miter saw: Useful for tricky cuts, but mind the dust and use a fine-tooth blade.
Notches for posts and obstacles
Make a careful template with cardboard if needed. Leave the required expansion gap around fixed objects, then cover gaps with trim or an appropriate escutcheon.
Step 10: Install the last row
The last row is usually the fiddly one because you’re working close to the wall.
- Measure the width needed, accounting for the expansion gap.
- Rip the planks lengthwise (utility knife and snap, or saw).
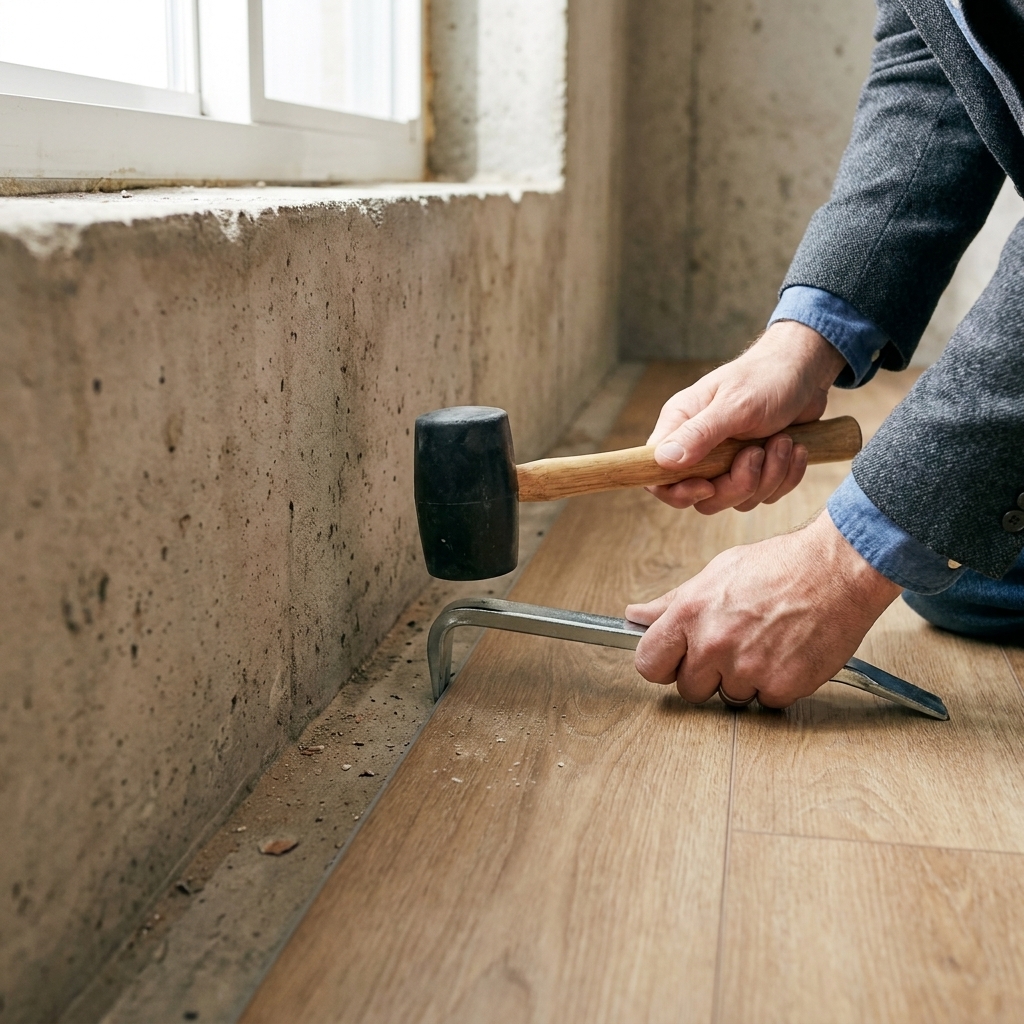
- Use a pull bar to lock the last row into place without damaging the wall.
Take your time here. This is where rushed installs earn their gaps.
Step 11: Finish edges and transitions
Trim the vapor barrier
If you ran plastic up the walls, trim it so it sits below the top of the flooring and will be hidden by baseboard.
Baseboards and shoe molding
- Baseboards should cover the expansion gap without pinning the floor down.
- If you removed baseboards, reinstall them slightly above the floor so the LVP can float.
- Shoe molding or quarter-round can help cover gaps, especially in older basements where walls are less than perfect.
Install transitions
Follow the transition manufacturer’s method. Some snap into a track fastened to the slab, others glue down. If you fasten anything through the LVP, you can restrict movement and create buckling, so keep fasteners where they belong, typically in the transition track only, not through floating planks.
Basement-specific tips
- Keep humidity steady. A stable basement environment makes floors happier.
- Leave access panels accessible. If you have a sump lid, cleanout, or shutoffs, plan for future-you.
- Mind floor drains. If your basement has one, consider how water would reach it in an emergency. Sometimes you keep that area clear or use a removable trim solution.
- Avoid pinning the floor. Heavy fixed equipment (some water heaters, furnaces, built-in islands, or anchored shelving) can restrict movement. Plan layout so the floor can float, and follow your manufacturer’s rules.
- Watch cold walls. In some climates, condensation can form near foundation walls. Vapor control and humidity control work together here.
Common mistakes to avoid
- Skipping flatness prep: Click-lock joints hate humps and dips.
- Using the wrong underlayment: Too soft equals joint failure over time.
- No expansion gap: Floors need room to move. Tight to the wall is a recipe for buckling.
- Installing over active moisture: LVP is water-resistant, not a magic spell.
- Not mixing boxes: You can end up with noticeable pattern repeats.
FAQ
Do I need a vapor barrier under LVP in a basement?
Very often, yes. Many manufacturers require a vapor barrier over concrete, even if the plank has an attached pad. The correct answer is the one in your product’s installation guide. If you are unsure, choose an LVP product with clear basement-on-concrete instructions and follow them exactly.
Can I install LVP directly on concrete?
Yes, if the concrete is clean, flat to spec, and you install the required vapor barrier or underlayment system. The slab does not need to be level, but it does need to be flat.
What thickness LVP is best for basements?
Thicker planks can feel more solid and may bridge tiny imperfections a bit better, but flatness still matters. For busy homes, I focus on a strong wear layer (commonly 12 mil to 20 mil) and a locking system with a good reputation, then make sure my subfloor prep is on point.
Should I glue down LVP in a basement?
Most DIY-friendly basement installs are floating click-lock. Glue-down can also be a solid choice in some spaces, especially for large open areas or where you want a more “planted” feel. The tradeoff is that glue-down is less forgiving and more sensitive to slab moisture and adhesive compatibility. If you go glue-down, follow the flooring and adhesive specs carefully and make sure the slab moisture meets requirements.
How soon can I walk on it and put furniture back?
Floating click-lock LVP can usually be walked on immediately. For heavy furniture, wait until trim and transitions are in, then move pieces in carefully using felt pads. If you used any adhesives (transitions, trim), follow cure times before stressing those areas.
My parting advice
If you do two things right, your basement LVP will look great for years: control moisture and prep for flatness. Everything else is clicking planks together and staying patient.
Take your time, read your flooring’s instructions like they are the rules of a board game, and you’ll end up with a basement that finally feels like real living space.