
A step-by-step DIY guide to digging the trench, laying a level gravel base, stacking interlocking blocks, adding drainage, and finishing a durable retaining ...
home improvement and DIY
DIY French Drain Installation

Marcus Hayes
Marcus Hayes is a lifelong DIY enthusiast and former residential carpenter who has spent the last decade renovating his 1970s fixer-upper. Through Tinksmith, he shares his hands-on experience to help fellow homeowners tackle repairs, choose the right tools, and build spaces they love without breaking the bank.
Published October 17, 2026
Updated October 17, 2026
If your yard turns into a squishy sponge every time it rains, you are not alone. My 1970s fixer-upper came with the classic combo meal: clay soil, questionable grading, and a low spot that collected water like it was being paid per puddle. A properly built French drain is one of the most reliable DIY fixes when the problem is groundwater saturation or runoff with a viable outlet and slope, not a structural leak.
This guide walks you through the full job, from figuring out where the water is coming from to trenching, laying perforated pipe, and backfilling so it actually drains for years. No mystery, no magic, just gravity and a little gravel.
What it does (and what it does not)
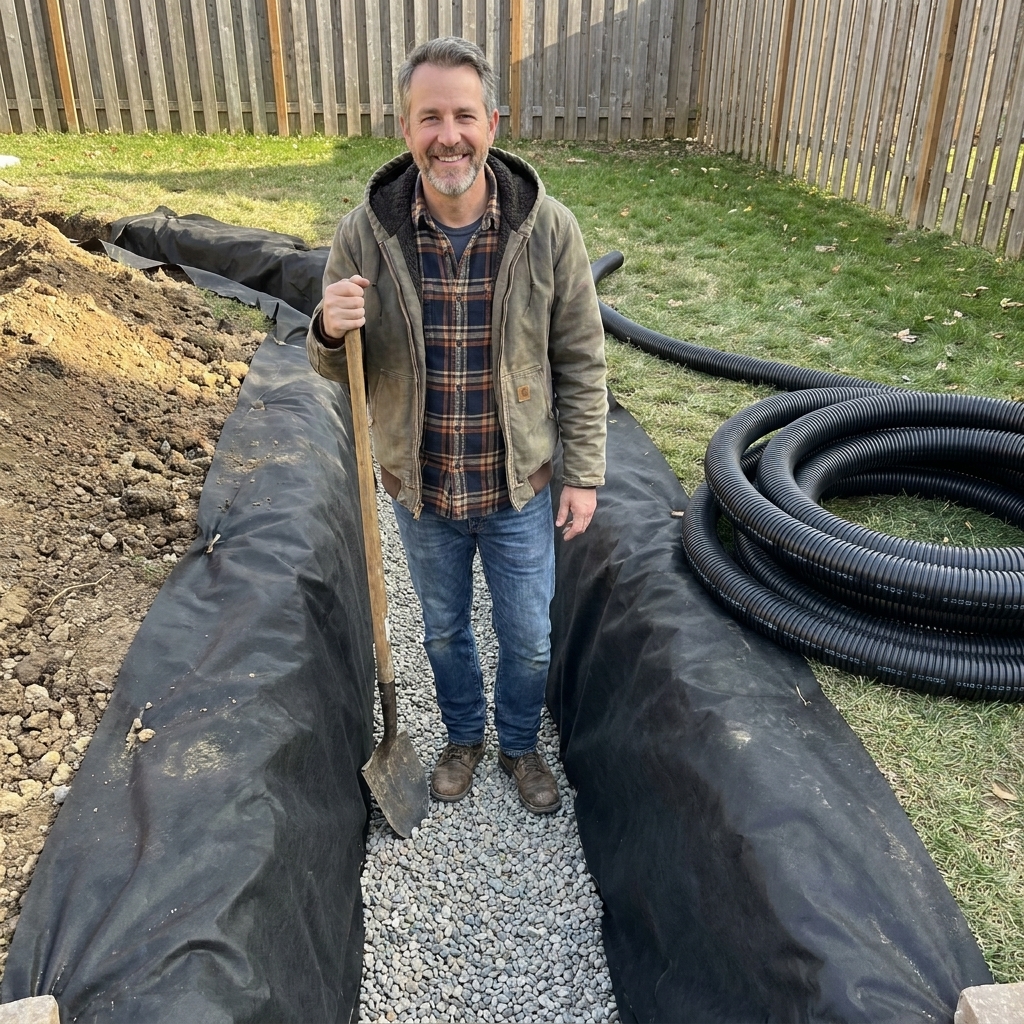
A French drain is a gravel-filled trench with a perforated pipe that collects groundwater and moves it to a better location. The pipe does not “suck up” water like a shop vac. It gives water an easier path than saturating your lawn, pushing against your foundation, or turning your mulch bed into soup.
Great for
- Low spots that stay wet days after rain
- Runoff that flows toward the house
- Water collecting along a patio, walkway, or fence line
- Downspout discharge that creates erosion or pooling
Not great for
- Fixing a basement leak caused by cracks or failed waterproofing
- Standing water caused by gutters dumping right next to the house (fix gutters first)
- Yards with nowhere legal to discharge water (you still need an outlet)
If water is entering your basement through a crack, address that directly. A French drain outside can help reduce hydrostatic pressure, but it is not a guaranteed cure for structural water intrusion.
Plan it: water and outlet
The success of a French drain is 80 percent planning and 20 percent sweating. You need two things: a collection path where water wants to gather, and a discharge point where you are allowed to send it.
Find the problem path
- Watch the yard during a rain. Note where water runs and where it sits.
- Look for clues. Mossy patches, muddy footprints, and dead grass can mark chronic wet zones.
- Do a simple percolation check. Dig a 12-inch-deep hole in the soggy area, fill it with water, and see how long it takes to drop. If it barely moves after a few hours, you likely have slow-draining soil and will benefit from a drain and plenty of gravel.
Pick an outlet you can actually use
A French drain has to empty somewhere. Common options:
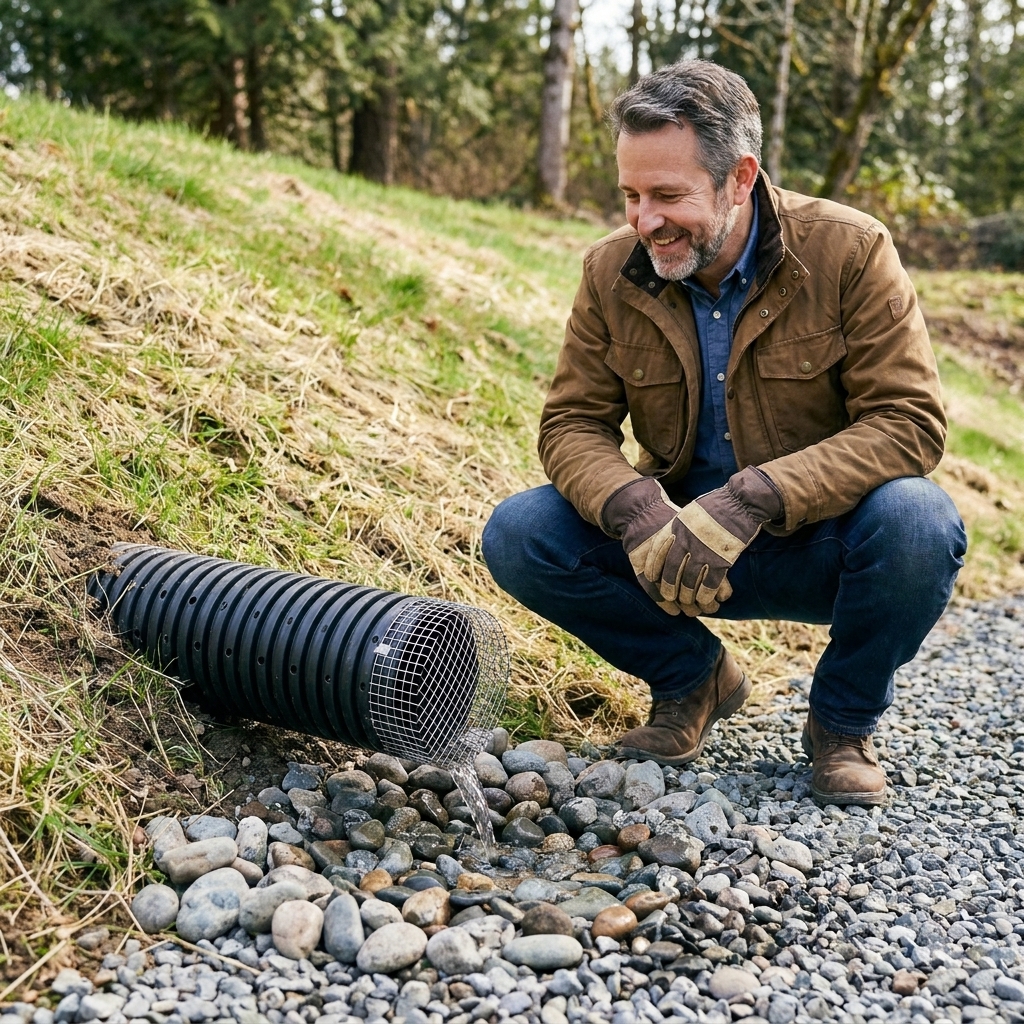
- Daylight outlet: The pipe exits at a lower point on your property (a slope, ditch, or wooded edge) and drains out into the open. This is usually the simplest and most reliable.
- Dry well: A buried pit filled with stone (or a manufactured dry well) that allows water to soak into the ground. Works best in soils that drain reasonably well.
- Tie into an approved storm system: Only where allowed and done correctly. Many areas prohibit connecting private drains to sanitary sewers, and some restrict storm connections too.
Do not discharge onto a neighbor’s property or across a sidewalk where it can freeze. Check local rules and HOA guidelines, and be mindful of wetlands and erosion sensitive areas. When in doubt, call your building department. It is cheaper than paying to redo the whole thing.
Call before you dig
French drains are trench-heavy projects, which means you are one shovel away from discovering why utility companies have their own vocabulary words. In the US, call 811 a few days before digging so lines can be marked. Keep your trench and any powered digging tools well away from marks, and hand dig carefully near them.
Also: keep trenches shallow and safe. Most yard French drains are in the 18 to 24-inch range. If you find yourself digging deep enough to worry about collapse (or you are anywhere near footings, retaining walls, or utilities), stop and get pro guidance. Dirt is heavier than your weekend plans.
Tools and materials
Tools
- Shovel and trenching shovel
- Pick mattock (clay and rocks laugh at regular shovels)
- Wheelbarrow and rake
- String line and stakes
- Line level or 4-foot level (a laser level is even better)
- Utility knife and scissors (for fabric)
- Tape measure
- Tamper (hand tamper works fine)
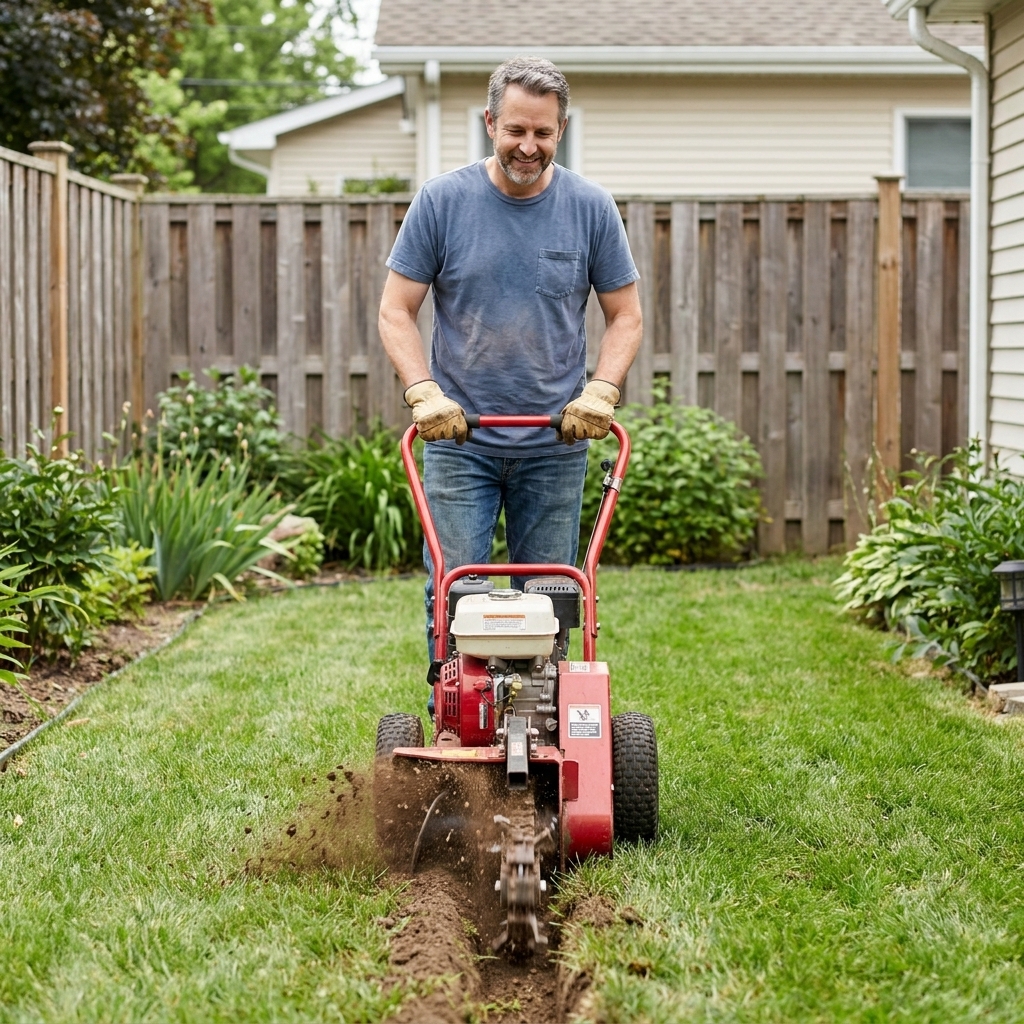
- Optional: rented trencher for long runs
Materials
- Perforated drain pipe: 4-inch is standard for most yards. Use rigid PVC with holes or corrugated perforated pipe. Rigid is easier to maintain slope and tends to resist crushing.
- Solid pipe: Use where you are carrying water without collecting, like from a downspout to a remote outlet.
- Clean drain rock: Washed angular gravel, often labeled drain rock or #57 stone. Pea gravel is rounded, which tends to reduce void space and can migrate and pack in ways that cut flow over time. If you have a choice, go with washed angular stone.
- Nonwoven geotextile fabric: This is your anti-clogging secret weapon. It separates soil from stone so fines do not fill your void space over time.
- Fittings: Couplers, wyes, elbows as needed, plus a cap and a cleanout riser if you add one.
- Pop-up emitter or rodent guard grate: Helps keep critters out at the outlet and keeps the end from silting shut.
Quick budget reality check: rock is usually the biggest cost. Measure your trench and price the gravel before you start, unless you enjoy surprise invoices.
Design basics
Depth and width
- Width: 8 to 12 inches is common for 4-inch pipe.
- Depth: Often 18 to 24 inches. Deeper is not automatically better. You want to intercept water in the root zone and near the problem area, while still being able to maintain slope to an outlet.
Slope
Aim for at least a 1 percent slope if you can. That is about 0.12 inch per foot (often rounded to 1/8 inch per foot). Many installers prefer 1/4 inch per foot where feasible, especially for longer runs. The key is consistent slope without bellies where water can sit and drop sediment.
How to check slope: Stretch a string line from start to finish, level it, then measure down to the trench bottom at several points. Or use a laser level and grade rod if you want to feel like a civil engineer for the afternoon.
Pipe placement
Pipe goes on a bed of gravel, not directly on soil. You want gravel under and around it for free-flowing water movement.
Quick sizing note
For most homes, a 4-inch French drain is plenty for a typical soggy-yard zone and modest downspout tie-ins. Consider 6-inch pipe (or multiple 4-inch runs) if you are moving a lot of water, like several downspouts feeding one line, a long run with heavy flow, or a big uphill drainage area. When in doubt, build the outlet right and avoid undersized fittings and sharp turns.
Step-by-step install
1) Lay out the route
Mark the trench path with marking paint, flags, or a garden hose. Keep it as straight as practical. Gentle curves are fine. Tight turns are where clogs like to audition.
Plan for at least one cleanout near the high end, especially if your yard sheds leaves, pine needles, or silt.
2) Dig the trench
Dig to your planned depth and width, checking slope as you go. If you are using a rented trencher, still plan on some hand cleanup. Trenchers are great at digging and pretty bad at “finishing.”
- Remove roots and big rocks that could puncture fabric or create voids under pipe.
- Make the bottom as smooth as you can, then fine-tune slope.
3) Line the trench with fabric
Lay nonwoven geotextile fabric in the trench with enough extra to fold over the top later like a burrito. Overlap seams by at least 12 inches if you need multiple pieces.
This fabric step is what keeps your gravel from slowly turning into a concrete-like mud loaf. Skip it and you are often installing a future problem.
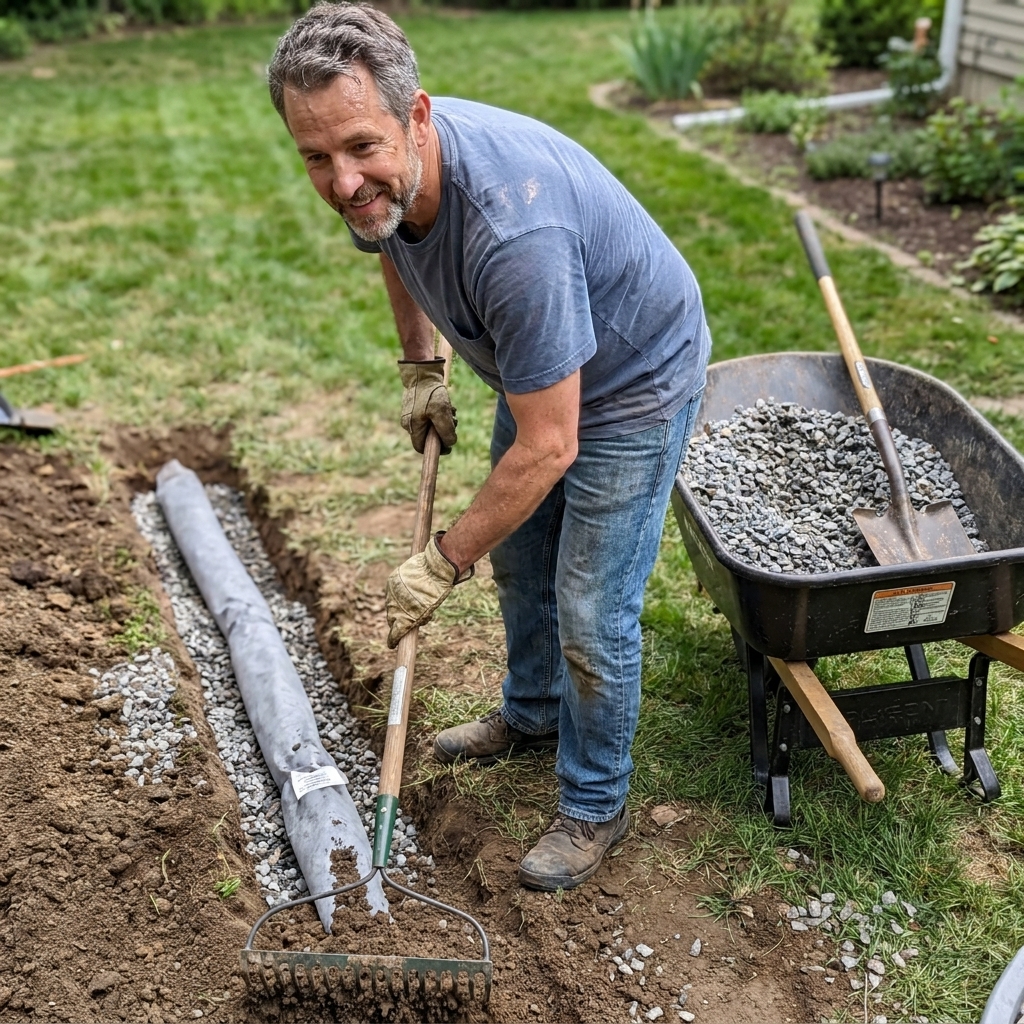
4) Add a gravel bedding layer
Pour in a base layer of clean drain rock, typically 2 to 3 inches deep. Rake it level, then recheck slope. Think of this as setting a stable, draining “mattress” for the pipe.
5) Lay the perforated pipe
Place the pipe on the gravel bed with the perforations oriented correctly. You will see different conventions here depending on the pipe and the installer. A common approach for yard French drains is to keep the holes on the lower sides, roughly the 4 and 8 o’clock positions, so water enters through the gravel bed while reducing direct sediment drop-in. Some products are designed to be installed holes-down, so follow the manufacturer’s guidance if it differs.
- Dry fit first, then connect sections.
- Keep the run smooth with no sags.
- Add a cleanout riser at the high end if possible.
If you are collecting water from a downspout, run solid pipe from the downspout to where you want water to infiltrate or connect to the French drain. Perforated pipe right next to the foundation is a great way to reintroduce water where you do not want it.
Foundation basics
If your drain route runs near the house, do not undermine footings. Keep your trench a safe distance away, avoid digging below the bottom of the footing, and be cautious about disturbing compacted backfill. If your plan involves digging right alongside the foundation wall, it is worth getting professional eyes on it first.
6) Cover pipe with gravel
Add drain rock until you have at least 2 to 4 inches of gravel over the top of the pipe. In heavy clay soils, more gravel generally helps because it increases the void space where water can move.
7) Wrap the fabric over the gravel
Fold the fabric over the top of the gravel like closing a taco. You want soil separated from stone on all sides. Overlap the fabric edges. You do not need to tape it, but you can pin it with landscape staples if it keeps shifting.
8) Backfill and restore the surface
Backfill the remaining trench with excavated soil. Remove large rocks and clods as you go. Lightly compact in lifts so the trench does not settle into a trough later.
Finish with:
- Sod if you want it to disappear quickly
- Seed and straw if you are patient and the weather cooperates
- Decorative gravel if you prefer a visible drainage swale look
Pro tip from a guy who has re-sodded the same strip twice: mound the soil slightly. It will settle.
Outlet options
Daylight outlet
- Terminate with a rodent guard grate.
- Set the outlet on a small gravel splash pad to reduce erosion.
- Keep the outlet accessible so you can inspect it after storms.
Pop-up emitter
Useful when you need water to exit on a flat lawn without an open pipe end. It stays closed until water pressure lifts the cap, then closes to keep debris out.
Dry well
Size matters here. If you have clay soil, a dry well can fill faster than it empties, which turns it into a buried bathtub. If you go this route, use lots of stone volume and use nonwoven geotextile where appropriate to limit sediment intrusion without choking off infiltration. In some yards, pairing a dry well with an overflow line to daylight is the difference between “works great” and “why is my lawn still a swamp?”
Common mistakes (ask me how I know)
- No slope, or inconsistent slope: Water sits, sediment drops, and performance tanks.
- Using the wrong gravel: Dirty gravel and fines clog the system. Use washed drain rock.
- Skipping fabric: It may work for a while, then it slowly silts up.
- Pipe too shallow under traffic areas: If a vehicle might cross it, bury deeper and consider rigid pipe, or sleeve it.
- Discharging too close to the house: The outlet should be well away from the foundation and preferably downhill.
- Trying to drain everything with one tiny pipe: For large areas or heavy flows, you may need multiple runs, a wider gravel trench, or to capture water earlier with surface grading and swales.
Maintenance
A French drain is not high maintenance, but it is not zero maintenance either.
- Inspect the outlet after big storms and clear leaves or mud.
- Flush the system annually if you added a cleanout. A garden hose can do a lot. A drain jetter does even more.
- Keep gutters and downspouts clean so you are not feeding roof grit into your yard drainage system.
- Watch for settling along the trench line and top off soil or reseed as needed.
FAQ
How deep should a French drain be?
Most DIY yard French drains are 18 to 24 inches deep. The best depth is the one that intercepts your wet zone while still allowing slope to an outlet. Deeper is fine if you can maintain grade, but it increases digging and gravel cost.
Should the holes face up or down?
It depends on the product, and you will see differing advice. Many DIY yard installs place perforations on the lower sides (around 4 and 8 o’clock) to let water enter through the gravel bed while reducing direct sediment fall-in. Some pipe is intended to be installed holes-down. Always follow the pipe manufacturer’s guidance if it differs.
Can I install a French drain next to my foundation?
You can, but be cautious. If you are dealing with roof runoff, fix gutters and extend downspouts first, usually with solid pipe. Digging along a foundation can also risk damaging waterproofing or disturbing backfill, and you do not want to undermine footings. If you have recurring basement water, consider talking to a waterproofing pro to make sure you are treating the actual cause.
Do I need a permit?
Often no for simple yard drainage, but rules vary. Some areas regulate where you can discharge water, especially near wetlands, storm drains, and property lines. A quick call to your local building department can save a lot of headache.
How long does a DIY French drain last?
Built with proper slope, clean drain rock, and nonwoven geotextile, a French drain can last for decades. Systems fail early when they clog with fines, settle into low spots, or discharge into a location that silts shut.
Final thoughts
A French drain is one of those projects that feels like a lot of work because it is. But it is also straightforward work. If you plan the outlet, keep your slope consistent, and use clean materials, you can turn a chronically wet yard into a space you actually want to use. And you will sleep better during heavy rain, which is a pretty great return on investment for a weekend of digging.